Dryer Vent Line Installation: Complete Step by Step Guide, Costs, Codes and Safety
A properly installed dryer vent removes hot, moist air from your clothes dryer and carries it outside. The system needs the right duct material, a suitable route, secure connections, and an unobstructed exterior outlet. Poor installation can restrict airflow, increase drying time, cause moisture problems, and allow lint to collect inside the duct.
This guide explains how to plan, install, connect, replace, and inspect a dryer vent system. You will learn which materials to use, how to handle tight spaces, what to check in local building codes, and when professional help makes sense.
The right installation depends on your dryer model, the building layout, and local requirements. Always check the manufacturer’s installation manual before selecting materials or deciding on duct length.
For more practical advice on keeping your property safe, clean, and well maintained, explore our Home Maintenance guides.
Quick Answer: How Should a Dryer Vent Be Installed?
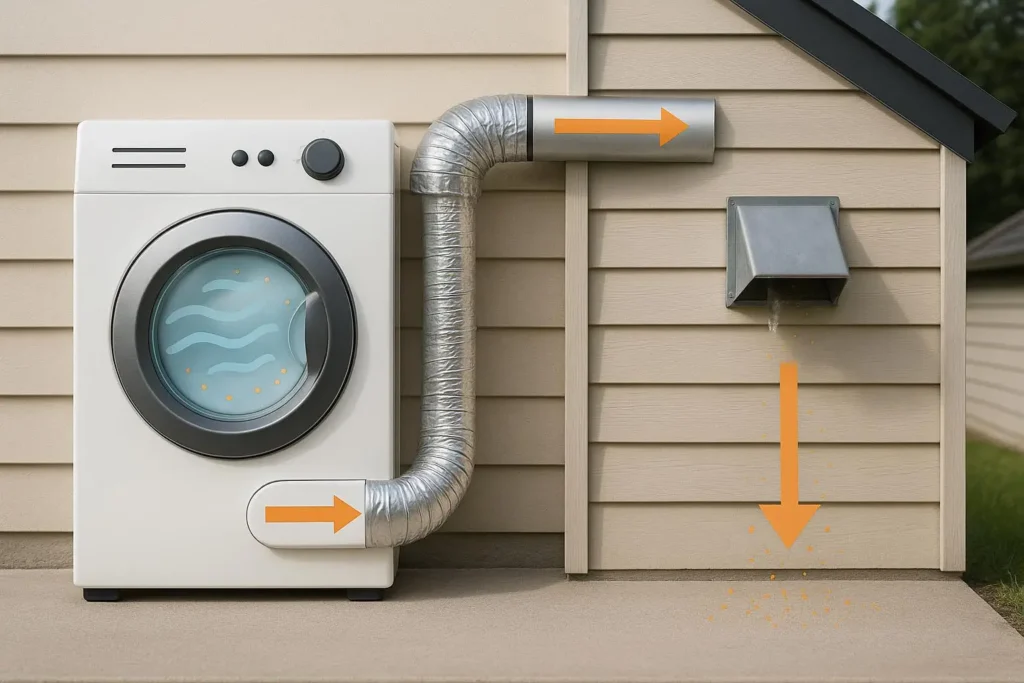
A conventional vented dryer should connect to a suitable exhaust duct that carries moist air to an approved outdoor termination. Plan the shortest practical route, use permitted smooth metal ductwork, limit bends, secure the connections, and keep the transition duct from becoming crushed behind the appliance. Finish by checking the exterior damper and confirming that air can leave the building.
What Is Dryer Vent Line Installation and How Does a Dryer Vent System Work?
A dryer vent system moves warm, moisture filled air from the appliance to the outside of your home. It also carries lint that escapes the dryer’s internal lint collection system.
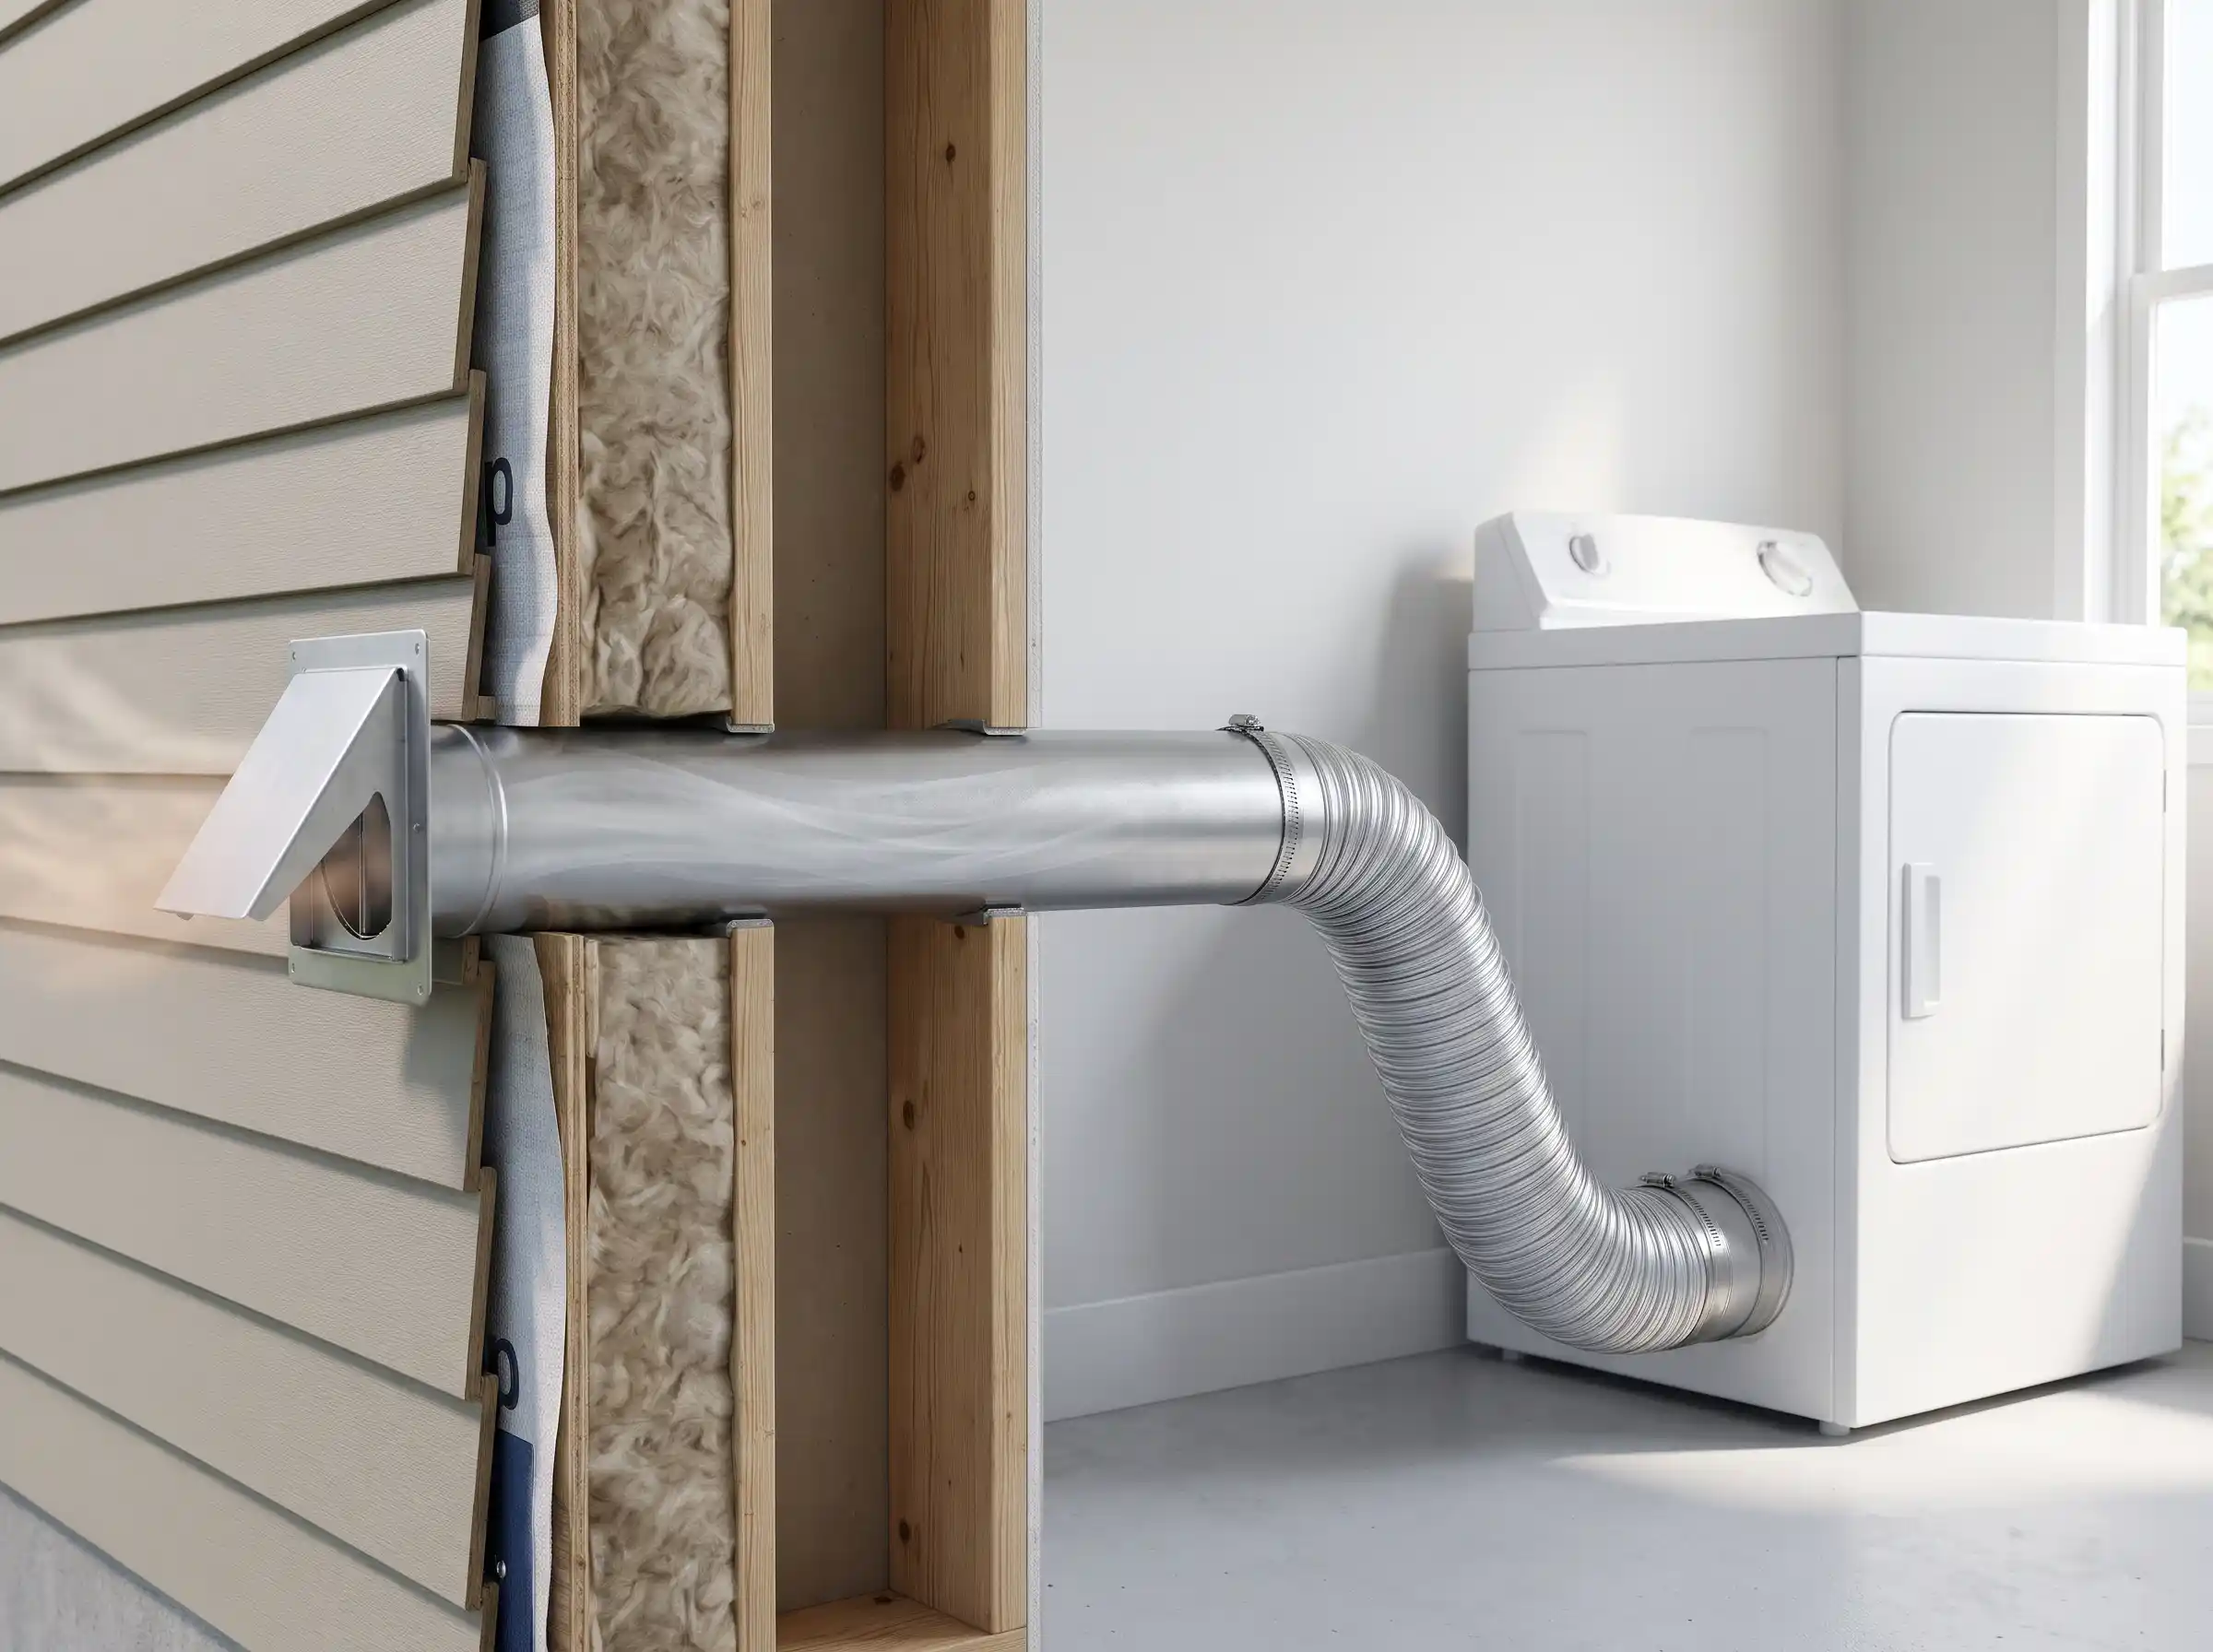
Most conventional electric and gas dryers use an exhaust outlet at the back of the machine. A short transition duct connects that outlet to a fixed exhaust duct. The fixed duct runs through a wall, floor, ceiling cavity, basement, or another approved route before reaching the exterior.
The system usually includes five main components:
- Dryer exhaust outlet: The opening where air leaves the dryer.
- Transition duct: The listed connector between the appliance and fixed exhaust duct.
- Main exhaust duct: The permanent duct that carries air through the building.
- Exterior vent hood: The fitting that provides the outdoor outlet.
- Backdraft damper: A moving flap that helps prevent outside air, pests, and debris from entering when the dryer is not operating.
These components have different jobs. A flexible transition hose is not a substitute for a long run of suitable permanent ductwork.
How Does a Dryer Vent Work?
A conventional clothes dryer heats air and moves it through the drum. The warm air takes moisture from wet clothing. The resulting humid air passes through the dryer’s lint filter and exits through the exhaust outlet.
The transition duct carries this air into the main exhaust duct. The duct then moves the moisture and remaining lint particles outside.
A clear route helps the dryer move air with less resistance. Sharp bends, long runs, crushed sections, and lint buildup can restrict this airflow.
The system also needs a suitable exterior termination. A working backdraft damper opens when exhaust air leaves the building. It should close when the dryer stops.
Why Is Proper Dryer Vent Installation Important?
A correctly installed system supports safe and reliable dryer operation.
It helps remove moisture. A conventional vented dryer releases moisture from wet clothes through its exhaust. A damaged or disconnected duct can release that moisture into the laundry room, wall cavity, or another indoor space.
It supports airflow. A short and properly sized duct helps the dryer move exhaust air. Restricted airflow can make drying cycles take longer.
It limits lint accumulation. Lint is highly combustible. A poor connection or damaged duct can allow lint to escape into areas where it becomes difficult to inspect and remove.
It helps protect the appliance. The dryer must move heated air through the exhaust system. A blocked route can cause overheating and may affect the appliance’s operation.
What Happens When a Dryer Vent Is Installed Incorrectly?
Common warning signs include damp clothes after a normal cycle, a hot laundry room, lint around duct connections, visible moisture, and an exterior flap that does not open.
These symptoms do not always prove that the vent is the only problem. A faulty heating component, blocked lint screen, or other appliance issue can cause similar symptoms.
Start by inspecting the lint screen and accessible exhaust route. Stop using the dryer if you notice a burning smell, smoke, or signs of overheating. Arrange a qualified inspection rather than continuing to run the appliance.
Which Types of Dryers Need an Exhaust Vent?
Not every clothes dryer uses the same moisture removal system. This distinction matters before buying a vent kit or cutting an opening in an exterior wall.
A conventional vented dryer sends moist air through an exhaust duct. A ventless model removes moisture inside the appliance instead.
Do All Clothes Dryers Need an Outside Vent?
No. Conventional vented electric and gas dryers normally require an exhaust route to the outdoors.
Some condenser and heat pump dryers are designed to operate without a traditional exterior exhaust duct. They use an internal system to collect moisture. Check the exact model before planning any duct installation.
The 2024 International Residential Code recognizes an exception for listed and labeled condensing ductless dryers. This is a model code provision, not a guarantee that every jurisdiction has adopted the same wording. Check the code used by your local building department.
Does a Heat Pump Dryer Need a Vent?
Most heat pump dryers do not need a conventional exterior exhaust vent.
A heat pump dryer uses a closed air cycle. It warms air, moves it through the drum, and removes moisture through its heat pump and heat exchanger system. The dryer then reuses much of that air instead of exhausting it outside.
The removed moisture becomes water. Depending on the model, the water drains through a hose or collects in a tank that needs regular emptying.
ENERGY STAR explains that heat pump dryers do not release their moist air through an exterior dryer vent. It also describes their water drainage options and energy saving potential. Check the model’s installation guide for the exact drain arrangement. ENERGY STAR: Clothes Dryers
How Do Condenser Dryers Work?
A condenser dryer removes moisture from the air inside the machine. It cools the moisture filled air so water can collect in a tank or leave through a drain connection.
Some condenser dryers use a water cooled system. Others use a different internal design. Their installation requirements depend on the appliance.
Do not connect a condenser dryer to a conventional exhaust duct unless the manufacturer specifically requires or permits it.
What Is the Difference Between Vented, Condenser, and Heat Pump Dryers?
Dryer type | How it removes moisture | Traditional exhaust duct |
Conventional vented dryer | Sends humid air outside | Usually required |
Condenser dryer | Collects water inside the appliance | Usually not required |
Heat pump dryer | Uses a closed air cycle and heat exchanger | Not required for typical ventless models |
Hybrid dryer | Depends on its specific design | Check the manufacturer |
A steam function does not automatically mean that a dryer is ventless. Steam features and exhaust design are separate appliance features.
What Is the Best Material for Dryer Vent Installation?
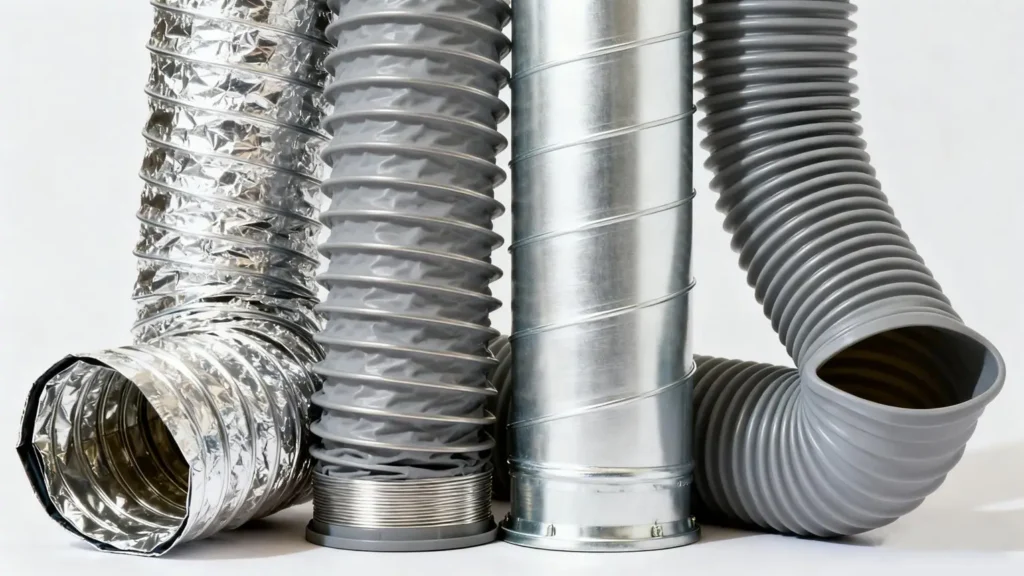
The duct material affects airflow, durability, cleaning, and safety. Choose products that meet the requirements for the part of the system where they will be installed.
For conventional dryer exhaust systems, smooth interior metal ductwork is the common standard. The transition connector behind the dryer has separate requirements.
Which Dryer Vent Duct Material Is Best?
Rigid metal duct is generally the preferred material for the permanent exhaust run. It has a smooth interior surface and holds its shape.
Galvanized steel and aluminum products are common options. The exact product must meet the relevant code, appliance instructions, and installation conditions.
A fixed exhaust duct should not become crushed or deformed inside a wall or ceiling cavity. A smooth interior also helps reduce places where lint can collect.
The 2024 International Residential Code, Section M1502.4.1, specifies a smooth interior metal duct with a nominal diameter of four inches for installations covered by that provision. It also sets a minimum metal thickness. Confirm that the version adopted by your jurisdiction matches the code you are using. International Residential Code, Chapter 15
Rigid Metal vs. Semi Rigid vs. Flexible Dryer Duct
Duct type | Typical role | Main consideration |
Rigid metal | Permanent exhaust duct | Smooth interior and stable shape |
Semi rigid metal | Approved transition applications where permitted | Must match the dryer and code requirements |
Flexible foil or plastic duct | Often unsuitable for conventional dryer exhaust | Can crush, tear, or collect lint |
Listed transition duct | Connects the dryer to the fixed exhaust duct | Must meet the listing and length requirements |
Do not assume every product described as flexible metal duct is approved for every part of the system. Read its listing and the dryer manual.
The 2024 IRC calls for a single length of transition duct listed and labeled to UL 2158A. Under that model code, the transition duct cannot exceed eight feet or be concealed inside construction. Your local adopted rules may differ. 2024 IRC, Section M1502.4.3
Can You Use Plastic, PVC, or Vinyl Pipe for a Dryer Vent?
Do not use ordinary plastic, PVC, or vinyl ducting for a conventional dryer exhaust system.
These materials are not suitable replacements for the metal exhaust duct specified by common dryer installation instructions and model code requirements. They can also create problems when exposed to dryer heat, lint, and repeated airflow.
A dryer vent should not be treated like a bathroom exhaust hose. The appliance moves hot air that carries lint and moisture. Use a product approved for the exact purpose.
What Is the Standard Dryer Vent Pipe Size?
Four inches is the common nominal diameter for conventional residential dryer exhaust ductwork. The 2024 IRC also specifies a nominal four inch duct under Section M1502.4.1.
However, do not rely on a measurement taken from the outside of a pipe or an unrelated vent kit. Check the dryer outlet, the manufacturer’s instructions, and local code before purchasing fittings.
Avoid reducing the duct diameter without approval. A smaller passage can restrict exhaust airflow.
What Is the Difference Between a Dryer Vent Hose and a Dryer Vent Pipe?
The terms often describe different parts of the same system.
The dryer vent hose usually refers to the short transition duct behind the appliance. The dryer vent pipe or exhaust duct refers to the fixed route that carries air to the outside.
The transition duct needs to be long enough to connect the dryer without stretching or crushing. It should not have unnecessary slack. The permanent duct should follow the permitted material, diameter, length, and support requirements.
What Tools and Materials Do You Need to Install a Dryer Vent?
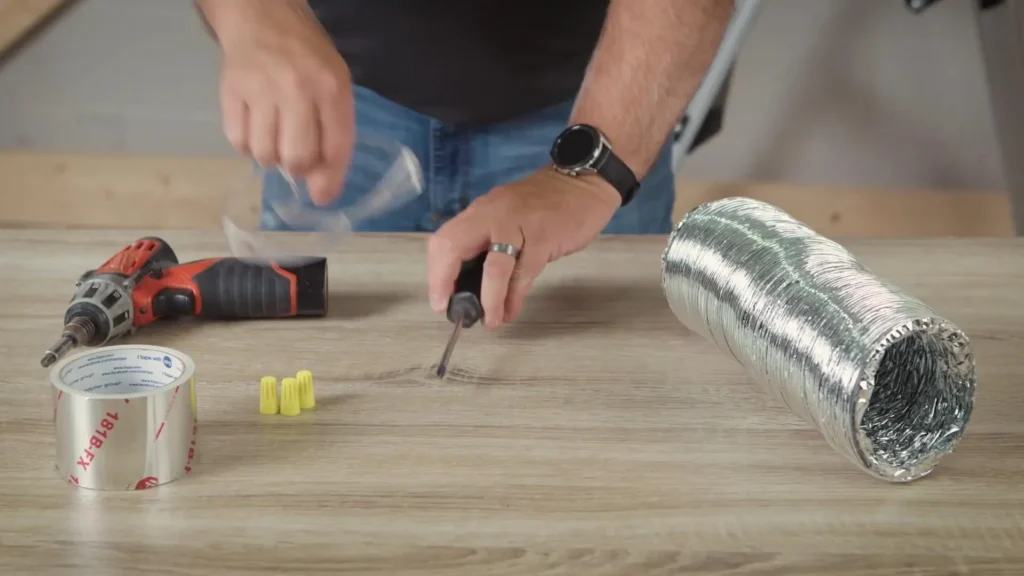
Gather the correct parts before starting. Buying a kit without checking the dryer outlet or wall connection can lead to mismatched fittings.
Essential Dryer Vent Installation Materials
A typical installation may require:
- Suitable smooth metal exhaust duct.
- A listed transition duct compatible with the dryer.
- Correct elbows and duct connectors.
- An exterior vent hood with a suitable backdraft damper.
- Compatible clamps or fastening components.
- Approved foil HVAC tape or another permitted sealing product.
- Duct supports and protective plates where required.
- Weather resistant sealing material for the exterior opening, as appropriate.
The final material list depends on whether you are replacing a transition hose, installing a new exhaust route, or changing an existing wall outlet.
What Tools Are Needed to Install a Dryer Vent?
You may need a tape measure, marker, screwdriver, drill, suitable cutting tools, tin snips, vacuum, and protective gloves.
Cutting an exterior wall may require additional equipment. The correct tool depends on the wall material and the location of electrical wiring, plumbing, structural framing, and other hidden services.
Never cut into a wall or floor until you have checked what is behind it. A professional should handle work that involves uncertain utilities, structural components, or complicated penetrations.
Should You Buy a Dryer Vent Installation Kit?
A kit can make a basic connection easier, but its contents must match the dryer and the installation.
Check the duct material, diameter, connector type, length, and exterior hood. A kit made for a short appliance connection may not be suitable for a complete exhaust route through a wall or ceiling.
How to Plan a Dryer Vent Line Installation
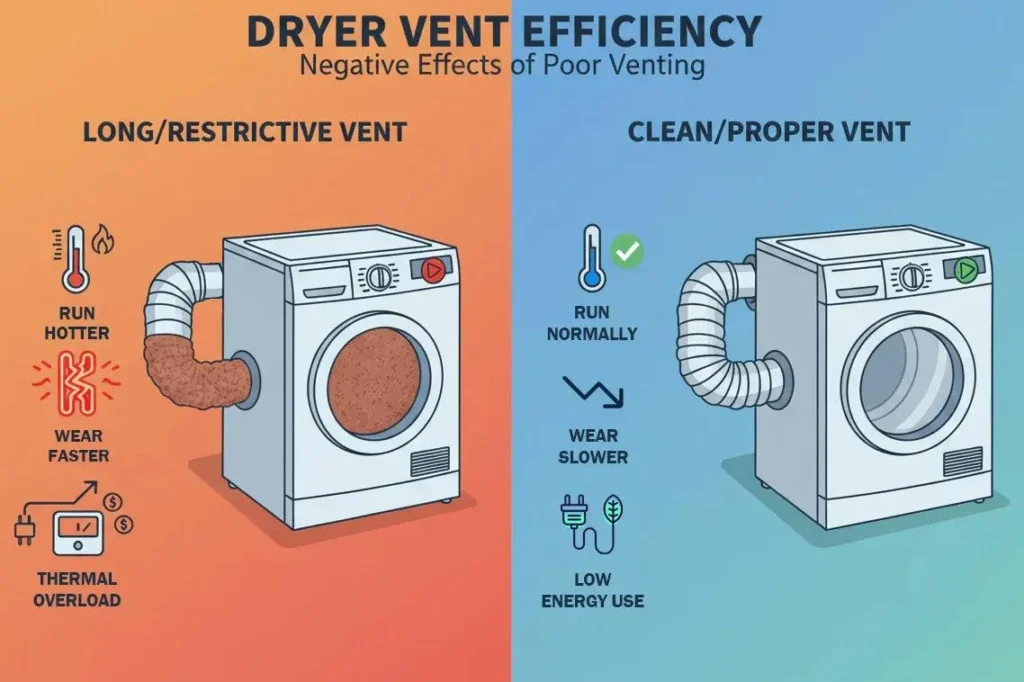
Good planning prevents many of the problems that appear after the dryer is pushed against the wall.
Before cutting anything, locate the dryer outlet, the intended exterior outlet, and the route between them. Measure the entire path rather than only the straight distance between two points.
How Do You Choose the Best Dryer Vent Route?
Choose the shortest practical route to an approved outdoor termination. Reduce unnecessary elbows and avoid sharp turns.
A route through a nearby exterior wall may be simpler than one that crosses several rooms. However, the shortest route is not automatically acceptable if it passes through an unsuitable location or violates local requirements.
Consider access for cleaning and inspection. A duct hidden behind finished walls needs careful planning before construction closes the cavity.
How Long Can a Dryer Vent Line Be?
There is no single maximum length that applies to every dryer and every jurisdiction.
The permitted length depends on the dryer manufacturer’s instructions, the duct design, the elbows, and the locally adopted code.
The 2024 IRC provides a method that uses a maximum length of 35 feet from the transition duct connection to the outlet terminal. Under that method, the allowable length is reduced for fittings. The same section also allows the length to be determined through the manufacturer’s instructions. These rules should not be treated as a universal 35 foot allowance.
For example, an installation with several tight elbows may have a lower permitted straight duct length than one with a simple route. Check the fitting table and instructions for the specific model. 2024 IRC, Section M1502.4.6
How Many Elbows Can a Dryer Vent Have?
Use as few elbows as the building layout allows. Each bend can add resistance to the exhaust path.
A smooth long radius elbow may create less resistance than a tight bend. However, you must use the equivalent lengths and fitting rules specified by the manufacturer or adopted code.
Do not count only the straight sections. Include each elbow and other fitting when calculating the permitted duct route.
Where Should a Dryer Vent Exit the House?
The exhaust duct should terminate outdoors at a suitable location.
The outlet must allow air to escape without directing exhaust into an attic, crawlspace, or another unsuitable building space. It should also be placed where lint and moisture will not create a new problem.
The 2024 IRC requires a backdraft damper at the duct termination and prohibits a screen at that termination. If the dryer manufacturer does not specify a termination location, the code provides a three foot clearance rule from openings into the building, including openings in ventilated soffits. Always check the actual adopted code and manufacturer’s instructions before selecting the outlet position. 2024 IRC, Section M1502.3
Should You Check Local Building Codes Before Installation?
Yes. The International Residential Code is a model code. It becomes enforceable in a location when that jurisdiction adopts it, often with amendments.
The rules may differ between cities, counties, and states. A permit or inspection may also be required for certain new installations or building alterations.
Contact the local building department before cutting a wall, installing concealed ductwork, or changing the exterior termination. Ask which code edition applies and whether the planned work needs a permit.
For a property in [City, State], check the official [City or County Building Department] website or contact its inspection office. Do not rely on an old online discussion as proof of current local requirements.
What Should You Check Before Cutting a Wall or Floor?
Check for electrical cables, plumbing lines, gas pipes, framing members, insulation, and exterior obstructions. Confirm that the proposed outlet will not damage the building envelope or create a moisture problem.
For a new opening, consider the wall material and the exterior finish. Brick, siding, stucco, and other materials require different cutting and sealing methods.
If the route crosses a floor, basement, crawlspace, or roof, check access and structural conditions before starting. A difficult path often calls for professional planning.
How to Install a Dryer Vent Line Step by Step
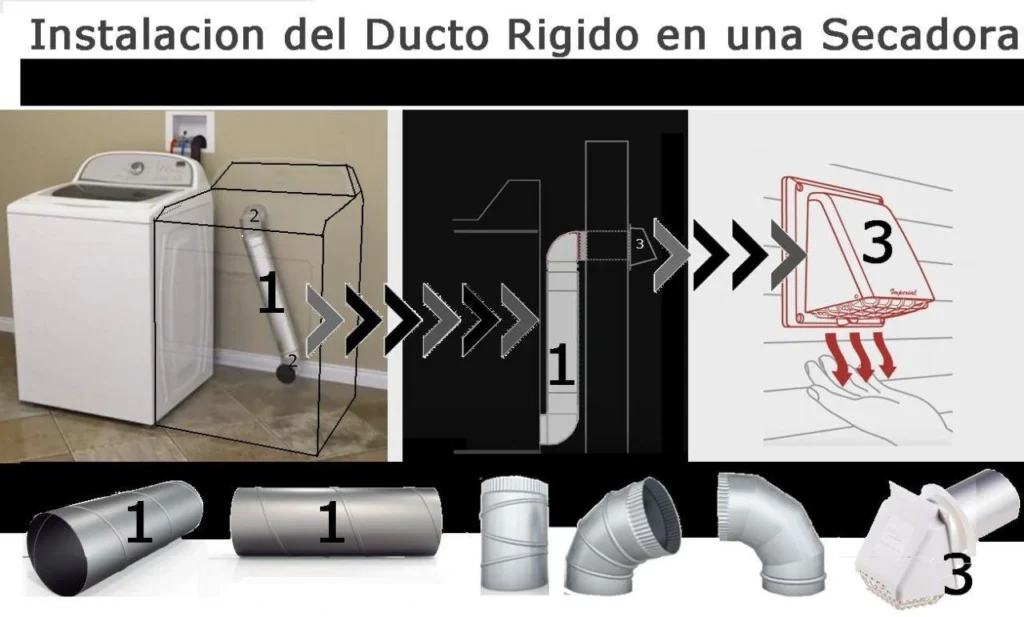
The steps below explain the overall process for a conventional vented dryer. They are not a substitute for the installation manual or local code. New duct routes and wall penetrations are more involved than replacing a short transition hose.
Step 1: Disconnect the Dryer and Inspect the Existing Vent
Read the appliance manual before disconnecting the dryer.
For an electric dryer, follow the manufacturer’s instructions for isolating power. For a gas dryer, do not disconnect or reconnect the gas supply unless you are qualified to do so. Arrange appropriate professional assistance when needed.
Move the dryer carefully and inspect the exhaust outlet, transition duct, fixed duct, and exterior hood. Look for lint, corrosion, gaps, crushed areas, and signs of moisture.
Step 2: Clean the Existing Dryer Vent System
Remove accessible lint before fitting new components. Check the dryer’s exhaust outlet and the connection points.
Inspect the exterior hood as well. A blocked outlet can restrict airflow even when the duct behind the dryer looks clean.
Do not use the dryer while its exhaust duct is disconnected. Reconnect the complete system before operating the appliance.
Step 3: Measure the Dryer Vent Route
Measure the actual route from the dryer connection to the exterior termination.
Include the length of straight duct and every bend or fitting. Check the dryer manual for the allowed duct arrangement and equivalent length.
Allow enough transition duct to connect the appliance without creating excess slack. The goal is a secure connection without a kink when the dryer reaches its normal position.
Step 4: Mark and Cut the Dryer Vent Opening
Mark the intended exterior opening using the vent hood dimensions and installation instructions.
Before cutting, confirm that no wiring, plumbing, gas pipe, or structural element lies in the path. Use a suitable cutting method for the wall material.
If you cannot confirm what is behind the wall, stop and arrange an inspection. An incorrect cut can cause damage beyond the cost of the vent installation.
Step 5: Install the Exterior Dryer Vent Hood
Fit the exterior hood according to its instructions. Make sure the passage is not smaller than the required duct size.
The hood should include a suitable backdraft damper. Check that the flap moves freely and is not blocked by the siding, wall finish, or sealant.
Seal the exterior opening using a method appropriate for the wall material. The seal should protect against water entry without blocking the exhaust passage or damper.
Do not add a fine mesh screen unless the specific approved design and local requirements allow it. The 2024 IRC model provision prohibits screens at dryer exhaust terminations.
Step 6: Cut and Assemble the Dryer Vent Duct
Measure each section before cutting. Remove burrs and sharp edges that could affect the joint or create a hazard during handling.
Assemble the duct sections so the inserted ends point in the direction of airflow. This helps reduce the chance of lint catching at the joints.
Keep the interior smooth and avoid unnecessary changes in direction. Follow the permitted support and fastening requirements.
Step 7: Secure and Seal the Dryer Vent Duct Joints
Secure the fixed duct with compatible mechanical connections and approved sealing materials.
Under the 2024 IRC model code, exhaust duct joints must be sealed and mechanically fastened. Fasteners must not protrude more than one eighth of an inch into the duct interior.
Do not place ordinary screws through the duct where their tips project into the exhaust passage. Lint can catch on protrusions and build up over time.
The method for the short transition duct may differ. Follow its listing and the dryer’s instructions for its connectors and clamps.
Step 8: Connect the Dryer Vent Transition Hose
Connect the approved transition duct to the dryer outlet and the fixed exhaust connection.
Use the correct connector size. Secure the ends using the method specified by the product and appliance instructions.
Check that the duct is not twisted, stretched, or sharply bent. A poor connection can leak exhaust air and lint into the laundry area.
Step 9: Reposition the Dryer Without Crushing the Vent
Guide the transition duct as you move the dryer into position.
Do not push the appliance back until the duct is trapped between the dryer and wall. Check the connection and available clearance as the dryer moves.
A low profile connector or recessed dryer vent box may help where space is limited. It still needs to be compatible with the appliance and installation requirements.
Step 10: Test Dryer Vent Airflow
Reconnect the appliance completely before use.
Run the dryer according to the manufacturer’s instructions. Observe the exterior termination while the dryer operates. The damper should open, and air should escape through the outlet.
Check accessible joints for disconnection or leakage. Confirm that the transition duct has not collapsed behind the appliance.
If the exterior flap does not open or airflow appears weak, stop and investigate. A blockage, unsuitable fitting, excessive duct length, or appliance fault may be responsible.
How to Connect a Dryer Vent Hose to the Dryer and Wall
Connection problems are common when an appliance outlet and wall fitting have similar sizes or mismatched ends. A connection that looks secure may still leak air or restrict the passage.
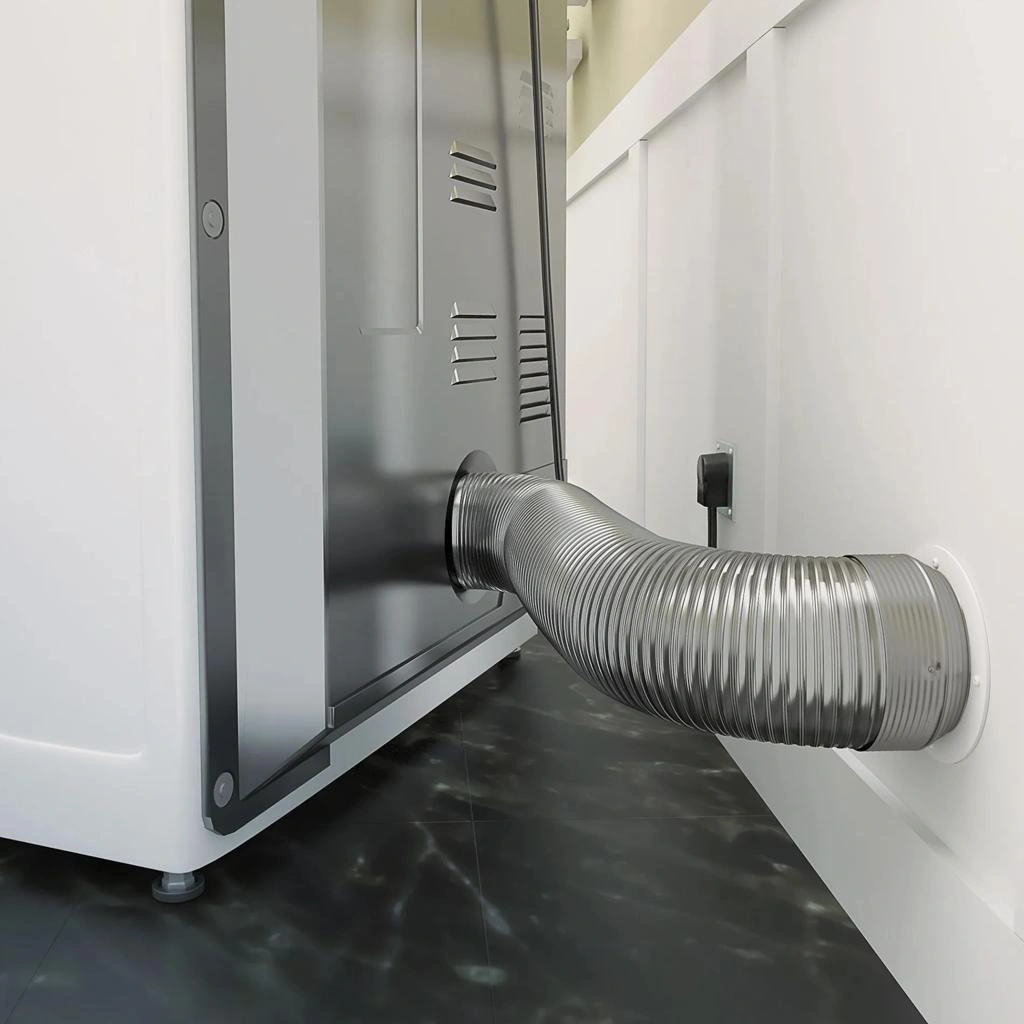
How Do You Attach a Dryer Vent Hose to the Dryer?
Check the dryer’s outlet diameter and the approved transition duct. Slide the transition duct onto the outlet using the connection method specified by the dryer and duct manufacturers.
Secure it without crushing the material. Make sure the clamp or connector does not reduce the open passage.
Check the connection again after moving the dryer into place. A hose that slips off during repositioning can release lint and moisture into the laundry room.
How Do You Connect a Dryer Vent Hose to a Wall Opening?
Start by identifying whether the wall has a proper duct connector, a short exposed duct section, or only an opening.
A compatible collar or connector may be needed. Do not force two pieces together when their diameters do not match.
Avoid makeshift reducers that narrow the exhaust passage. If the wall opening is damaged, incorrectly sized, or poorly positioned, have it corrected before connecting the dryer.
What Is the Best Way to Connect Two Dryer Vent Pipes?
Use compatible duct sections and fittings designed for the exhaust application.
Check which end is crimped and which end accepts the adjoining piece. Orient the connection in the airflow direction so the joint does not create an unnecessary internal lip.
Secure and seal the joint according to the duct and code requirements. Avoid improvised connections that can separate when the dryer vibrates.
Which Way Should Crimped Dryer Vent Ends Face?
The inserted end should point in the direction of airflow.
This creates a smoother path for the exhaust and reduces the chance of lint catching on an exposed joint edge. The 2024 IRC includes this direction requirement in Section M1502.4.2.
Should You Use Foil Tape or a Hose Clamp?
They do different jobs. A compatible clamp can hold a transition duct in place. Approved foil HVAC tape may seal a joint where the installation instructions and code allow it.
Do not use ordinary cloth duct tape. It is not a substitute for a suitable dryer vent connector or approved joint sealing method.
Do not assume that tape alone satisfies every requirement for a permanent metal duct connection. Follow the applicable mechanical fastening and sealing rules.
What If the Dryer Vent Hose Does Not Fit the Wall Opening?
Do not stretch, crush, or force the hose onto the opening.
Measure both connections and identify the fitting that is missing or incorrectly sized. A proper collar or compatible connector may solve the problem.
If the opening is too small, damaged, or out of position, a qualified installer can assess whether it needs modification. Avoid adding a narrow reducer simply to make the parts fit.
How to Install a Dryer Vent in a Tight Space
A tight laundry area requires careful measurement. The dryer may fit into the room while leaving too little room for the transition duct.
When the appliance is pushed back, excess duct can fold, kink, or disconnect.
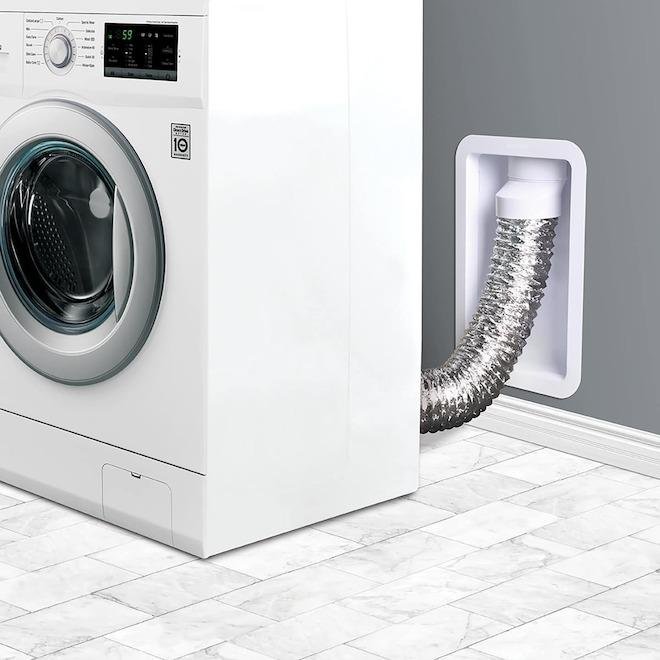
How Do You Install a Dryer Vent Hose Behind a Dryer With Limited Space?
Measure the available space between the dryer and wall. Check the location of the outlet and the direction in which the transition duct must turn.
Use a compatible low profile connector or recessed vent box where suitable. Keep the transition duct as short as the installation allows without stretching it.
Do not sacrifice airflow to make the dryer sit closer to the wall.
How Do You Prevent Kinks in a Dryer Vent Hose?
Use the correct length and route. Avoid leaving a long loop behind the dryer.
Guide the duct while repositioning the appliance. Once the dryer is in place, check the connection and confirm the hose has not been flattened.
A crushed section can restrict the exhaust even when both ends remain attached.
Are Magnetic Dryer Vent Connectors Worth Using?
Magnetic dryer vent connectors can make appliance connection and removal easier. Some designs use a wall mounted connector that joins to a matching appliance fitting.
Check the product’s listing, compatibility, installation instructions, and permitted use before buying one. A magnetic connector does not replace the permanent exhaust duct or correct exterior termination.
It also does not make a poor duct route acceptable.
Should You Use a Dryer Vent Box?
A dryer vent box creates a recessed area for the transition duct behind the dryer. It can reduce the space needed between the appliance and wall.
It is useful in some new construction projects and some renovations. The box must be installed with the correct duct connection, framing protection, and clearances.
Choose the model before closing the wall. Retrofitting a box may involve opening the wall and changing the duct route.
How to Install a Dryer Vent Through a Wall, Floor, Basement, or Roof
The route determines the complexity of the job. A short exterior wall installation is different from a long route through a basement or roof.
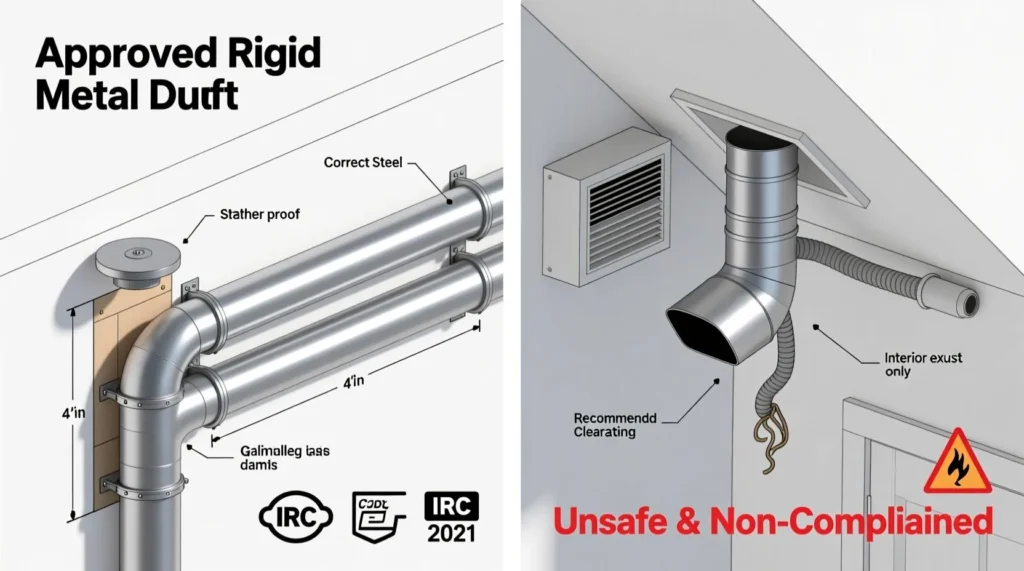
How to Install a Dryer Vent Through an Exterior Wall
Find an approved termination position and check the building layout before cutting.
Install the wall opening to match the exterior hood and duct. Connect the fixed duct to the hood, secure the joints, and seal the exterior opening against water entry.
Check the damper and clearances before connecting the dryer. The exhaust must discharge outdoors rather than into an enclosed wall cavity.
How to Install a Dryer Vent Through the Floor
A floor route needs careful planning because it may pass through framing, a basement, or a crawlspace.
Check for plumbing, electrical wiring, heating components, and structural members. Do not cut joists or other structural elements without the required approval.
The duct still needs a suitable outdoor termination. Sending exhaust into the space below the floor is not an acceptable substitute for an outdoor outlet for a conventional vented dryer.
How to Install a Dryer Vent Through a Basement or Crawlspace
A basement route may offer a direct path to an exterior wall. A crawlspace installation can be more difficult because access, moisture, and protection from physical damage become concerns.
Keep the duct supported and protected. Follow the requirements for materials, route length, and concealed sections.
Do not discharge dryer exhaust into the basement or crawlspace. The 2024 IRC’s general exhaust provisions prohibit such discharge for mechanical exhaust systems, with specific exceptions for certain equipment. Check the adopted code before proceeding.
Can You Install a Dryer Vent Through the Roof?
A roof route may be considered when the dryer is far from an exterior wall or when the building layout leaves no practical alternative.
Roof work involves additional risks. The penetration must be properly flashed and sealed. The roof termination must be suitable for dryer exhaust and compatible with the appliance instructions and local code.
A roof route also needs to account for every elbow and the total equivalent duct length. Because leaks, falls, and incorrect termination can create serious problems, professional installation is often the better choice.
Can a Dryer Vent Terminate Through a Soffit?
Do not assume that a soffit is an acceptable termination point.
The 2024 IRC says mechanical exhaust air must not be discharged into a soffit, attic, ridge vent, or crawlspace. Its dryer section also addresses clearance from openings in ventilated soffits.
The outlet location must follow the manufacturer’s instructions and locally adopted code. A vent that simply points into the soffit can send moist air into the roof space.
What Is Different About Dryer Vent Installation in New Construction?
New construction provides a chance to plan the route before walls and ceilings are closed.
The designer or installer can coordinate the dryer location, wall opening, duct route, vent box, and exterior hood. The duct can be supported and protected before finishing work hides it.
The 2024 IRC includes provisions for dryer exhaust protection where nails or screws could penetrate concealed ductwork. This may require protective steel shield plates in specified locations.
Before closing the wall, confirm the route, duct material, fastening, and inspection requirements. Keep the dryer model information available for the code official if requested.
How to Replace an Existing Dryer Vent Line or Hose
Replacement may involve only the short transition duct behind the dryer. In other cases, the fixed exhaust duct or exterior hood also needs attention.
Inspect the full accessible route before purchasing replacement parts.
When Should You Replace a Dryer Vent Hose?
Replace a transition hose if it is torn, crushed, disconnected, badly kinked, corroded, or made from unsuitable material.
A damaged hose can leak lint and moisture. A crushed hose can restrict airflow and increase drying time.
Also check the exterior hood and permanent duct. Replacing the short hose will not solve a blockage farther along the system.
How to Replace a Dryer Vent Hose Step by Step
- Read the dryer manual and follow the correct shutdown procedure.
- Move the appliance carefully to gain access.
- Disconnect the old transition duct.
- Inspect the dryer outlet and wall connector.
- Clean accessible lint from the connection area.
- Measure and cut the approved replacement to the required length.
- Attach both ends using the specified connection method.
- Reposition the dryer without crushing the duct.
- Recheck both connections and test airflow at the exterior outlet.
Gas dryers need extra care. Do not disconnect gas connections unless you are qualified to perform that work.
How to Replace an Exterior Dryer Vent Hood
Check the existing hood for a stuck damper, damaged flap, cracks, corrosion, or a blocked passage.
Remove the old component without damaging the wall opening. Confirm that the replacement fits the duct and meets the required termination design.
Seal the exterior opening using a suitable weatherproofing method. Make sure the damper moves freely and the passage remains unobstructed.
How to Install a Dryer Vent Extension
An extension may be needed when the existing transition duct cannot reach the connection point. However, adding duct length can increase resistance.
Check whether the product is an approved transition duct or a fitting for the permanent exhaust system. Do not join multiple flexible sections to create a long substitute for fixed metal ductwork.
Confirm the total route length and fitting allowances before using an extension.
Can You Replace a Dryer Vent Pipe Without Moving the Dryer?
Sometimes a short accessible section can be replaced without removing the entire appliance. However, the connection must still be inspected and secured.
If the pipe is behind the dryer, it may be difficult to confirm that the joint is sound without moving the machine.
For a complete inspection, the appliance may need to be pulled away from the wall. Have someone assist if the dryer is heavy or difficult to move.
What Are the Signs of Improper Dryer Vent Installation?
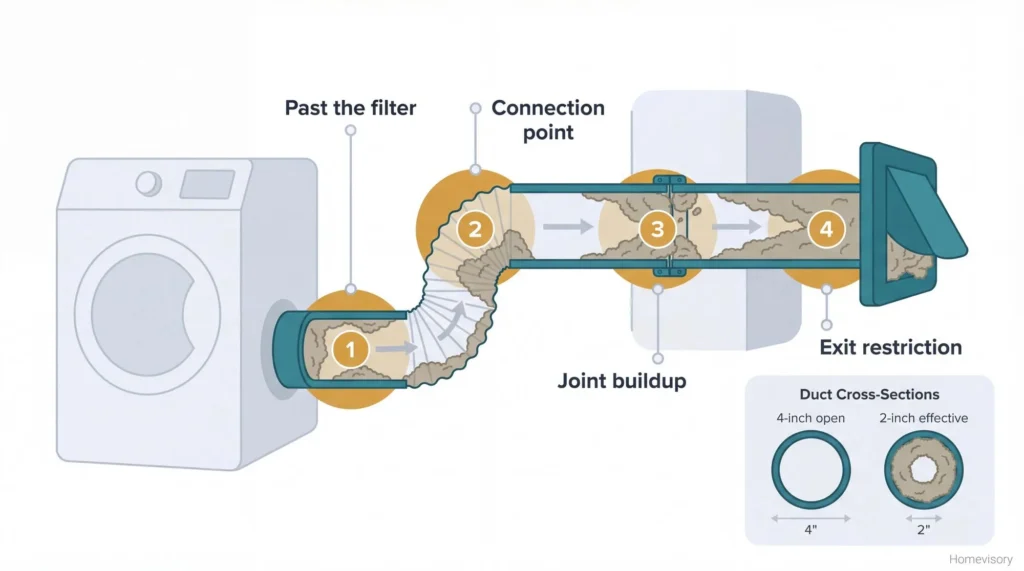
Drying performance can provide early clues that an exhaust system needs attention. These symptoms are useful, but they do not prove the cause by themselves.
Why Does a Dryer Take Too Long to Dry Clothes?
A blocked lint screen or exhaust duct can reduce airflow. A crushed transition hose, long duct run, or too many bends can also affect drying.
Start with the lint screen. Then inspect the accessible transition duct and exterior vent while following the appliance safety instructions.
The CPSC warns that damp clothes after a normal cycle or longer drying times may indicate a blocked lint screen or exhaust duct. CPSC: Overheated Clothes Dryers Can Cause Fires
Why Is There Condensation or Humidity Around the Dryer?
Moisture in the laundry area can indicate a disconnected transition duct, leaking joint, or incorrect exhaust route.
First, identify the dryer type. A conventional vented dryer sends moist air through its exhaust system. A ventless condenser or heat pump dryer handles moisture inside the appliance and may use a collection tank or drain pipe.
A problem in a vented system should not be confused with normal water collection in a ventless model.
Why Does the Dryer Get Too Hot?
Restricted exhaust airflow may contribute to overheating. A blocked duct, crushed transition hose, or faulty component can also affect the appliance.
Stop using the dryer if it smells like burning or shows signs of overheating. Do not keep running cycles in the hope that the problem will clear.
Arrange a qualified inspection if a simple lint screen check does not explain the issue.
Why Is Lint Collecting Around the Dryer Vent?
Visible lint around a connection may indicate a loose or damaged duct.
Check the transition hose, wall connector, and accessible joints. Look for gaps, tears, and signs that the duct has separated.
Do not cover the leak with tape without first identifying the correct repair method and checking the underlying connection.
Why Is the Exterior Dryer Vent Flap Not Opening?
The damper may be stuck, blocked by lint, damaged, or connected to a duct with poor airflow.
While the dryer operates, check the exterior outlet from a safe position. The flap should open and allow exhaust air to escape.
If it remains closed, stop the dryer and inspect the system. Do not force the flap open and assume the issue is resolved.
What Are the Most Common Dryer Vent Installation Mistakes?
Common mistakes include:
- Using unsuitable plastic or vinyl ducting.
- Selecting a transition duct that is too long.
- Crushing the hose behind the dryer.
- Adding unnecessary elbows.
- Reducing the duct diameter without approval.
- Allowing joint edges or fasteners to create internal obstructions.
- Discharging exhaust into an attic or crawlspace.
- Blocking the exterior damper with a screen or debris.
- Ignoring the manufacturer’s duct length limits.
- Failing to test airflow after installation.
A careful inspection can catch many of these problems before the dryer returns to normal use.
What Are the Dryer Vent Installation Code and Safety Requirements?
Building code provisions are designed to support suitable duct materials, airflow, termination, and protection. The rules that apply to a property depend on the code adopted by its jurisdiction.
The International Residential Code is a model code. It is not automatically the enforceable rule in every US city or county.
Does a Dryer Vent Have to Exhaust Outdoors?
A conventional vented dryer normally sends its exhaust outdoors through a dedicated duct.
Under the 2024 IRC, dryer exhaust systems must be independent of other systems and carry moisture outside. The code provides an exception for listed and labeled condensing ductless dryers.
Follow the appliance manual and check the locally adopted code before installing the system.
Can You Vent a Dryer Into an Attic, Garage, or Crawlspace?
Do not discharge a conventional dryer exhaust into an attic, crawlspace, or enclosed indoor area.
Moist exhaust can contribute to condensation and moisture damage. Lint can also accumulate in areas that are difficult to inspect.
The 2024 IRC’s exhaust provisions prohibit discharge into spaces such as attics, soffits, ridge vents, and crawlspaces. A conventional dryer should use a proper outdoor termination.
Does a Dryer Vent Need a Backdraft Damper?
A suitable exterior termination needs a backdraft damper under the 2024 IRC dryer provision.
The damper opens when the dryer exhausts air and closes when the system is idle. It should move freely.
A stuck or obstructed damper can restrict airflow. Inspect it during routine maintenance.
Can You Put a Screen Over an Exterior Dryer Vent?
The 2024 IRC prohibits screens at the dryer exhaust termination.
A screen can catch lint and restrict airflow. Use a suitable vent hood designed for dryer exhaust instead of adding ordinary mesh.
Check the product instructions and adopted code before changing the exterior termination.
Are Dryer Vent Booster Fans Allowed?
Do not install a booster fan as a quick fix for a long or poorly designed duct.
The 2024 IRC has specific provisions for dryer exhaust power ventilators and also addresses domestic booster fans. Their use is not something to decide from a generic online diagram.
Check the appliance instructions, product listing, and local code. Ask the building department or a qualified professional before considering any powered ventilation device.
What Safety Checks Should You Complete Before Using the Dryer?
Before normal operation, confirm the following:
- The transition duct is approved for the appliance and application.
- The main exhaust duct is suitable and properly secured.
- No section is crushed, kinked, or disconnected.
- Joints are secured and sealed using the correct method.
- The exterior damper opens during operation.
- Exhaust air reaches the outdoors.
- The dryer is connected and positioned according to its manual.
- There is no visible leakage or unusual noise.
- The route meets the manufacturer’s length and fitting requirements.
- Any required inspection has been completed.
How Much Does Dryer Vent Line Installation Cost?
The cost depends on the existing setup and the work involved. Replacing a short transition hose is different from creating a new duct route through an exterior wall or roof.
There is no reliable single price for every American home. Labor rates, access, materials, building design, and local permit requirements all affect the final estimate.
What Is the Cost to Install a New Dryer Vent Line?
A basic connection may involve a short approved transition duct and existing wall outlet. A new installation may require ductwork, exterior cutting, a hood, supports, sealing, and inspection.
A complicated route through a basement, crawlspace, finished ceiling, or roof can require more labor. Some installations may also require repairs to existing openings or damaged ductwork.
Ask for a written estimate that separates the main work, materials, and any additional repairs.
What Factors Affect Dryer Vent Installation Cost?
Cost factor | Why it matters |
Duct length | Longer routes usually require more material and labor |
Number of elbows | Fittings add work and affect permitted duct length |
Wall penetration | Cutting and finishing an exterior opening takes time |
Roof route | Roof access and weatherproofing add complexity |
Basement or crawlspace | Restricted access may increase labor |
Existing duct condition | Damaged or unsuitable ductwork may need replacement |
Materials | Duct type, connectors, hood, and vent box affect the estimate |
Permits and inspection | Local rules may require additional steps |
The location of the dryer also matters. A laundry room beside an exterior wall may need less ductwork than a machine placed near the center of a building.
Is DIY Dryer Vent Installation Cheaper?
A simple transition hose replacement may be manageable for someone who can follow the dryer manual and safely access both connections.
A new duct route is more demanding. Cutting an exterior wall, working around wiring, or routing duct through finished construction carries greater risks.
DIY work is not always cheaper if an incorrect cut damages the wall or a poorly installed system needs to be rebuilt. Compare the cost of the right materials and tools with a professional estimate before starting.
When Is Professional Dryer Vent Installation Worth the Cost?
Professional help is worth considering when the route is long or concealed, the installation requires wall or roof work, or the existing duct is difficult to inspect.
A qualified installer can also help with unusual connections, new construction, and complicated appliance locations.
Gas dryer work requires particular care. Use a qualified professional for gas disconnection or reconnection.
How to Maintain a Newly Installed Dryer Vent Line
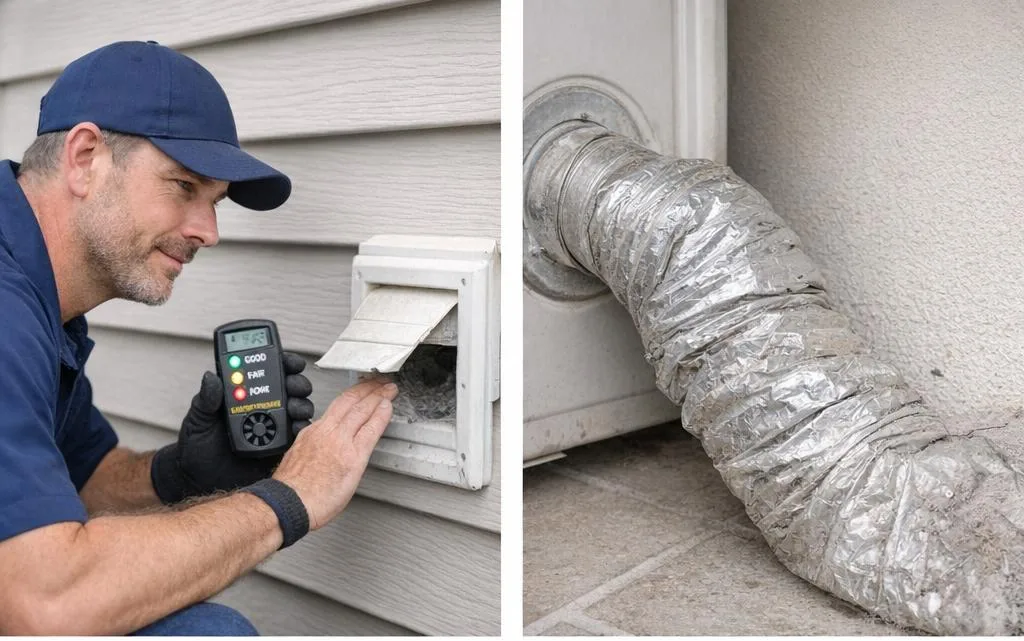
A new installation still needs regular attention. Lint can collect over time, and the exterior flap can become blocked by debris or damaged.
Maintenance helps you catch changes before they affect the dryer’s operation.
How Often Should You Clean a Dryer Vent?
Clean the lint screen before or after each load, following the dryer’s instructions. Also inspect the exhaust route and clean the vent when needed.
The CPSC recommends cleaning the vent pipe at least once a year. The right interval can vary with dryer use, household laundry volume, duct length, and the appearance of warning signs. A large household that runs several loads each day may need more frequent inspection.
The CPSC estimates an average of 6,400 clothes dryer fires each year in the figures it cited in its 2023 safety release. It advises users to keep the lint filter clean, check the outdoor flap, and clean lint from the vent pipe at least annually. CPSC dryer safety guidance
The US Fire Administration also reports that failure to clean was the leading factor contributing to clothes dryer fires in homes from 2018 to 2020. US Fire Administration: Appliance and Electrical Fire Safety
How Do You Check the Exterior Dryer Vent Flap?
Look at the exterior hood while the dryer is operating. The damper should open when exhaust air passes through it.
Check for lint, leaves, nests, damage, or anything blocking the passage. Do not install an unsuitable screen to keep pests away.
If the flap does not move normally, inspect the duct for a blockage or arrange a professional check.
How Can You Prevent Lint and Moisture From Building Up?
Keep the lint screen clean and avoid using a damaged transition duct. Make sure the dryer is not pushed against the wall in a way that crushes the connection.
Inspect the exterior termination and accessible duct joints. Clean the system when lint begins to accumulate or when the dryer shows signs of reduced airflow.
Do not ignore longer drying times. They may indicate a maintenance issue that needs attention.
What Should You Inspect After Dryer Vent Installation?
Use this checklist during the final inspection and future maintenance:
Inspection item | What to look for |
Duct material | Suitable metal exhaust duct and approved transition connector |
Duct size | Matches the appliance instructions and applicable code |
Route | Short practical path with permitted fittings |
Connections | Secure joints with suitable sealing |
Supports | Duct remains stable and does not sag |
Transition duct | No crushing, stretching, or kinks |
Exterior hood | Suitable termination with a moving damper |
Airflow | Exhaust escapes outdoors during operation |
Moisture | No visible leakage around connections |
Access | Important inspection points remain accessible |
Keep the dryer’s installation manual and any inspection records with your appliance documents.
Local Considerations for Homeowners in [City, State]
Dryer installation requirements are not identical in every US community. The building department, local code amendments, property layout, and weather conditions can affect the best route.
For a property in [City, State], start with the official [City or County Building Department]. Confirm which residential or mechanical code edition applies and whether the planned work requires a permit or inspection.
When planning the outlet, consider the actual exterior layout of the property. A laundry room near [Verified Local Street or Neighborhood] may have a different practical route from one in [Second Verified Neighborhood]. Do not assume a route that works in one building will work in another.
Local property types also matter. A detached home, townhouse, condominium, and multi unit building may have different access and approval requirements. In a shared building, check the property manager or homeowners association rules before changing an exterior wall or common duct route.
For local relevance, add useful information that residents can verify:
- The correct permit office and its official contact details.
- The adopted local code edition or a link to the official code page.
- Genuine installation examples from the service area.
- Actual neighborhoods and communities served.
- Real photographs of wall outlets, exterior hoods, and completed duct routes.
- Relevant customer feedback that the business has permission to publish.
For example, homeowners around [Verified Local Landmark], [Verified School or College], or [Verified Main Street] may find it helpful to understand which building department handles permit questions. Include those place names only when they genuinely relate to the website’s service area.
Do not add a local name just to place it in a heading. A useful local reference should help readers identify the right authority, understand a building type, or confirm service availability.
Frequently Asked Questions About Dryer Vent Line Installation
How Do You Install a Dryer Vent Line?
Connect the dryer to a suitable transition duct, then join it to a properly installed exhaust duct leading outdoors. Use permitted materials, keep the route short, secure the joints, and test airflow at the exterior outlet. Follow the appliance manual and local code.
Can You Install a Dryer Vent Yourself?
A simple replacement of an accessible transition hose may be manageable for a homeowner who follows the manufacturer’s instructions. New wall openings, roof routes, concealed ductwork, and gas appliance connections are more complex. Hire a qualified professional when the work involves structural, electrical, or gas risks.
How Long Can a Dryer Vent Line Be?
The permitted length depends on the dryer manual, fittings, and locally adopted code. The 2024 IRC includes a 35 foot method with reductions for elbows, but it also allows manufacturer based calculations. Do not treat 35 feet as a universal limit.
What Is the Standard Size of a Dryer Vent Pipe?
Four inches is the common nominal size for conventional residential dryer exhaust ductwork. Confirm the required size using the appliance instructions and the code adopted by your jurisdiction.
Can You Install a Dryer Vent Through the Floor?
A floor route may be possible when it leads to an approved exterior termination and meets code requirements. Check framing, wiring, plumbing, access, and total duct length before cutting. Do not discharge exhaust into a basement or crawlspace.
Can You Install a Dryer Vent Through the Roof?
A roof route may be possible when the building layout requires it and the selected termination is approved. Roof penetrations need correct weatherproofing and suitable exhaust fittings. Because the work can involve fall and water damage risks, professional installation is often appropriate.
Can You Vent a Dryer Indoors?
Do not discharge a conventional vented dryer’s exhaust indoors. It carries moisture and lint into the building. Listed ventless condenser and heat pump dryers are different because they remove moisture within the appliance.
Does a Gas Dryer Need to Vent Outside?
A conventional gas dryer needs the exhaust arrangement specified by its manufacturer and applicable code. Do not discharge its exhaust into a room, attic, garage, or crawlspace. Use qualified help for gas connections and installation concerns.
Does a Heat Pump Dryer Need an Exhaust Vent?
Typical heat pump dryers do not need a traditional exterior exhaust duct. They use an internal closed air cycle and collect moisture in a tank or send it through a drain hose. Check the exact model’s installation instructions.
Can You Use a Flexible Dryer Vent Hose?
Only use a transition duct that is approved for the dryer and installation. Do not assume ordinary plastic or foil flex duct is suitable. The fixed exhaust route and the transition connector have separate requirements.
How Do You Connect Two Dryer Vent Hoses?
Use compatible duct sections and the correct connector. Orient inserted ends with the direction of airflow, then secure and seal the joint using the required method. Avoid creating a long flexible run from several short hoses.
How Do You Connect a Dryer Vent Hose in a Tight Space?
Measure the available clearance and use a compatible short transition duct or suitable low profile connector. Guide the hose as you move the dryer back into place. Check for kinks and confirm both ends remain secure.
Can You Use PVC Pipe for a Dryer Vent?
Do not use ordinary PVC pipe for a conventional dryer exhaust duct. Use suitable duct material that meets the dryer instructions and applicable code.
Does Dryer Vent Installation Require a Permit?
Permit requirements depend on the local jurisdiction and the work being done. Contact the building department before cutting an exterior wall, changing concealed ductwork, or altering a building’s structure.
How Much Does It Cost to Install a Dryer Vent?
The price depends on duct length, material, route complexity, wall or roof access, labor, and local permit requirements. A short transition hose replacement costs less than installing a new route through finished construction. Request a written estimate based on the actual layout.
When Should You Hire a Professional Dryer Vent Installer?
Hire a qualified installer for long or concealed routes, roof penetrations, difficult wall openings, damaged ductwork, or uncertain building code requirements. Use qualified professionals for gas appliance work and other tasks outside your experience.
Final Thoughts
A reliable dryer exhaust system starts with the correct duct material and a well planned route. Keep the path practical, avoid unnecessary bends, secure each connection, and make sure the exhaust reaches an approved outdoor termination.
Do not overlook the transition duct behind the appliance. Even a well installed permanent duct can perform poorly if the hose becomes crushed when the dryer is moved into place.
Check the manufacturer’s instructions and local building code before starting. After installation, test the exterior damper and confirm that exhaust air can leave the building.
Regular cleaning and inspection help maintain airflow. If the dryer takes longer to dry clothes, the laundry area becomes unusually humid, or the exterior flap stops opening, investigate the system before continuing normal use.
Authoritative References and Further Reading
The following sources support the technical and safety guidance in this article. Always check the edition and requirements applicable to your property.
- 2024 International Residential Code, Chapter 15: Exhaust Systems. See Section M1502 for dryer exhaust requirements, duct material, size, joints, transition ducts, and length.
- U.S. Consumer Product Safety Commission: Overheated Clothes Dryers Can Cause Fires. Safety guidance on lint buildup, blocked airflow, and dryer maintenance.
- U.S. Consumer Product Safety Commission: Clothes Dryer Safety. Guidance on lint filters, exterior flaps, and vent cleaning.
- U.S. Fire Administration: Appliance and Electrical Fire Safety. Fire prevention information, including dryer fire ignition factors.
- ENERGY STAR: Clothes Dryers. Information on conventional dryers, heat pump dryers, moisture removal, and energy use.