How to Reseal Windows: A Step-by-Step Guide to Fix Drafts, Repair Seals, and Reduce Energy Loss
Windows help protect your home from outdoor temperatures, rain, wind, and moisture. However, worn caulk, damaged weatherstripping, and loose window components can allow outside air and water to enter.
These problems can make rooms uncomfortable. They can also increase heating and cooling costs.
The good news is that some window sealing problems are easy to fix. You may be able to repair small gaps with new caulk, replace worn weatherstripping, or seal suitable gaps around the window frame. These repairs can improve comfort without replacing the entire window. You can find more practical advice in our home maintenance guides.
However, not every window seal problem has the same solution. A gap around the frame is different from a failed seal inside double-pane glass. Applying exterior caulk will not repair condensation trapped between glass panes.
This guide explains how to reseal windows, identify common sealing problems, choose suitable materials, and decide when professional repair is necessary.
Quick Answer: How Do You Reseal Windows?
To reseal a window, first identify where air or water enters. Remove damaged caulk from the joint that needs repair. Clean the surface and let it dry completely. Apply a suitable window and door sealant, smooth the bead, and allow it to cure according to the manufacturer’s instructions.
If the problem comes from worn weatherstripping, replace the damaged strip instead of covering it with caulk.
If moisture or fog appears between double-pane glass, the insulated glass unit may have a failed seal. That problem usually requires professional assessment and may need glass unit replacement.
How Do You Know If Your Window Seal Is Broken?
A damaged window seal can cause several problems. Some signs are easy to see, while others become noticeable during cold, hot, or rainy weather.
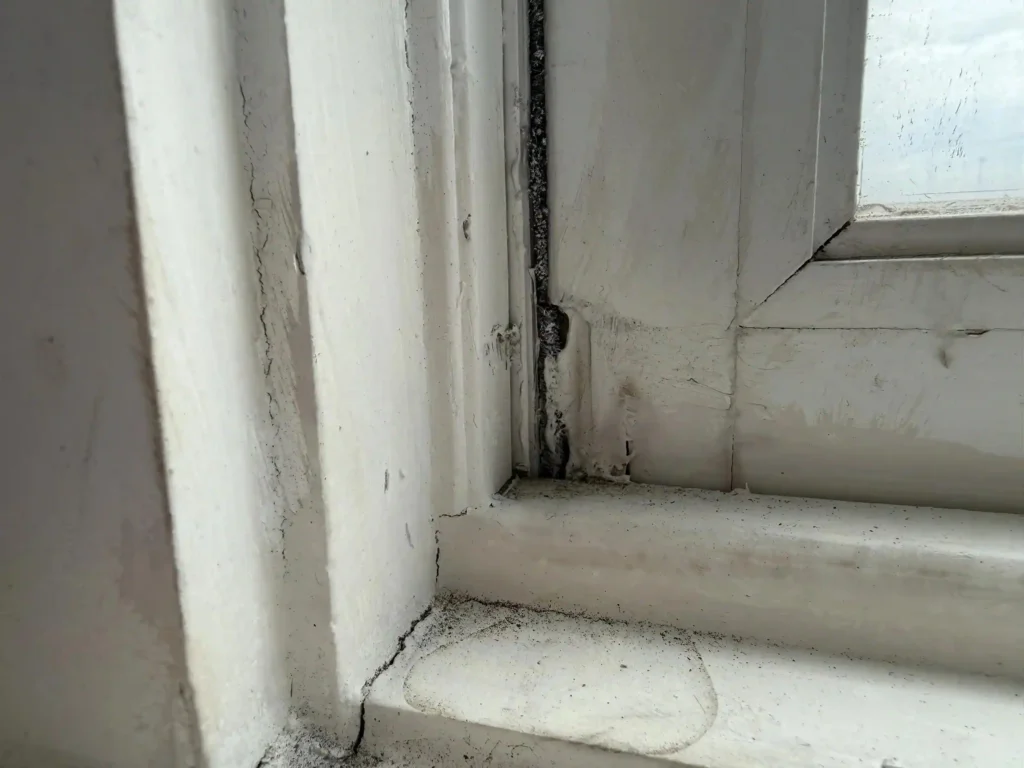
Check the following areas before deciding how to repair the window.
1. You Feel Drafts Around the Window
A draft is one of the most common signs of air leakage.
You may notice cold air entering during winter. In summer, warm outdoor air may move into the room. The problem can come from cracked caulk, worn weatherstripping, or a gap between the window frame and wall.
Move your hand slowly around the frame on a windy day. Pay attention to the corners, meeting rails, and areas where the sash closes.
A draft near the moving sash may indicate worn weatherstripping. Air entering around the stationary frame may point to a gap between the frame and the surrounding wall.
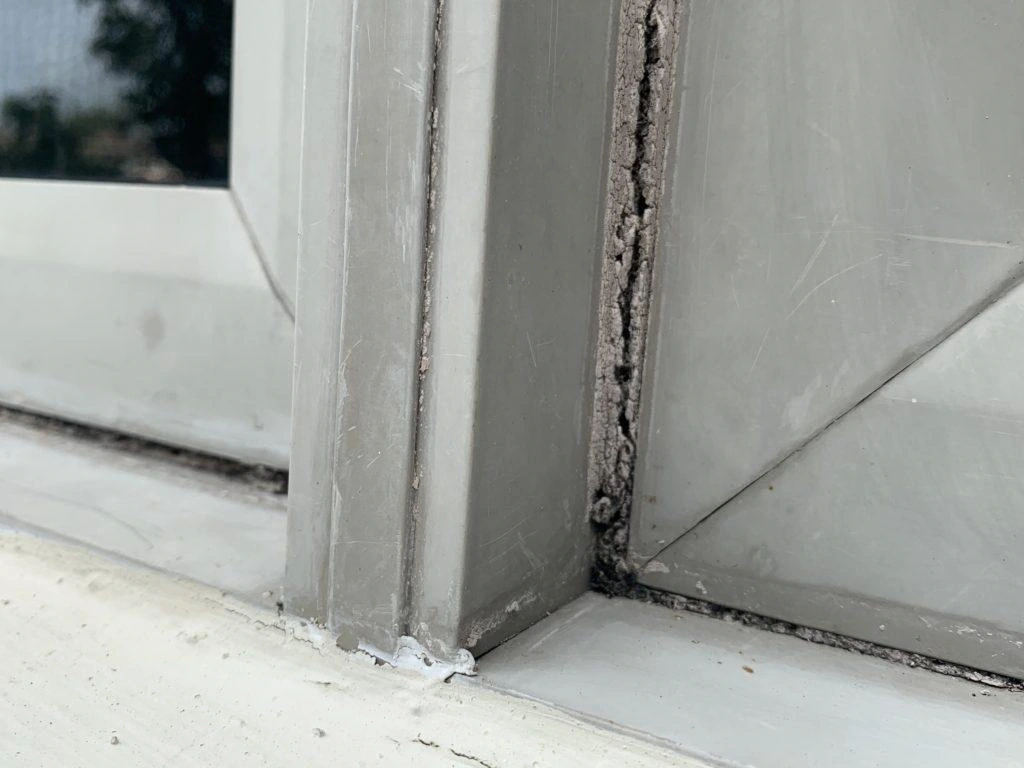
2. The Caulk Is Cracked or Peeling
Inspect the caulk around the interior and exterior window frame.
Look for:
- Cracks along the sealant bead
- Gaps between the frame and wall
- Caulk pulling away from the surface
- Brittle or loose material
- Missing sections around the corners
Old sealant may lose adhesion after years of exposure to sunlight, rain, temperature changes, and movement.
If the surrounding material remains sound, removing the damaged caulk and applying a compatible replacement may solve the problem.
3. Condensation Appears Between Double-Pane Glass
Condensation between two glass panes is different from moisture on the room-facing surface.
Double-pane windows contain an insulated glass unit, often called an IGU. The unit has two panes separated by a spacer. Its edges are sealed to help protect the space between the panes.
When that internal seal fails, moisture can enter the space. You may notice fog, cloudy patches, or mineral deposits that you cannot wipe away from either side.
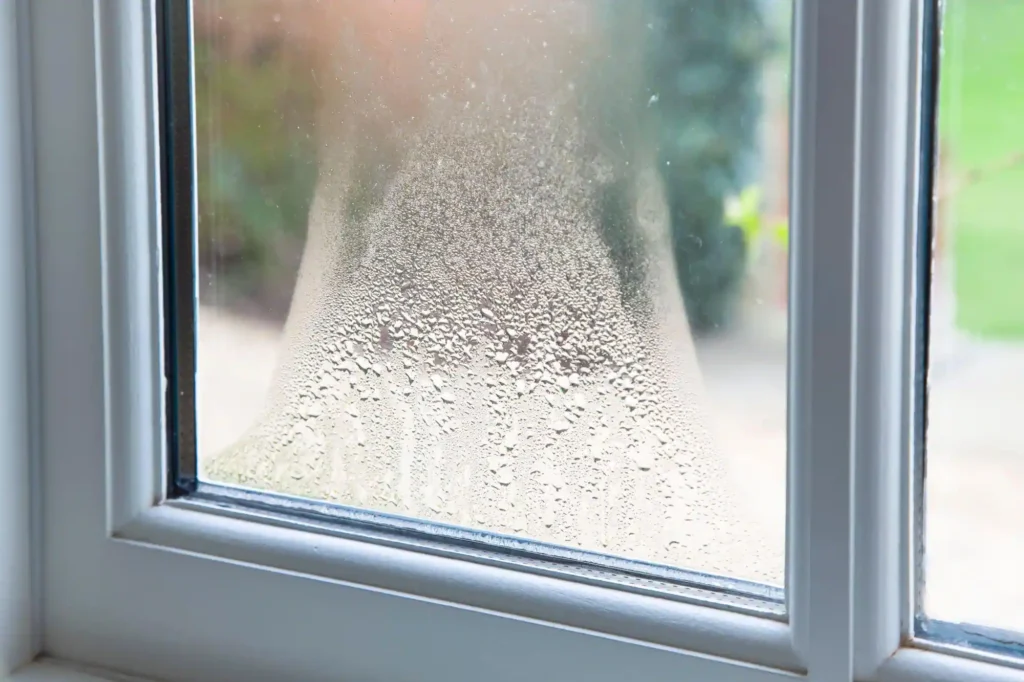
Exterior caulk cannot repair this internal glass seal. A window professional may recommend replacing the insulated glass unit or the complete window, depending on its condition and design.
4. Water Leaks Around the Window
Water stains near a window can indicate a sealing or drainage problem.
Check for:
- Damp areas around the frame
- Water stains below the sill
- Peeling paint near the corners
- Soft or damaged wood
- Mold or mildew growth
- Water entering during heavy rain
Do not assume that every leak comes from failed caulk. Water may enter through damaged flashing, siding, roof components, or a failed window installation.
The Building America Solution Center explains that properly integrated flashing helps direct water away from window openings and prevents it from entering wall cavities. If water continues to enter after a surface repair, the underlying water-management system may need inspection.
5. Your Energy Bills Increase
Air leaks can make heating and cooling systems work harder to maintain indoor temperatures.
However, higher energy bills do not automatically mean your window seals have failed. Insulation, HVAC performance, thermostat settings, and outdoor temperatures also affect energy use.
Check the windows for drafts and visible gaps. If several areas of the home feel uncomfortable, a professional home energy assessment may help identify the main sources of air leakage.
What Is the Difference Between Window Caulking, Window Seals, and Weatherstripping?
These terms describe different parts of a window’s sealing system. Understanding the difference helps you choose the correct repair. The U.S. Department of Energy recommends caulking and weatherstripping as practical ways to reduce air leaks and improve home energy efficiency.
Window Caulking
Caulk is a flexible sealant used to close suitable stationary gaps.
Homeowners commonly use it around the joint between a window frame and nearby trim or wall material. The correct product depends on the surface, location, expected movement, and exposure.
Caulk is not a replacement for every type of window seal. It should not cover moving parts or drainage openings.
Window Seals
A window seal can refer to several different sealing components.
It may describe the sealant around the frame, a rubber gasket between moving components, or the edge seal inside an insulated glass unit.
These components perform different jobs. A failed frame seal may be repaired with suitable caulk. A damaged gasket may need replacement. A failed IGU edge seal may require professional glass unit repair or replacement.
Weatherstripping
Weatherstripping seals the moving parts of a window.
It is commonly installed where the sash meets the frame. It helps reduce drafts when the window is closed.
Weatherstripping can become compressed, torn, loose, or brittle. When that happens, replacing it with a compatible strip is usually more effective than applying caulk over the moving joint.
Can Caulk Fix a Broken Double-Pane Window Seal?
No. Caulk cannot restore the internal seal between two panes of glass.
It may seal a separate gap around the window frame, but it cannot remove moisture trapped inside the insulated glass unit or restore its original insulating performance.
If fog remains between the panes, have the unit inspected by a qualified window professional.
What Materials and Tools Do You Need to Reseal Windows?
The materials depend on the location and size of the gap. Using the wrong product can lead to poor adhesion, failed repairs, or restricted window movement.
Gather the following tools and supplies before starting.
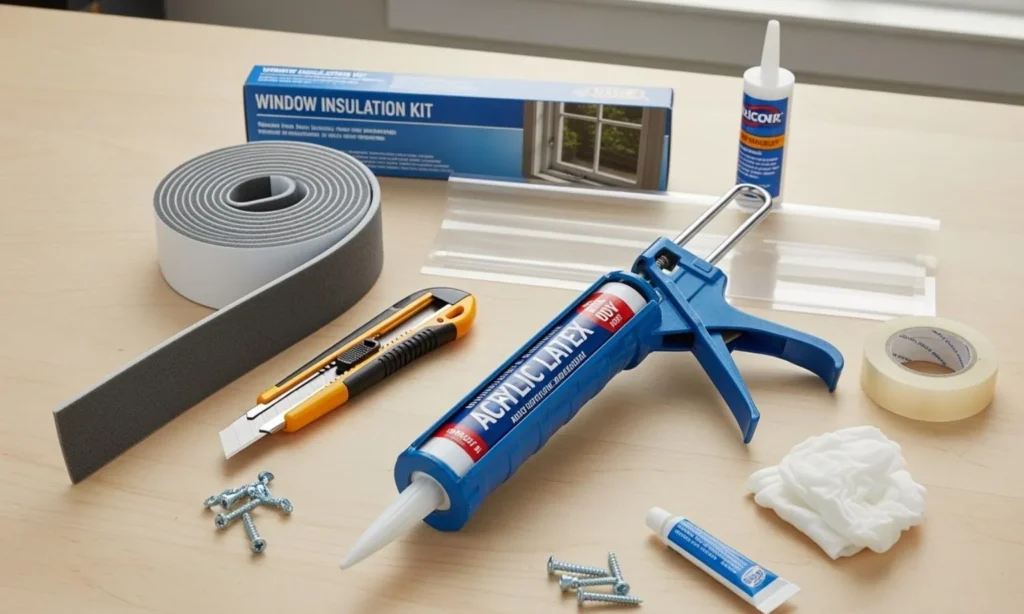
Basic Tools
- Caulking gun
- Utility knife
- Caulk removal tool
- Putty knife or scraper
- Cleaning cloths
- Painter’s tape
- Gloves
- Safety glasses
- Suitable cleaning supplies
Use tools carefully to avoid scratching glass, damaging the frame, or cutting into nearby weather barriers.
Which Caulk Is Best for Window Sealing?
There is no single caulk that suits every window. Consider the material, location, paint requirements, and product instructions.
Silicone sealant: Silicone products are commonly used for exterior window and door joints. Many offer good flexibility and weather resistance. Standard silicone is usually not paintable, so check the product label before choosing it.
Acrylic latex caulk: Acrylic latex products are often suitable for interior trim and small gaps. Many can be painted after curing. Their performance varies by formulation and exposure.
Siliconized acrylic latex: These products combine acrylic properties with silicone additives. They may offer improved flexibility and adhesion compared with basic acrylic caulk. Check whether the product is approved for the intended exterior or interior application.
Polyurethane sealant: Some polyurethane products provide strong adhesion and movement capability. They may suit certain exterior joints, depending on the manufacturer’s specifications and the materials involved.
Always check the technical data sheet. Confirm that the sealant is compatible with the window frame, surrounding surface, and expected exposure.
Other Useful Materials
Weatherstripping: Use a replacement strip designed for your window style and frame.
Foam backer rod: This material fills suitable deeper joints before sealant application. It helps control sealant depth and supports the correct joint shape.
Low-expansion window and door foam: Some products are designed to seal gaps between a window unit and its rough opening. Use only foam labeled for windows and doors. Ordinary expanding foam can place pressure on the frame and affect window operation.
Glazing compound: Older wood windows may use glazing compound to secure and seal glass within the sash. This is a different repair from caulking the joint between the frame and wall.
How to Reseal Windows Step by Step
Follow these steps when the problem involves a suitable stationary joint around the window frame.
Before starting, identify the exact source of the leak. Do not apply new caulk over moving joints, drainage paths, or failed insulated glass seals.
Gaps between the window frame and wall framing may need additional air sealing. Follow established guidance for air sealing window and door rough openings to avoid leaving hidden gaps.
Step 1: Inspect the Window
Examine the full window, both inside and outside where accessible.
Look for cracked caulk, open joints, damaged trim, loose weatherstripping, and signs of water intrusion.
Check the corners carefully. Small gaps can be difficult to notice from a distance.
Open and close the window to confirm that the sash moves correctly. If it sticks, do not assume caulk will solve the problem. The frame may be distorted or the hardware may need adjustment.
Step 2: Remove the Old Caulk
Use a caulk removal tool or suitable scraper to remove loose and damaged sealant.
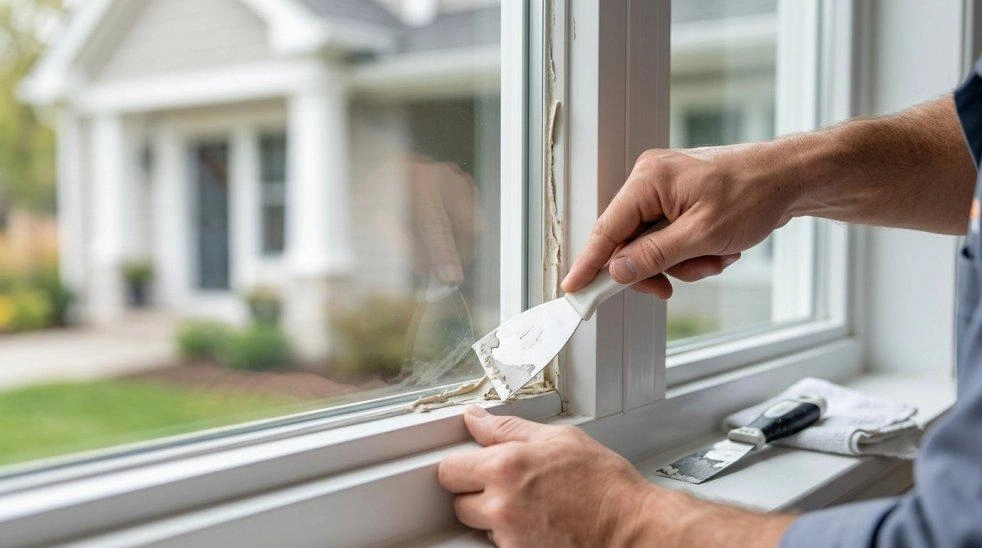
Work slowly. Avoid cutting into the window frame, siding, glass, or surrounding finishes.
Remove enough material to create a clean surface for the new sealant. If the existing caulk remains firmly bonded and is compatible with the new product, the manufacturer’s instructions may allow a different preparation method.
Do not simply cover loose, cracked, or contaminated caulk with another layer.
Important safety note: Homes built before 1978 may contain lead-based paint. Scraping, sanding, or cutting painted window components can release hazardous lead dust. The U.S. Environmental Protection Agency recommends lead-safe work practices and advises homeowners to hire a lead-safe certified contractor for renovation work that may disturb lead paint.
Step 3: Clean the Surface
Remove loose debris, dust, old sealant residue, and other contamination from the joint.
Use a cleaning method suitable for the frame and surrounding material. Avoid chemicals that may damage vinyl, painted wood, metal finishes, or glass coatings.
Let the surface dry completely before applying new sealant.
A clean surface helps the sealant bond properly. Applying caulk over dirt, moisture, or loose paint can cause early failure.
Step 4: Prepare the Joint
Check the width and depth of the gap.
Small joints may accept sealant directly. Deeper or wider joints may need a suitable backer rod or another approved joint preparation method.
Follow the sealant manufacturer’s instructions for joint dimensions and preparation.
Use painter’s tape along the edges if you want a cleaner finish. Keep the tape outside the area where the sealant needs to bond.
Step 5: Apply the New Sealant
Cut the nozzle at an angle. Choose an opening that suits the joint size.
Place the nozzle against the joint and apply steady pressure to the caulking gun.
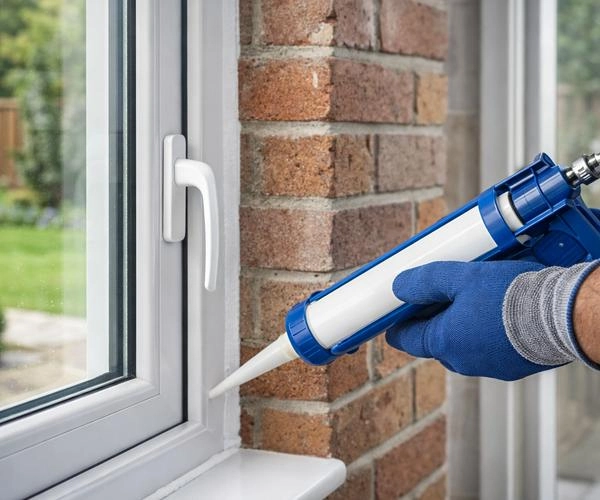
Move at a consistent speed so the sealant fills the gap without leaving empty sections.
Maintain contact between the nozzle and joint where practical.
Avoid applying excessive sealant. A large bead does not automatically create a better seal.
Use a product designed for the specific window material and location.
Step 6: Smooth the Sealant
Smooth the bead with a suitable finishing tool according to the product instructions.
The sealant should contact both sides of the joint. Remove excess material before it begins to skin over.
If you used painter’s tape, remove it at the stage recommended by the manufacturer.
Step 7: Allow the Sealant to Cure
Do not expose fresh sealant to water, movement, or cleaning before the product allows it.
Curing time depends on the sealant type, bead size, temperature, humidity, and other conditions.
Read the product label and technical data sheet. Do not assume that every sealant cures within the same number of hours.
Step 8: Test the Repair
After the sealant has cured, inspect the repaired joint.
Check for gaps, bubbles, missed sections, or poor adhesion.
On a suitable day, check the area for drafts. If water previously entered, monitor the window during the next rain event.
If the leak continues, investigate other possible causes. The issue may involve flashing, the sill, the window assembly, or the surrounding wall.
How to Reseal Windows from Outside
Exterior window caulking helps protect suitable joints from rain and outdoor air.
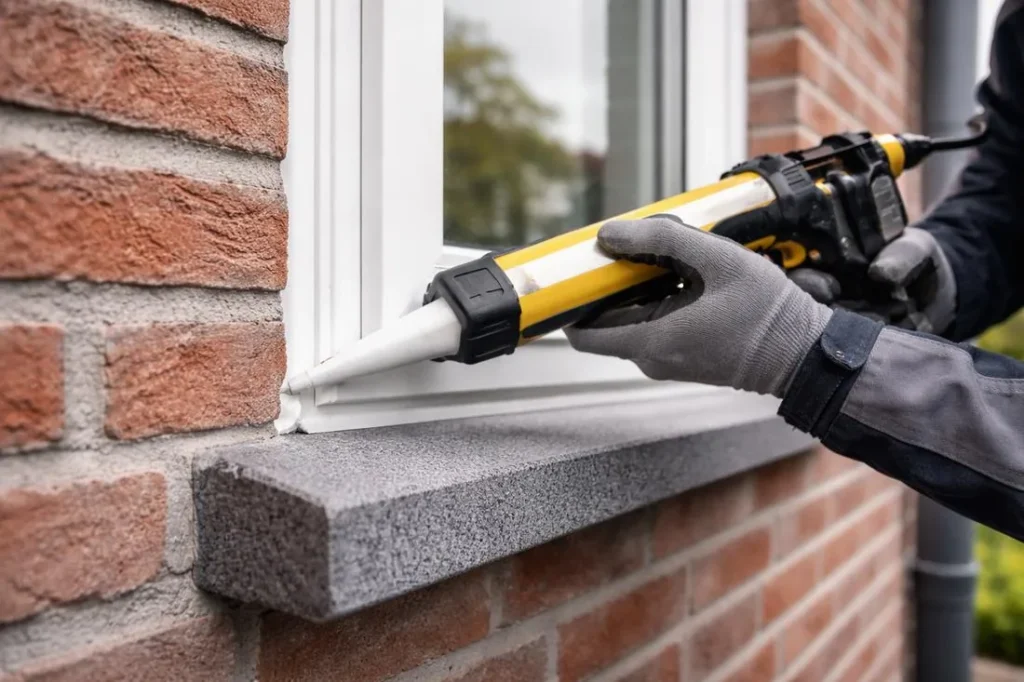
However, exterior sealant is only one part of the window’s water-management system.
Use this process for accessible exterior joints that are designed to receive caulk.
1. Inspect the Exterior Frame
Check the joints between the window frame and surrounding trim or siding.
Look for cracked sealant, open gaps, damaged paint, loose trim, and water stains.
Inspect the upper corners and side joints carefully. These areas may show damage after repeated exposure to rain and temperature changes.
2. Remove Damaged Exterior Caulk
Remove loose or failed sealant with a suitable tool.
Avoid damaging siding, flashing, window flanges, or the frame.
If you find extensive rot or hidden water damage, stop and arrange a professional inspection. New caulk will not repair damaged structural materials.
3. Clean and Dry the Joint
Remove dirt, dust, and loose debris.
Follow the sealant manufacturer’s preparation instructions. Some surfaces may need a specific cleaner or primer.
Allow the joint to dry before applying the new material.
4. Apply Exterior Window Sealant
Choose a sealant approved for exterior window and door applications.
Apply it to the intended joint. Keep the bead consistent and avoid covering components that must remain open for drainage or movement.
The Building America Solution Center describes exterior sealing at the head and side jambs in certain window installation details. It also warns against caulking across the sill in those details because the sill area must allow water to drain.
The correct treatment depends on the window design and manufacturer’s instructions. Do not apply a universal caulking pattern to every window.
5. Check the Sill and Drainage Openings
Look for small drainage openings, often called weep holes, in the window frame.
These openings allow water that enters parts of the window assembly to escape.
Never block weep holes or other designed drainage paths with caulk. Blocking them can trap water and increase the risk of damage.
What About Brick, Stucco, and Vinyl Siding?
The surrounding exterior material affects sealant selection and preparation.
Brick and masonry: Use a sealant approved for masonry and the window frame. The joint may require backer rod if it is deep.
Stucco: Check for cracks and signs of water damage. A surface bead may not correct a leak caused by failed flashing or improper installation.
Vinyl siding: Use a compatible exterior sealant. Do not seal over siding joints or drainage features that are designed to move or drain.
Fiber cement siding: Follow the siding and sealant manufacturers’ instructions. Surface preparation and paint compatibility matter.
If water enters behind the siding, a professional may need to inspect the flashing and water-resistive barrier.
How to Reseal Windows from Inside
Interior sealing can reduce air movement through gaps between the window unit and the surrounding wall.
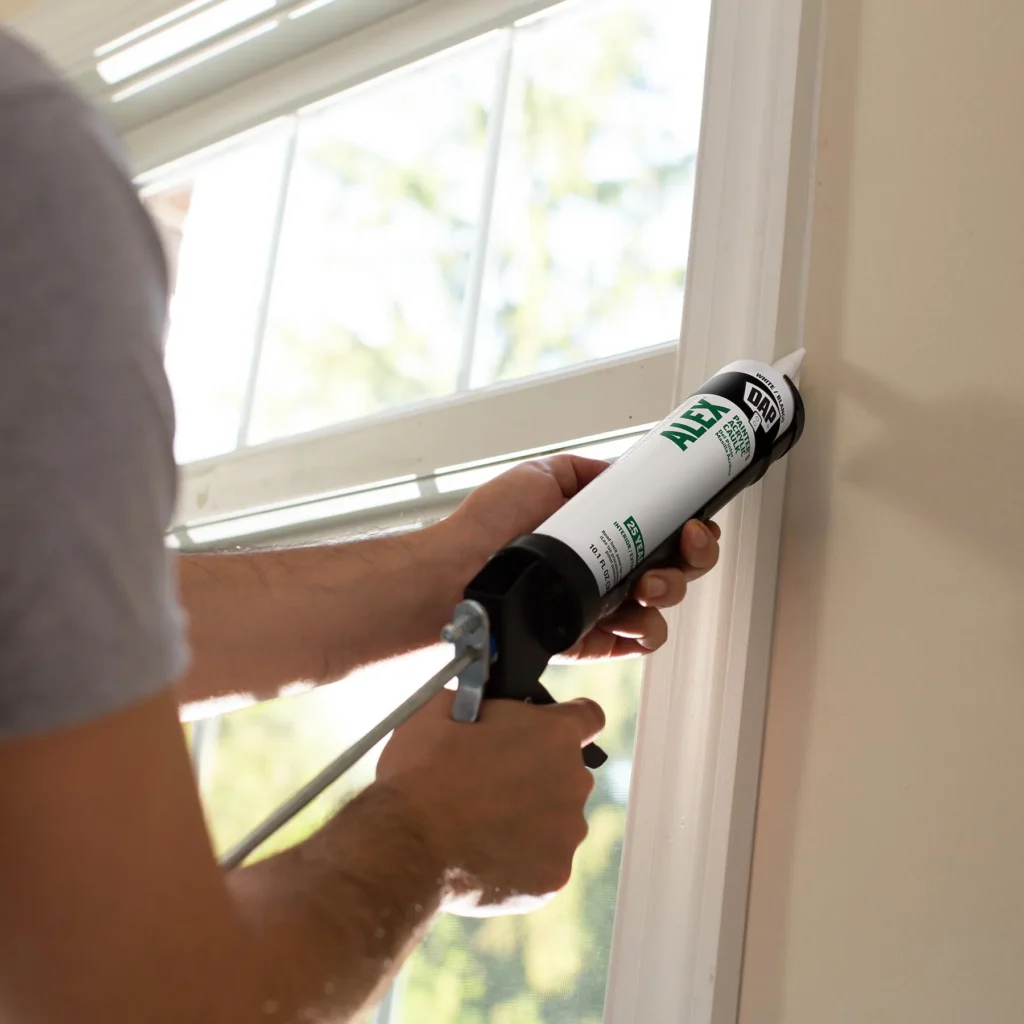
It is also useful when a draft comes from the interior trim area. First, confirm that the gap is not part of a drainage or ventilation feature.
Step 1: Find the Source of the Draft
Check the window corners, frame edges, sash, and meeting rails.
Move your hand around the closed window to identify noticeable air movement.
If the draft comes from the moving sash, inspect the weatherstripping. If it comes from the stationary frame and wall joint, caulk may be suitable.
Step 2: Remove Loose Interior Caulk
Cut away damaged sealant carefully.
Protect the paint, drywall, trim, and window frame. If the home was built before 1978, consider the lead-paint precautions described earlier.
Step 3: Clean the Joint
Remove dust and loose debris. Make sure the surface is dry and stable.
Do not apply new sealant over peeling paint or damp materials.
Step 4: Apply Interior Caulk
Choose a product suitable for the interior surface.
Paintable acrylic latex caulk is often used for small gaps around interior trim. Check the label to confirm compatibility with the materials.
Apply a narrow, even bead. Smooth it according to the product instructions.
Step 5: Replace Damaged Weatherstripping
If air enters where the sash meets the frame, inspect the existing weatherstripping.
Remove the worn strip and clean its channel if the window design allows it. Install a compatible replacement of the correct size and profile.
Do not use caulk to seal a sash that needs to open and close.
How to Reseal Different Types of Windows
Window materials and designs affect the repair method. Always check the manufacturer’s instructions before applying sealant or replacing components.
Vinyl Windows
Vinyl windows are common in residential buildings.
Inspect the exterior frame joints, sash, and weatherstripping. Use a sealant approved for vinyl and the surrounding surface.
Do not use products that may damage the frame. Keep drainage openings clear.
If the frame is warped or the sash does not close correctly, caulking may not solve the problem.
Aluminum Windows
Aluminum frames can develop gaps around joints and worn seals.
Check the frame connections, weatherstripping, and surrounding wall material.
Use a compatible sealant. Some products may be unsuitable for certain metals or finishes, so check the technical data sheet.
If the frame has corrosion or structural damage, arrange an inspection before sealing it.
Wood Windows
Wood windows need careful inspection because moisture can cause paint failure and rot.
Look for soft wood, peeling paint, cracked glazing compound, and gaps around the frame.
Repair damaged wood before applying new sealant. Caulk cannot restore rotted material.
Older wood windows may also contain lead-based paint. Take suitable precautions before scraping or disturbing painted surfaces.
Older Single-Pane Windows
Older single-pane windows may have gaps around the sash, frame, or glass.
The correct repair depends on the window’s construction. Some may need new weatherstripping, fresh glazing compound, or frame repairs.
Do not assume that exterior caulk is the correct product for every joint.
Double-Pane Windows
Double-pane windows contain an insulated glass unit.
If you notice fog or moisture between the panes, the internal edge seal may have failed. This is not a normal caulking repair.
A professional can assess whether the glass unit can be replaced separately or whether the complete window needs replacement.
uPVC Windows
uPVC windows often use compression seals and weatherstripping around moving sections.
Check the gasket for gaps, damage, or compression. Replace worn components with compatible parts.
Use an approved sealant for stationary frame joints only. Avoid sealing moving sections shut.
Can You Reseal Double-Pane Windows Without Replacing Them?
It depends on which seal has failed.
There are two different issues homeowners often confuse.
A gap around the window frame may be repaired with suitable exterior or interior sealant.
A failed seal between the glass panes is part of the insulated glass unit. Caulking the outside of the frame will not restore that internal seal.
Why Do Double-Pane Window Seals Fail?
Insulated glass units experience temperature changes and movement over time.
The edge seal may deteriorate because of age, manufacturing defects, installation problems, or repeated exposure to moisture and temperature changes.
When the seal fails, moisture can enter the space between the panes.
Can You Remove Fog Between the Glass Panes?
Wiping the inside or outside surface will not remove moisture trapped inside a sealed glass unit.
Some companies offer services that drill or treat glass to reduce visible fog. These treatments may improve appearance in certain situations, but they do not necessarily restore the original insulating seal.
Ask what the service repairs and what performance it guarantees.
Should You Replace the Glass Unit or the Whole Window?
If the frame remains sound, a replacement insulated glass unit may be possible.
If the frame is damaged, warped, rotted, or difficult to operate, full window replacement may make more sense.
Ask a window professional to compare both options. Consider the condition of the frame, glass, hardware, installation, and expected service life.
How to Seal Drafty Windows Without Replacing Them
You may be able to reduce drafts without buying new windows. The right solution depends on where the air enters.
Replace Worn Weatherstripping
Weatherstripping seals the gaps between moving window parts.
If it is torn, compressed, or missing, replace it with a compatible product.
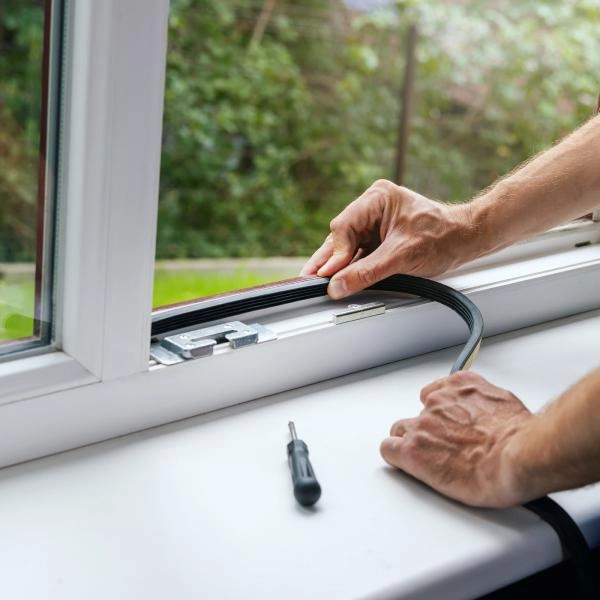
Measure the existing strip and check the window manufacturer’s recommendations before buying a replacement.
Recaulk Stationary Frame Gaps
Cracked caulk around a stationary frame may allow outside air to enter.
Remove the failed sealant, prepare the surface, and apply a suitable product.
Do not caulk the sash or other moving components.
Seal Suitable Gaps Around the Rough Opening
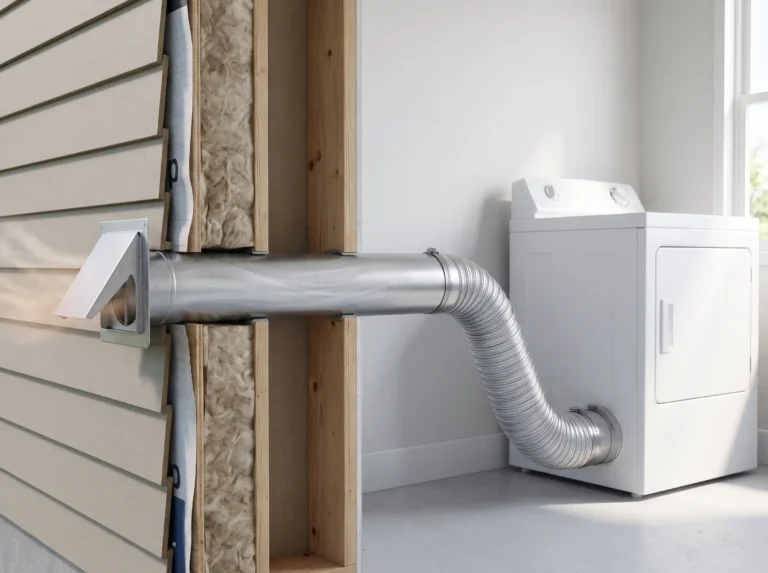
Some air leaks occur behind the interior trim, between the window unit and wall framing. Proper ventilation is also important for a healthy home. Read our guide to dryer vent line installation to learn about safe dryer exhaust routing.
The Building America Solution Center recommends suitable caulk, foam backer rod, or low-expansion window and door foam for these gaps.
This work may require removing trim. Use care around wiring, finishes, and the window frame. Foam must be designed for windows and doors because excessive expansion can distort the frame.
Use Removable Window Insulation
Temporary window film can provide an additional barrier during colder months.
Follow the product instructions and make sure the window is clean and dry before installation.
Temporary film does not repair a damaged frame, failed weatherstripping, or broken insulated glass seal.
Check the Window Locks and Alignment
A window that does not close fully may allow drafts.
Check the locks, hinges, tracks, and sash alignment. Some windows have adjustable locking components.
If the sash is damaged or the frame is out of square, a professional may need to repair it.
How to Reseal Windows for Winter
Cold weather can make window drafts more noticeable. Before winter, inspect the seals and repair suitable gaps.
Start with the following checks.
- Inspect exterior caulk for cracks and missing sections.
- Check weatherstripping around each moving sash.
- Look for gaps between interior trim and the wall.
- Check for water stains and damaged wood.
- Confirm that windows close and lock properly.
- Replace worn components where needed.
Can You Apply Window Caulk in Winter?
Some sealants can be applied in cooler weather. Others have minimum application temperatures.
The acceptable temperature may refer to the air, surface, or both. Moisture, frost, and condensation can also affect adhesion.
Read the manufacturer’s technical data sheet before applying sealant. Do not apply a product outside its stated temperature or weather limits.
If conditions are unsuitable, wait for an appropriate weather window or use a qualified professional.
How Much Does It Cost to Reseal Windows?
The cost depends on the type of problem, number of windows, materials, accessibility, and labor.
A small caulking repair is different from replacing weatherstripping or repairing a failed insulated glass unit.
DIY Window Resealing Costs
A simple repair may require only a tube of sealant and basic tools.
Your total cost may increase if you need a caulking gun, removal tools, backer rod, replacement weatherstripping, or access equipment.
Before buying materials, identify the exact problem. Buying the wrong sealant can waste money and lead to another repair.
Professional Window Resealing Costs
Professional costs vary by location and job complexity.
A contractor may charge more when the work involves removing trim, repairing damaged wood, replacing gaskets, accessing upper floors, or investigating water intrusion.
A failed double-pane glass seal may require a different quote from a standard caulking repair.
What Affects the Total Cost?
Common cost factors include:
- Number of windows
- Window size and design
- Frame material
- Type of seal or gasket
- Condition of the existing caulk
- Amount of surface preparation
- Water damage or wood rot
- Accessibility
- Local labor rates
- Need for glass unit replacement
Ask for an itemized estimate. It should explain the repair method, materials, affected areas, and any additional work.
DIY Window Resealing vs. Professional Window Repair
DIY resealing can work for simple, accessible problems. Professional repair is more suitable when the cause is unclear or the window has deeper damage.
When Can You Reseal Windows Yourself?
DIY work may be suitable when:
- The problem is a small gap around stationary trim.
- The old caulk is easy to remove.
- The frame is in good condition.
- The correct sealant is available.
- The repair area is safely accessible.
- No lead-paint hazard or major water damage is involved.
Follow the sealant instructions and avoid sealing any moving or drainage components.
When Should You Hire a Professional?
Consider professional help when:
- Fog appears between double-pane glass.
- Water continues entering after surface repairs.
- The frame is warped or damaged.
- Wood around the window is rotting.
- The window does not open or close correctly.
- The repair requires removing exterior cladding or trim.
- The window is on an upper floor and access is unsafe.
- Older painted surfaces may contain lead.
A professional can identify whether the problem involves caulk, weatherstripping, glazing, flashing, the frame, or the insulated glass unit.

What Should You Ask a Window Contractor?
Before hiring someone, ask:
- What is causing the leak or draft?
- Which part of the window needs repair?
- Can the existing frame remain?
- What sealant or replacement component will you use?
- Will the repair affect window drainage?
- Is the work covered by a written warranty?
- Does the estimate include damaged material removal and disposal?
A clear diagnosis is more useful than simply applying another layer of caulk.
How Long Does Window Sealant Last?
There is no fixed lifespan for every window sealant.
Performance depends on the product, joint movement, surface preparation, installation quality, sunlight, moisture, and temperature changes.
A properly selected sealant can last for years. Poor preparation or an incompatible product may fail much sooner.
What Causes Window Caulk to Fail?
Common causes include:
- Applying sealant to dirty surfaces
- Applying it over wet materials
- Using an incompatible product
- Poor joint preparation
- Excessive joint movement
- Incorrect bead size
- Exposure outside the product’s limits
- Water damage behind the joint
How Often Should You Inspect Window Seals?
Inspect your windows at least once a year and after severe weather when practical.
Look for cracked caulk, loose weatherstripping, open joints, water stains, and condensation between glass panes.
Repair problems when you find them. Waiting until water damage becomes visible can make the repair more expensive.
Common Window Resealing Mistakes to Avoid
A small sealing mistake can cause the repair to fail. Avoid these common problems.
1. Applying New Caulk Over Damaged Caulk
New sealant may not bond properly to loose or deteriorated material.
Remove failed caulk and prepare the joint as directed by the manufacturer.
2. Choosing the Wrong Sealant
Not every caulk works on every surface.
Check compatibility with wood, vinyl, aluminum, masonry, glass, and painted finishes.
3. Applying Caulk to a Wet or Dirty Surface
Moisture, dust, and loose material can prevent proper adhesion.
Clean and dry the joint before applying sealant.
4. Blocking Weep Holes
Weep holes allow water to drain from parts of the window assembly.
Covering them can trap moisture and create further damage.
5. Using Ordinary Expanding Foam
Ordinary expanding foam can place pressure on the frame.
Use only a low-expansion product specifically designed for windows and doors. Follow its application instructions.
6. Ignoring a Failed Double-Pane Seal
Exterior caulk cannot restore the seal between glass panes.
Have foggy insulated glass assessed by a window professional.
7. Testing the Repair Too Soon
Fresh sealant needs time to cure.
Follow the manufacturer’s instructions before exposing it to water or movement.
8. Ignoring the Source of Water Intrusion
A leak may come from damaged flashing, siding, roofing, or the wall assembly.
Do not assume that adding caulk will solve every water problem.
Frequently Asked Questions About Resealing Windows
Can You Reseal Windows Yourself?
Yes, you can reseal some windows yourself. Small gaps around stationary frames may be suitable for DIY caulking. Worn weatherstripping can also be replaced if compatible parts are available. Failed insulated glass seals and major water damage need professional assessment.
Can You Reseal Windows Instead of Replacing Them?
Yes, if the frame and main window components remain in good condition. Recaulking, replacing weatherstripping, or repairing a suitable gasket may restore the window’s performance. A damaged frame or failed insulated glass unit may need a different repair.
How Do You Check Window Seals?
Inspect the frame for cracked caulk, open joints, and damaged weatherstripping. Check for drafts around the closed window. Look for water stains and condensation between double-pane glass. These signs help identify the type of sealing problem.
How Long Does Window Sealant Last?
Its lifespan depends on the sealant, surface preparation, joint movement, weather exposure, and installation quality. Inspect the joints regularly and replace sealant when it cracks, separates, or loses adhesion.
How Much Does It Cost to Reseal a Window?
The cost depends on the repair. Replacing a small section of caulk is usually less involved than removing trim, repairing rot, replacing weatherstripping, or changing an insulated glass unit. Request a quote based on the actual problem.
What Is the Best Caulk for Window Seals?
The best product depends on the joint and surface. Silicone, acrylic latex, siliconized acrylic, and polyurethane products all have different uses. Choose a sealant labeled for the intended window material and location.
Can You Reseal Windows in Winter?
Some products allow application in cold weather, while others require warmer conditions. Check the manufacturer’s temperature limits and surface requirements. Avoid applying sealant to frost-covered, wet, or unsuitable surfaces.
How Long Does It Take to Reseal a Window?
A simple caulking repair may take less time than a job involving old sealant removal, trim removal, or weatherstripping replacement. The full process also includes curing time. Follow the product instructions before using or exposing the repaired area.
Should You Reseal Windows Inside or Outside?
It depends on where the gap is located and what caused the problem. Exterior caulk may seal suitable frame joints against weather. Interior sealing can reduce air leakage through the rough opening. Some windows need repairs on both sides, but drainage paths must remain open.
Does Resealing Windows Reduce Outside Noise?
Sealing air gaps may reduce some noise that travels through those openings. However, it will not make a window soundproof. Glass type, frame design, installation, and other building gaps also affect noise transmission.
Is Window Resealing a Permanent Fix?
It can provide a lasting repair when the correct problem is identified and the right materials are used. However, sealants and weatherstripping wear over time. A surface repair will not solve structural damage or a failed insulated glass seal.
Final Thoughts
Resealing windows can improve indoor comfort and reduce unwanted air movement. The key is to identify the source of the problem before choosing a repair.
Use suitable caulk for stationary frame gaps. Replace worn weatherstripping around moving sections. Keep window drainage openings clear. If moisture appears between double-pane glass, arrange an inspection of the insulated glass unit.
A careful repair can help extend the useful life of a window. However, damaged frames, persistent water leaks, and failed glass seals need more than a fresh bead of caulk.
Choose materials that match the window, follow the manufacturer’s instructions, and address the underlying problem rather than covering its symptoms.