
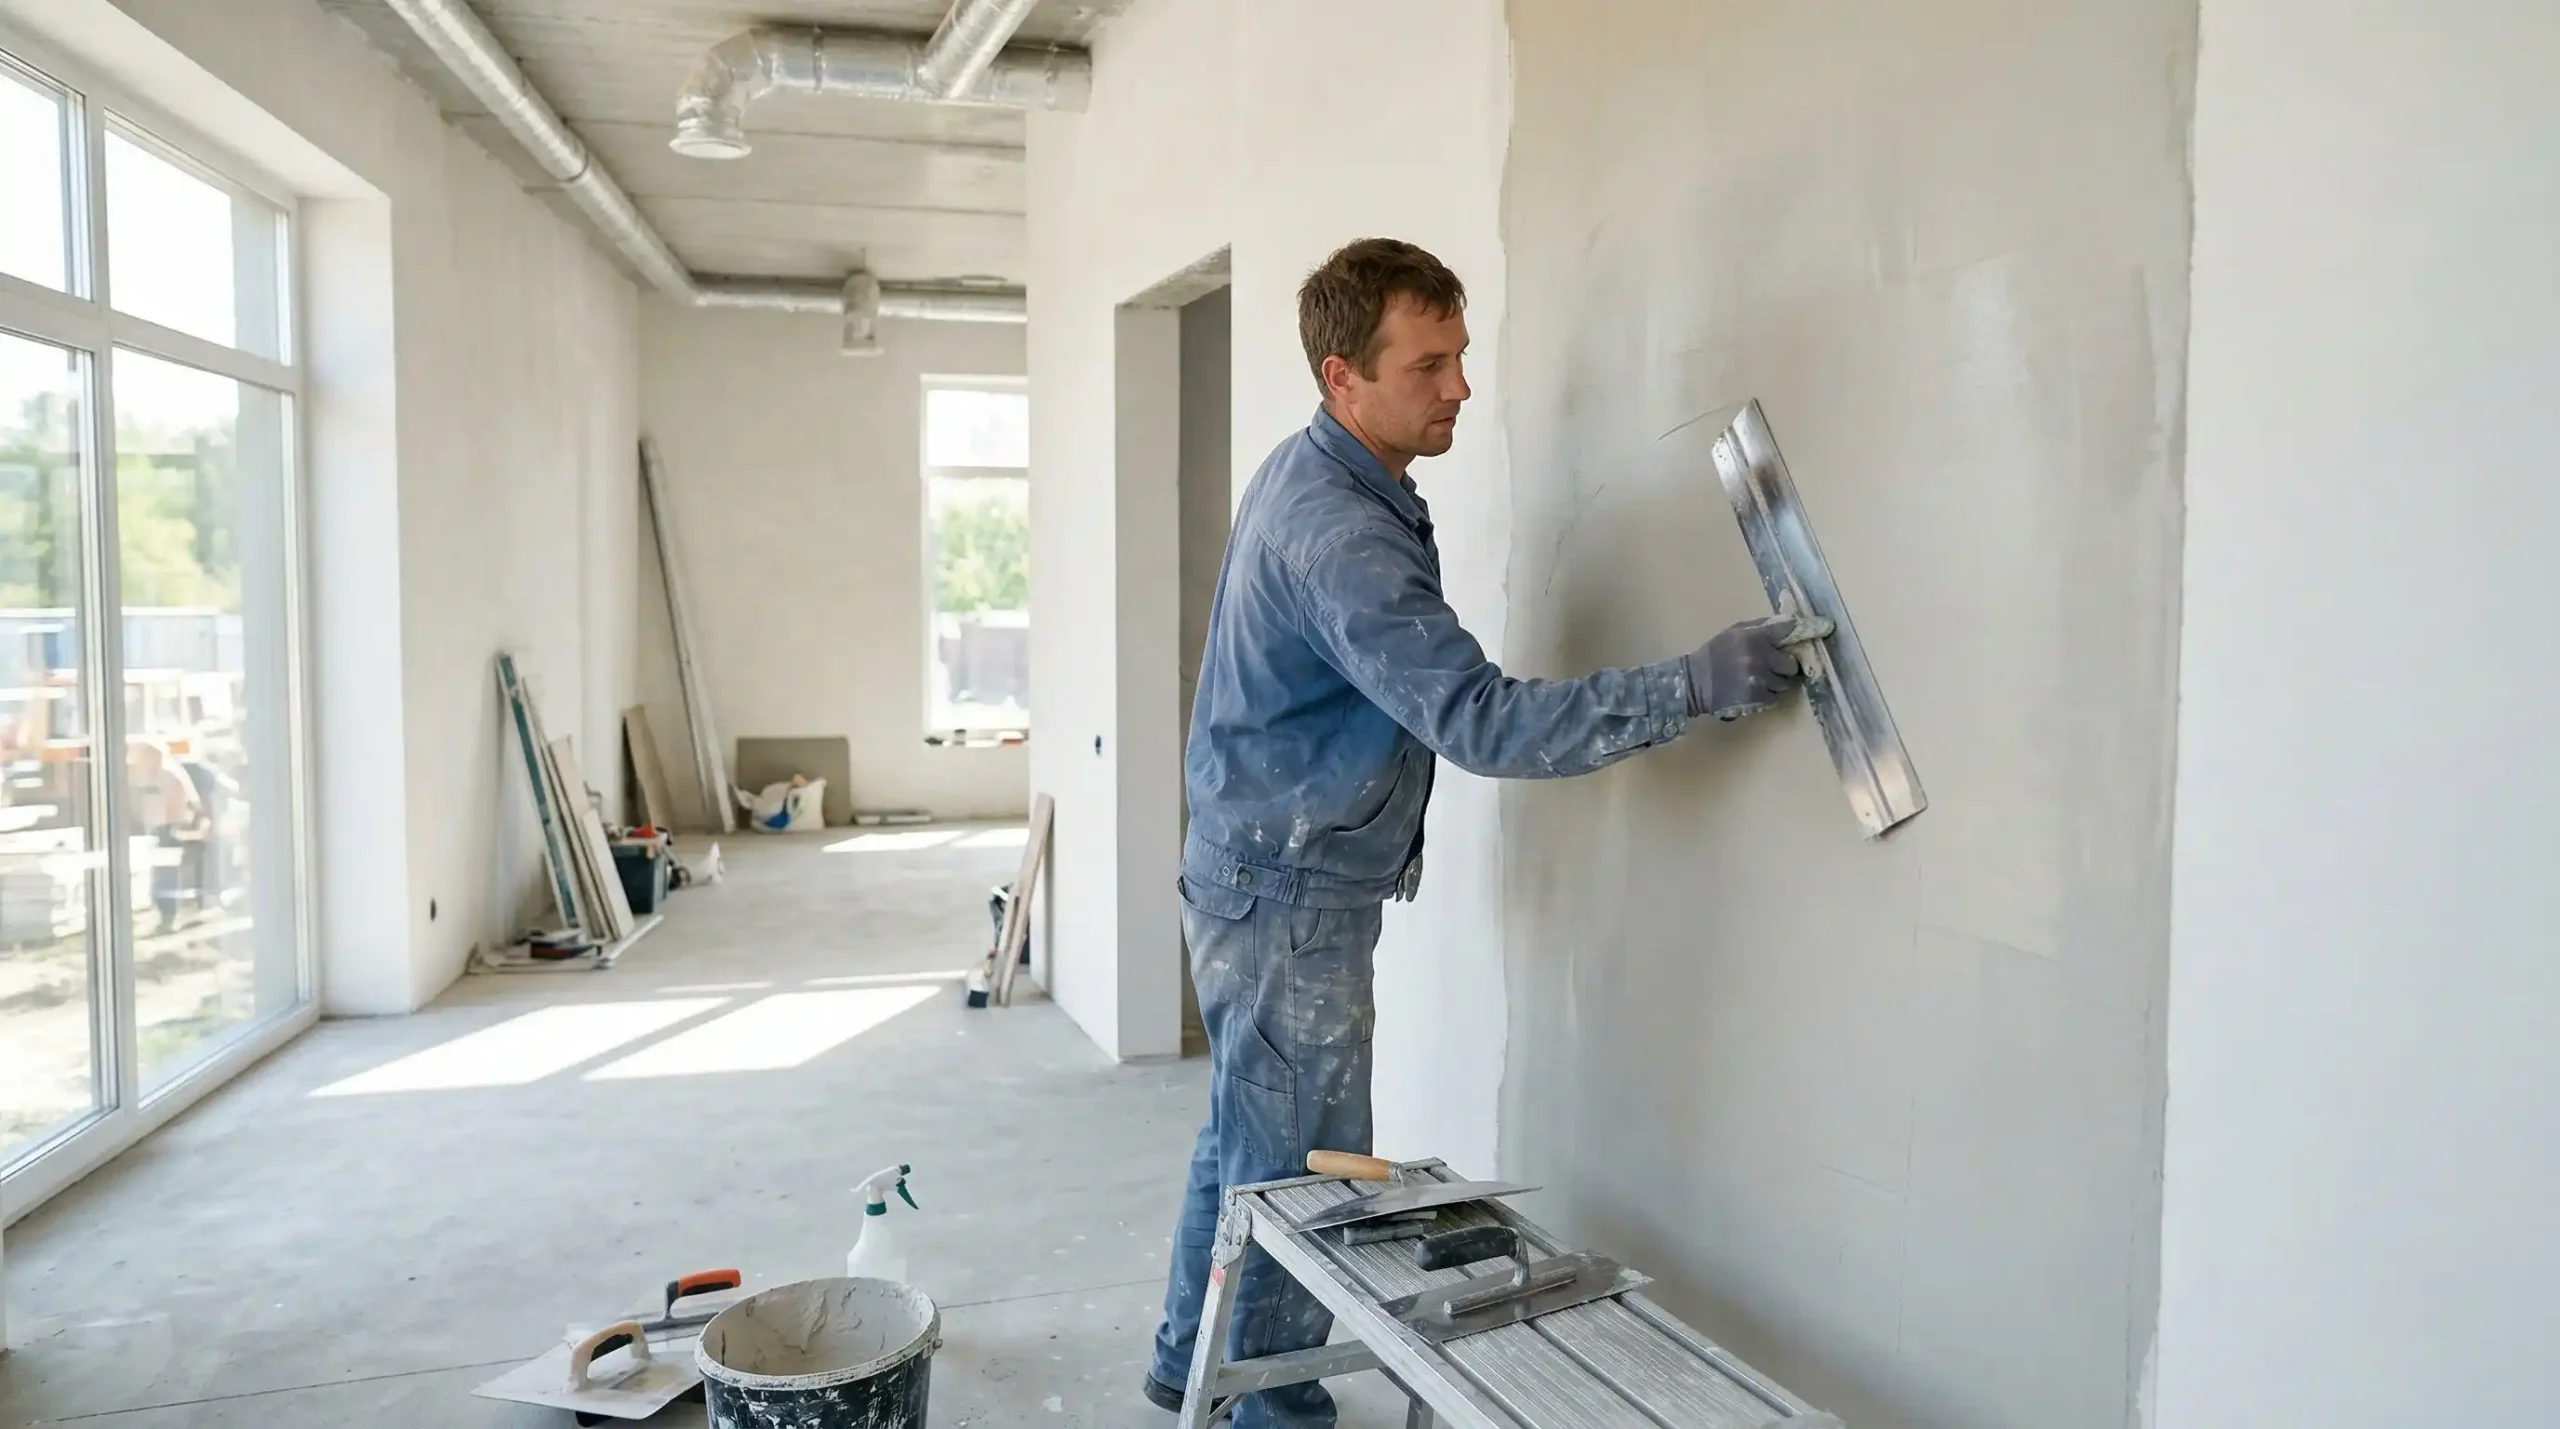
How to Replaster a Wall: A Step by Step Guide for Beginners
A damaged wall can make an otherwise attractive room look neglected. Cracks, loose plaster, peeling paint, and uneven surfaces can also make decorating difficult. Replastering can restore the wall and create a smooth surface for painting.
To replaster a wall, first identify the existing surface and remove any loose or damaged material. Fix moisture problems, repair deeper damage, and apply a suitable primer or bonding agent. Then mix the correct plaster, apply it in the required coats, level the surface, and finish it with a trowel. Allow the material to dry according to the manufacturer’s instructions before painting.
The right method depends on the wall. A small crack in traditional plaster needs a different repair from a whole wall with loose plaster. A drywall surface may need joint compound or a compatible veneer plaster system rather than conventional plaster.
This guide explains how to inspect, prepare, repair, and replaster different interior wall surfaces. It also covers material selection, tools, drying, costs, common mistakes, and situations that require a professional.
What Is Replastering a Wall?
Replastering means restoring an existing plaster surface by repairing damaged areas or applying a new layer of plaster. The goal is to create a sound, even surface that is ready for decoration.
The work may involve removing loose plaster, filling cracks, repairing holes, applying a bonding product, and adding fresh plaster. Some projects only need a thin finishing layer. Others require more extensive repairs before a new surface can be applied.
What Is Wall Plaster and How Does It Work?
Plaster is a material used to create a protective and decorative surface on walls and ceilings. Traditional plaster systems usually contain a binder, such as lime or gypsum, combined with other ingredients.
The material is applied while workable. It then sets and hardens to form a solid surface.
Traditional plaster walls may contain several layers. These layers can include a base coat, an intermediate coat, and a finishing coat. The plaster may sit over wood lath, metal lath, masonry, or another suitable backing.
Modern wall systems use different materials. A drywall wall, for example, consists of gypsum board with finished joints and fasteners. Joint compound is commonly used to cover those joints and prepare the surface for paint.
These systems may look similar after decoration, but their construction and repair methods differ.
What Does Replastering a Wall Involve?
The exact process depends on the condition of the wall.
A simple project may involve removing loose material, filling a few damaged spots, and applying a skim coat. A badly damaged wall may require the removal of failing plaster, repairs to the backing, and a new plaster system.
Most projects involve these stages:
- Inspect the wall and identify its construction.
- Find the cause of cracks, dampness, or loose plaster.
- Remove material that no longer holds securely.
- Repair holes, cracks, and damaged backing.
- Clean and prepare the surface.
- Apply compatible plaster or a suitable finishing material.
- Level and finish the surface.
- Let the material dry before decorating.
Skipping the inspection stage can create problems later. Fresh plaster will not correct a leaking pipe, unstable lath, or a wall that continues to move.
What Is the Difference Between Replastering and Skim Coating?
Replastering and skim coating are related, but they do not always describe the same work.
Replastering can involve repairing or replacing damaged plaster layers. It may require removing loose material and rebuilding parts of the wall before applying a finish.
Skim coating means applying a thin layer of finishing material to create a smoother surface. It is often used to improve an existing wall that is still stable.
For example, a firm wall with minor surface imperfections may only need a skim coat. A wall with large areas of detached plaster needs repair before any finishing layer is applied.
Do not use a skim coat to hide serious damage. It may look smooth at first, but the weak material underneath can continue to separate.
Replastering vs. Patching vs. Full Wall Resurfacing
Choose the method that matches the damage.
Method | Best suited to | Typical work |
Patching | Small holes, chips, and isolated cracks | Fill and finish selected areas |
Skim coating | Stable walls with minor surface defects | Apply a thin finishing layer |
Partial replastering | A damaged section of a larger wall | Remove and rebuild the affected area |
Full replastering | Widespread plaster failure or major surface damage | Repair the backing and apply a suitable plaster system |
A full replacement is not always necessary. The National Park Service recommends repairing historic plaster where practical instead of removing it without a clear reason. Existing plaster may remain serviceable even when its surface looks damaged.
Its guidance explains that historic plaster can contribute to a building’s character and may be worth preserving. Read the National Park Service guidance on historic plaster repair.
Why Do Homeowners Replaster Their Walls?
Homeowners may replaster walls for several reasons:
- Cracks have spread across the surface.
- Old plaster has become loose or started falling away.
- Previous repairs have left uneven patches.
- Wallpaper removal has damaged the finish.
- Peeling paint has exposed rough or damaged areas.
- A renovation requires a fresh wall finish.
- The existing surface needs repair before painting.
A new plaster finish can improve the appearance of a room. However, it should not be treated as a cure for structural movement, water intrusion, or damaged framing.
How Do You Know If Your Wall Needs Replastering?
Start by examining the entire wall. Look for visible cracks, raised areas, loose sections, discoloration, and signs of water damage.
The size and location of the damage help determine the right repair.
Cracked or Damaged Plaster
Small cracks may develop as buildings settle or materials respond to changes in temperature and humidity. Some are limited to the finish coat.
Larger cracks need more attention. A crack that keeps returning may indicate movement, poor bonding, or another issue behind the surface.
Look for these warning signs:
- Cracks that become wider over time.
- Diagonal cracks near doors or windows.
- Cracks that continue across several surfaces.
- Sections that bulge or move when touched.
- Cracks accompanied by sticking doors or other signs of movement.
Do not simply cover a large or recurring crack with fresh plaster. Identify the cause first. A qualified building professional may need to inspect cracks that suggest structural movement.
Loose, Hollow, or Crumbling Plaster
Tap the plaster lightly with your fingertips or a suitable tool. Firm plaster usually sounds solid. Detached areas may sound hollow.
A hollow sound does not automatically mean the whole wall must be removed. It can indicate that the plaster has separated from its backing.
Look for additional signs, such as:
- Plaster that moves when pressed gently.
- Powder falling from the surface.
- Large blisters or bulges.
- Crumbling edges around a damaged area.
- Plaster separating from wood or metal lath.
Loose plaster must be secured or removed before applying a new finish. Fresh material will not create a dependable bond over a surface that is already failing.
Peeling Paint and Flaking Wall Surfaces
Paint can peel when the surface underneath is damp, dirty, poorly prepared, or incompatible with the coating.
Before replastering, identify why the paint is failing. Check for leaks, condensation, previous coating problems, and loose plaster.
Scraping paint from a modern, stable wall is different from disturbing old paint in an older home. Homes built before 1978 may contain lead based paint. Sanding, scraping, and other renovation work can create hazardous dust.
The EPA Lead Renovation, Repair and Painting Program explains the rules for paid renovation work that disturbs painted surfaces in covered homes. It also recommends lead safe contractors for homeowners planning work in older properties.
Uneven or Rough Plaster Finishes
A rough wall does not always need complete replastering.
If the underlying plaster is firm, a suitable skim coat may be enough. Deep hollows, loose sections, and large changes in surface level need repair before finishing.
Use a straightedge or long level to check the surface. This helps identify high and low areas that may not be obvious under normal room lighting.
Do not assume a thick layer of finishing plaster can correct every uneven surface. Choose a repair or basecoat product designed for the depth and condition of the wall.
Water Damage, Dampness, and Mold
Water damage requires more than a fresh coat of plaster.
Look for:
- Brown or yellow stains.
- Soft or crumbling plaster.
- Peeling paint.
- Musty odors.
- Visible mold.
- Damp areas near plumbing, windows, or exterior walls.
Find and repair the source of moisture before rebuilding the surface. The problem may come from a plumbing leak, roof leak, damaged window seal, poor ventilation, or water entering from outside.
The EPA explains that mold growth depends on moisture. Cleaning visible mold without fixing the water problem usually allows it to return. Its guidance also recommends drying wet materials within 24 to 48 hours when possible to reduce mold growth.
See the EPA guide to mold, moisture, and your home.
Do not cover damp plaster with a new layer. It can trap moisture and lead to further damage.
When Can You Repair the Damaged Area Instead of Replastering the Whole Wall?
You may only need a local repair when:
- The surrounding plaster remains firm.
- Damage is limited to a small area.
- There are no signs of continuing moisture.
- The backing is stable.
- The repair can be blended into the surrounding surface.
Consider wider repairs when plaster has detached across several areas or when the backing itself has failed.
The International Masonry Institute recommends examining existing plaster composition, layers, adhesion, and condition before selecting repair materials. That is particularly important on older walls where the original plaster may not match modern products.
Its plaster restoration guidance explains the importance of field and laboratory testing for some restoration projects.
Plaster Walls vs. Drywall: Understand Your Existing Wall
Before choosing a material, identify what your wall is made from. This is one of the most important steps in a successful repair.
What Are Traditional Plaster and Lath Walls?
Traditional plaster walls commonly use a backing made from narrow strips of wood called lath.
The plaster is pushed through gaps between the strips. It forms small sections behind the lath, often called plaster keys. These keys help hold the plaster in position.
Traditional systems may contain several coats. The first creates the main body of the wall. Later coats provide a more even and finished surface.
Older homes may also have metal lath or other plaster bases.
If the plaster keys break or the lath becomes loose, the surface may separate from the backing. Applying a thin finishing layer will not solve that problem.
How Are Plaster Walls Attached to Wood or Metal Lath?
Wood lath is installed across wall framing. Plaster is applied over it so that material passes through the gaps and forms a mechanical connection.
Metal lath provides another suitable base for certain plaster systems. It may be used where traditional wood lath is not suitable or where a replacement section is needed.
The backing must remain secure. Rusted metal, damaged wood, loose fasteners, and deteriorated framing can all affect the repair.
The National Park Service explains how traditional lath systems work and why their repair requires suitable materials and skilled application. Its historic plaster guidance is a useful reference for older properties.
What Are Modern Gypsum Plaster Walls?
Gypsum plaster uses gypsum as its main binder. It is common in modern interior plaster systems.
Some systems use gypsum plaster over a prepared masonry surface or a compatible plaster base. Others use a veneer plaster system over a suitable gypsum base.
These products have their own preparation and application requirements. A gypsum plaster intended for one base should not automatically be used on another.
Read the product label and technical instructions before choosing it.
What Is the Difference Between Plaster and Drywall?
Drywall is a panel made mainly from a gypsum core with paper facing. It is attached to wall framing or another approved support.
The joints between panels are finished with joint compound and tape. Additional compound may be applied to create a smooth surface.
Traditional plaster is applied as a wet material over a suitable backing. It hardens into a continuous surface.
Feature | Traditional plaster | Drywall |
Construction | Wet plaster over a backing | Gypsum board panels |
Joints | Usually no panel joints across the wall face | Panel joints need tape and compound |
Repair | May need compatible plaster and backing repairs | Often repaired with patching compound and joint tape |
Installation | Requires plaster application skills | Usually faster to install |
Older homes | Common in many historic properties | Common in newer construction |
The word Sheetrock is a brand name often used informally to describe drywall. It is not a separate plaster material.
How to Identify Whether Your Wall Is Plaster or Drywall
You can often identify the wall without opening a large section.
Check the following:
Look at an existing opening. A small area around an electrical box or plumbing opening may show the wall construction. Do not remove electrical components unless the circuit is safely isolated and you know how to work around them.
Check the wall thickness. Traditional plaster walls may have a different depth from standard drywall assemblies. Thickness alone is not proof.
Look for seams. Drywall panels are joined together. Older plaster walls generally do not show the same regular panel seams.
Check the backing. An exposed edge may reveal paper faced gypsum board, wood lath, metal lath, or masonry.
If you are unsure, ask a qualified plasterer or building professional to identify the surface before buying materials.
Can You Replaster a Drywall Surface?
Yes, but only with a system designed for that surface.
Some drywall walls can receive a suitable veneer plaster finish. Others are better repaired with joint compound or a skim coat product intended for drywall.
Check the manufacturer’s instructions for the exact board, primer, and finishing material.
Do not apply conventional plaster over drywall simply because both products contain gypsum. Their intended uses and bonding requirements may differ.
What Type of Plaster Should You Use for Walls?
The best plaster depends on the existing wall, the amount of damage, the required finish, and the product system.
Gypsum Plaster for Interior Walls
Gypsum plaster is widely used for interior wall finishes. It can create a smooth surface when applied to a compatible base.
It is available in different formulations for basecoats, finish coats, and particular application methods.
Use a product designed for the specific substrate. Some gypsum plasters are intended for masonry. Others work as part of a multi layer system.
Do not assume every gypsum product can be used as a thin finishing compound.
Lime Plaster for Traditional and Older Walls
Lime plaster is commonly found in older buildings. It is also used in some restoration work.
Traditional lime plaster can behave differently from modern gypsum products. It may allow more moisture movement through the wall and has different setting and drying characteristics.
If you are repairing an old lime plaster wall, do not cover it automatically with a modern gypsum or cement product. The materials may have different physical properties.
The National Park Service recommends understanding historic plaster and preserving it where practical. Its guidance is particularly useful for owners of older homes.
Cement Based Plaster for Masonry Surfaces
Cement based plaster is used in certain masonry and exterior applications. In the United States, Portland cement plaster is often associated with stucco systems.
It should not be treated as a universal substitute for interior gypsum plaster.
A cement based product may be appropriate for a particular brick, concrete, or masonry surface. Check its intended location, substrate requirements, and moisture exposure.
For exterior walls, distinguish between interior plaster and exterior stucco. Exterior assemblies need suitable weather protection and drainage details.
Veneer Plaster for Smooth Wall Finishes
Veneer plaster systems use a compatible base and a thin plaster finish to create a smooth surface.
They are often used over specially prepared gypsum plaster bases. The full system matters. The base, bonding product, and finish material must be compatible.
Veneer plaster is not the same as ordinary drywall joint compound, even though both can produce a smooth surface.
Plaster Repair Compound for Small Damaged Areas
Repair compounds are useful for small holes, chips, and localized damage.
Some are designed for plaster. Others are intended for drywall or general interior repairs.
Check the label for:
- Approved surfaces.
- Maximum repair depth.
- Required primer.
- Drying or setting instructions.
- Whether another coat is needed.
- Whether the surface can be painted directly.
Do not use a small repair compound to rebuild a large area where the backing is unstable.
How to Choose the Best Plaster for a Beginner
A beginner should choose a product that matches the repair and clearly explains its application process.
For a small drywall repair, a suitable patching compound may be easier to control than traditional plaster.
For a stable wall that needs a smoother finish, a compatible skim coat product may be appropriate.
For a traditional plaster wall, use a material suited to the existing plaster system. Ask a plastering professional before replacing old lime plaster with a modern product.
Avoid choosing plaster only because it is cheap or easy to find.
Gypsum vs. Lime vs. Cement Plaster: Which Is Right for Your Wall?
Material | Common use | Key point |
Gypsum plaster | Interior wall finishes | Check substrate compatibility |
Lime plaster | Traditional and historic walls | Preserve compatibility with old materials |
Cement based plaster | Suitable masonry and exterior systems | Follow system requirements for moisture and exposure |
Veneer plaster | Smooth interior finish systems | Requires a compatible base |
Repair compound | Small repairs | Choose for the repair depth and surface |
There is no single best plaster for every wall. The correct choice begins with the wall itself.
What Tools and Materials Do You Need to Replaster a Wall?
Prepare your materials before mixing anything. Once some plaster products begin setting, there may be limited time for application and finishing.
Essential Plastering Tools
You may need:
- Plastering trowel.
- Finishing trowel.
- Plaster hawk.
- Mixing bucket.
- Paddle mixer and suitable drill.
- Bucket trowel.
- Filling knife.
- Scraper.
- Straightedge or darby.
- Sponge float, if required by the system.
- Sanding sponge for suitable dried compounds.
- Utility knife.
- Measuring tape.
- Work light.
A plaster hawk holds the material while you work. A trowel spreads and levels it. Different trowels may be useful for corners, edges, and finishing.
You do not need every specialist tool for a small patch. Match the tools to the job.
Plaster and Surface Preparation Materials
Depending on the wall, you may need:
- Compatible plaster mix.
- Plaster repair compound.
- Primer or bonding agent.
- Mesh tape or reinforcement.
- Paper tape for drywall joints.
- Drop cloths and protective sheets.
- Clean water.
- A suitable brush or sponge.
- Compatible paint primer.
Do not mix unrelated products without checking compatibility. A bonding agent intended for concrete may not be the right choice for every painted wall.
Safety Equipment for DIY Plastering
Wear safety glasses and gloves. Use suitable respiratory protection when dust may be present.
Keep the work area ventilated. Protect nearby furniture, flooring, and heating or ventilation openings from dust.
Before scraping or sanding old painted surfaces, consider the age of the home. If a home was built before 1978, lead based paint may be present. The EPA recommends lead safe practices when renovation work may disturb old paint.
Also consider asbestos in older building materials. You cannot identify asbestos reliably by sight. The EPA recommends using a properly trained and accredited asbestos professional to inspect and sample suspect materials before renovation disturbs them. Read the EPA guidance on asbestos in home building materials.
How Much Plaster Do You Need for a Wall?
The amount depends on the wall area, product coverage, and application thickness.
Measure the wall height and width. Multiply those measurements to find the approximate surface area.
For example:
A wall measuring 12 feet wide and 8 feet high has an area of 96 square feet.
If you are treating more than one wall, calculate each area and add the results. Subtract large openings only when doing so makes a meaningful difference.
Check the product packaging for its coverage rate. Coverage may vary with surface texture, thickness, and application method.
Buy enough material for the full job, but avoid mixing more than you can apply within the product’s working time.
How to Prepare a Wall Before Replastering
Good preparation affects the final result. A smooth coat cannot compensate for dust, loose plaster, dampness, or a weak backing.
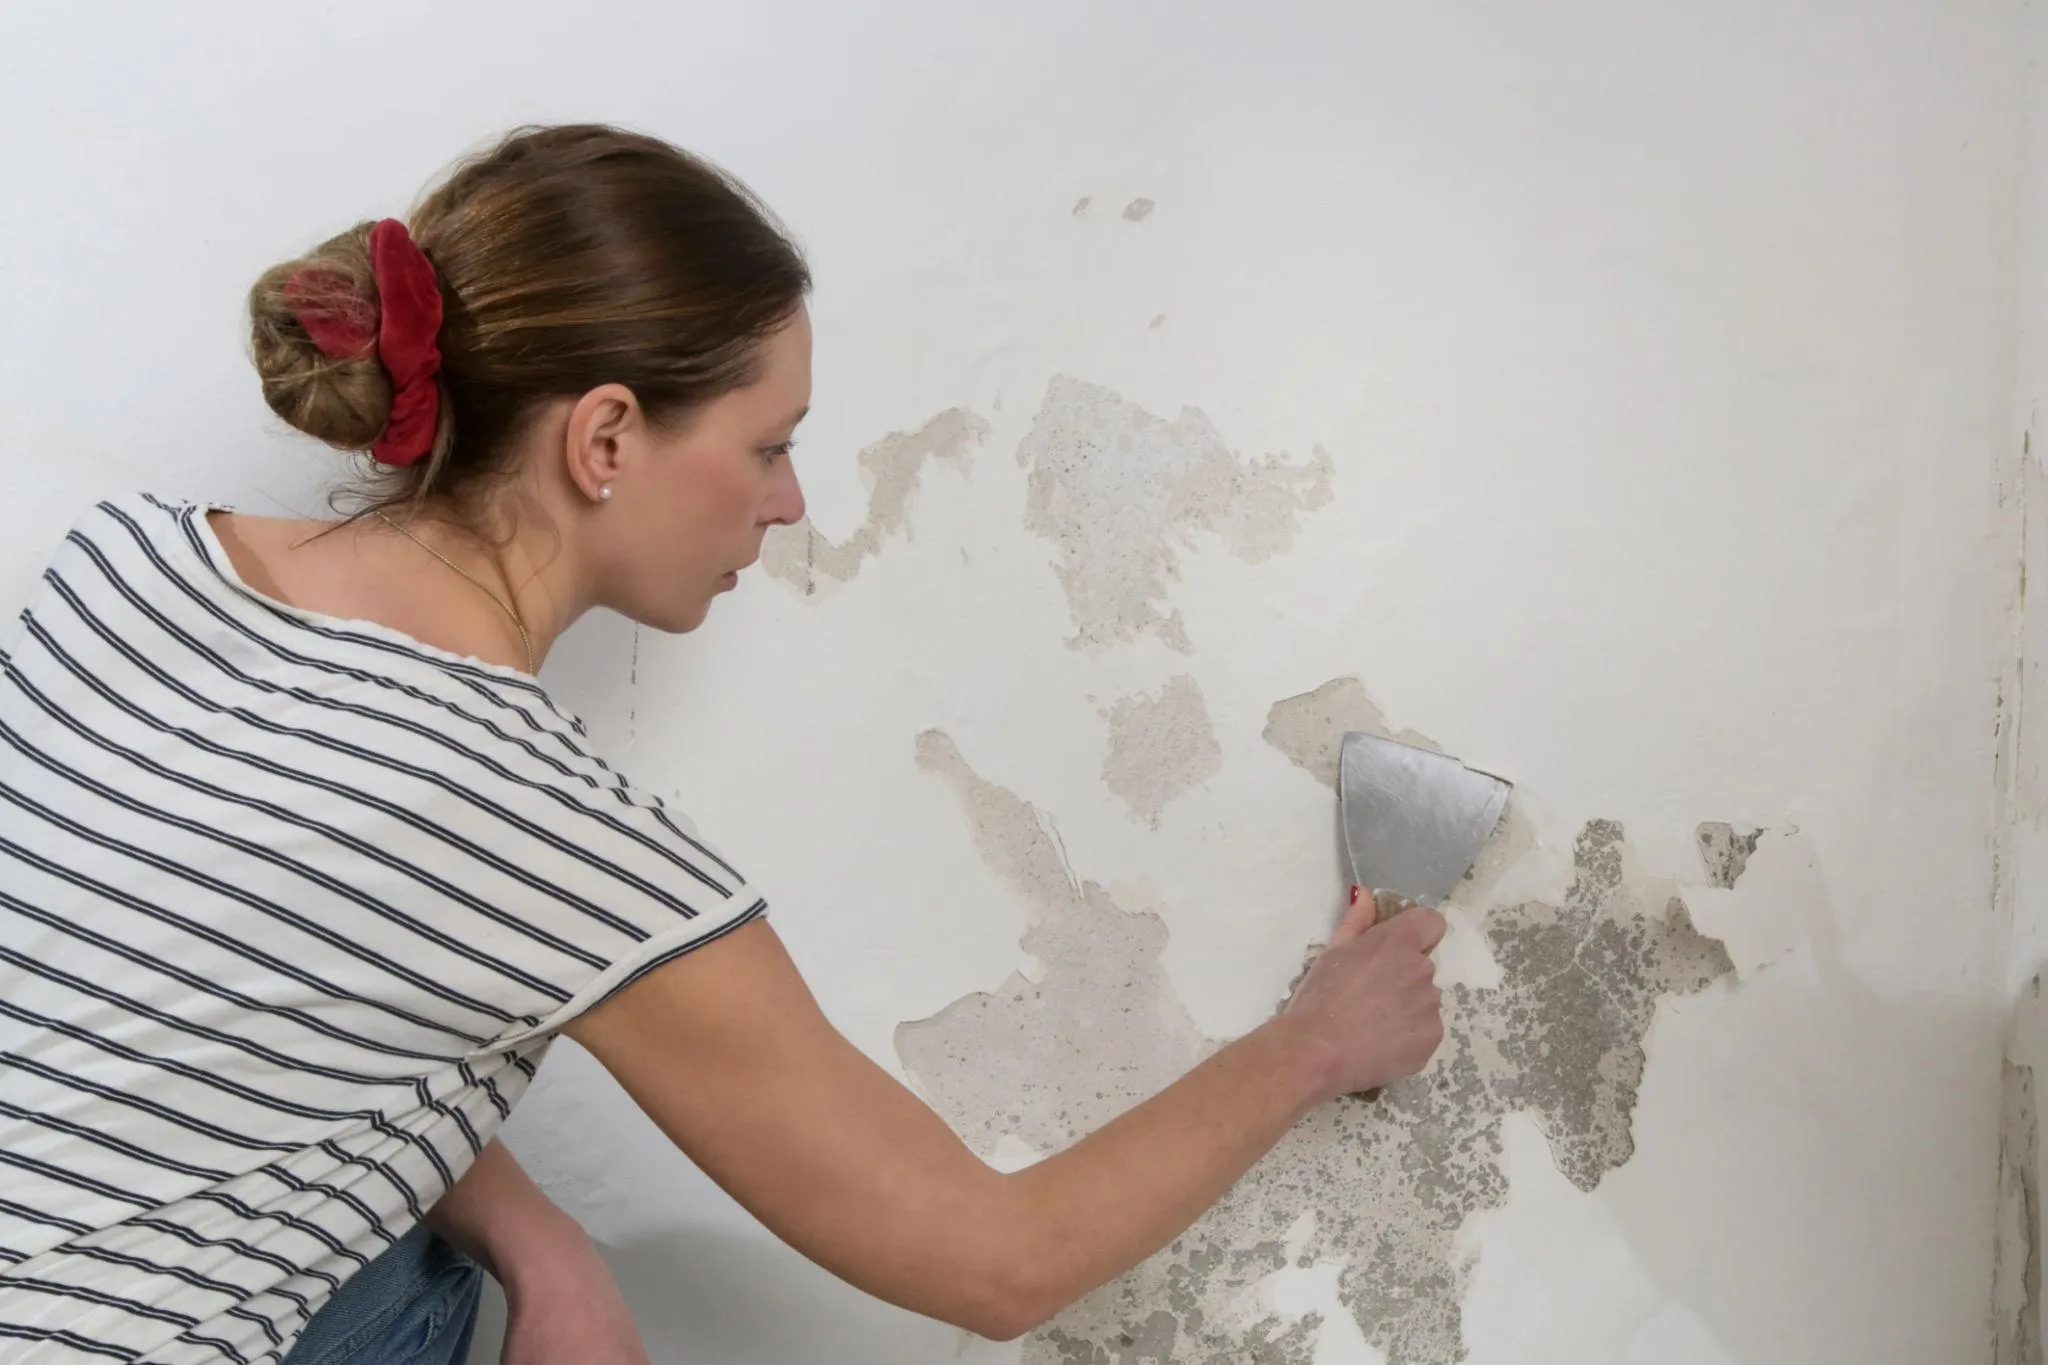
Step 1: Inspect the Wall and Identify the Existing Surface
Check whether the wall is traditional plaster, drywall, masonry, or a different surface.
Look for cracks, holes, bulges, loose sections, peeling paint, and water stains.
Pay attention to the edges of damaged areas. A small visible hole may have a larger area of loose plaster around it.
Step 2: Find and Fix Moisture or Water Damage
Do not apply plaster until you have dealt with the source of moisture.
Check nearby plumbing, windows, roof areas, exterior walls, and bathroom fixtures. Moisture can enter through several routes.
If the wall has extensive mold, a persistent leak, or damage inside the wall cavity, seek professional help. Covering the problem will not make it disappear.
The EPA advises fixing moisture sources and completing mold cleanup before painting or covering affected surfaces.
If moisture is entering around a window, inspect the frame and surrounding sealant before repairing the plaster. Damaged window seals can allow water to reach the surrounding wall. Read our guide on how to reseal windows to learn how to identify and repair failing window seals.
Step 3: Clear the Work Area and Protect Floors
Move furniture away from the wall. Cover the floor with durable protective sheets.
Remove wall hangings and protect nearby fixtures. Cover electrical outlets and switches without creating an electrical hazard.
Keep children and pets away from the work zone.
Step 4: Remove Loose and Damaged Plaster
Remove material that is already detached or crumbling.
Work carefully around the edges of the damaged area. Avoid breaking sound plaster unnecessarily.
If the wall is old, stop before disturbing suspect materials that may contain lead or asbestos. Use an appropriately qualified professional when the risk is unclear.
If plaster is separating from lath, you may need a repair method that reattaches it or a professional to assess the backing.
Step 5: Remove Wallpaper, Flaking Paint, and Surface Debris
Wallpaper should generally be removed before plastering. Adhesive residue can interfere with bonding.
Use a suitable wallpaper removal method. Avoid soaking the wall so heavily that you damage the plaster or drywall underneath.
Remove paint that is loose or failing. Stable painted surfaces may need a compatible bonding or preparation system. Follow the plaster manufacturer’s instructions.
Do not plaster over wallpaper or loose paint.
Step 6: Clean the Wall and Remove Dust
Brush or vacuum away loose dust and debris. Clean the surface using a method suitable for the existing material.
Let the wall dry if you used water during cleaning.
Dust can prevent materials from bonding properly. A clean surface is an essential part of preparation.
Step 7: Repair Cracks, Holes, and Damaged Joints
Fill small holes and cracks using a compatible repair product.
For deeper damage, apply the repair material in the layers recommended by its manufacturer. Some products need reinforcement or a backing support.
On drywall, damaged joints may need tape and joint compound. On lath and plaster, the repair may require a different method.
Do not fill a moving structural crack without investigating the cause.
Step 8: Apply the Correct Primer or Bonding Agent
Different surfaces require different preparation.
A porous masonry surface may need a particular primer or controlled dampening. Smooth concrete may require a bonding product. Painted surfaces need an approved preparation system.
Do not use one primer for every surface.
For example, USG’s gypsum plaster application guidance describes different preparation requirements for masonry and concrete surfaces. This illustrates why the product system and substrate must be considered together.
Step 9: Allow the Prepared Surface to Become Ready for Plastering
Follow the primer or bonding product instructions. Check whether the material must dry, remain tacky, or be covered within a certain period.
Do not guess. The correct timing depends on the selected product.
How to Replaster a Wall Step by Step
Once the wall is stable and prepared, you can apply the new plaster or finishing material.
The following method explains the general workflow. The exact number of coats, thickness, working time, and finishing process depend on the plaster system you select.
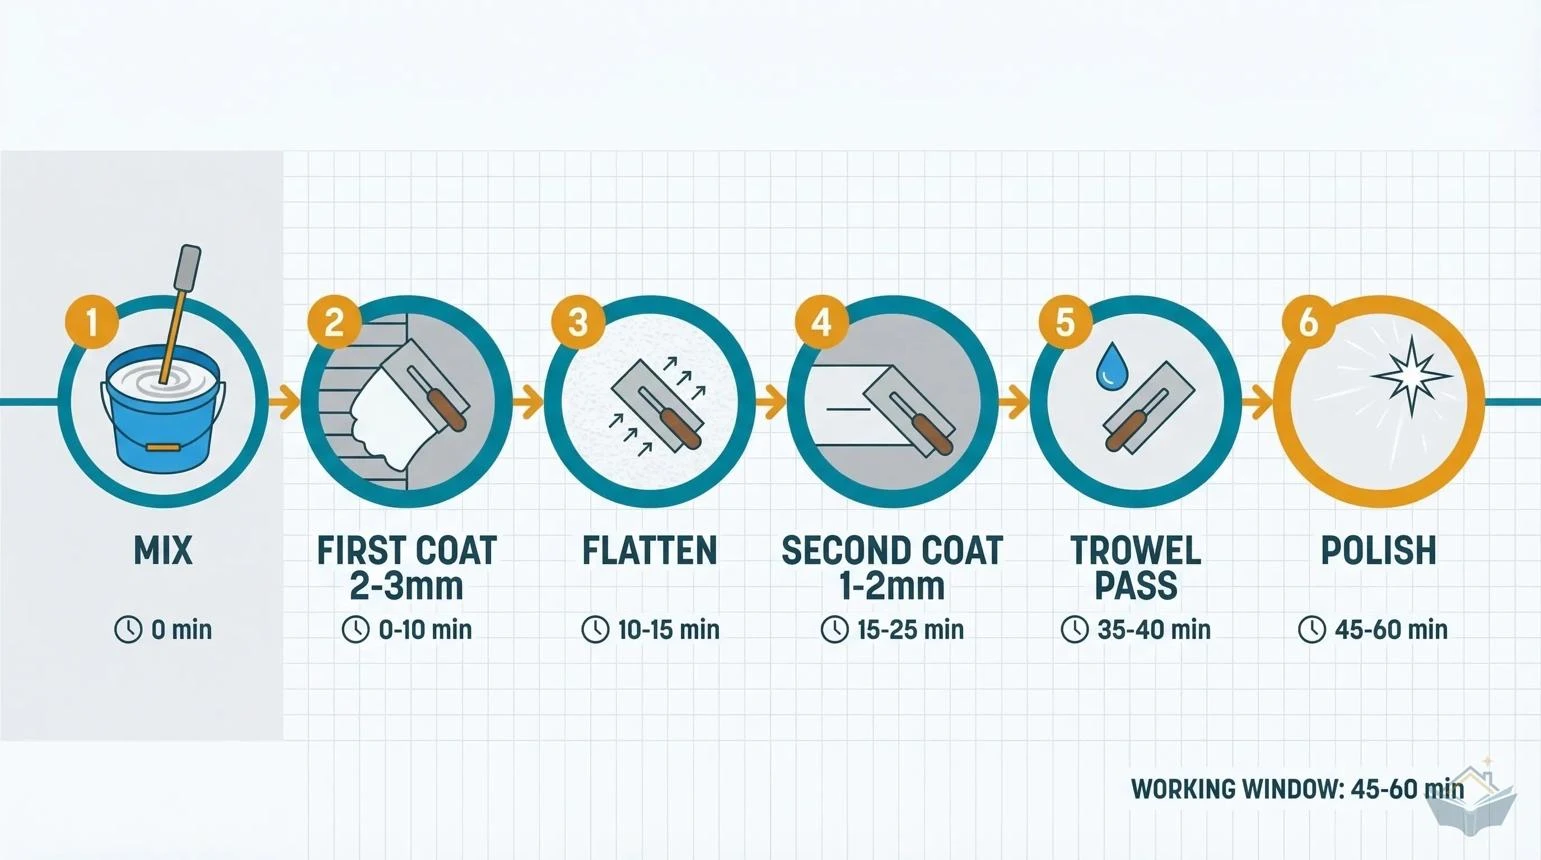
Step 1: Prepare the Plaster Mix Correctly
Read the product label before mixing.
Use a clean bucket and clean water. Measure the amounts stated by the manufacturer. Add the ingredients in the specified order.
Mix until the material reaches the recommended consistency. Avoid lumps and dry pockets.
Do not add extra water simply because the mixture feels difficult to spread. Too much water can affect performance.
Prepare a manageable batch. Beginners often benefit from smaller batches because they have less material to control while learning the process.
Do not add fresh plaster to a batch that has already started setting unless the manufacturer specifically allows it.
Step 2: Load the Plastering Hawk and Trowel
Place a manageable amount of mixed plaster on the hawk.
Use the trowel to pick up material from the hawk. Keep your tools clean and avoid overloading them.
A large amount of plaster can be difficult to control. Start with a smaller quantity until you become comfortable with the movement.
Hold the hawk steadily and work at a comfortable height.
Step 3: Apply the First or Base Coat
Start with a manageable section of the wall.
Place the plaster against the surface and spread it using even movements. Apply enough pressure to establish proper contact with the prepared base.
Avoid leaving deep ridges or large gaps.
If the plaster system requires a basecoat, follow its application instructions. Some systems need a separate finish coat. Others use a different sequence.
Do not assume that every plaster needs the same number of coats.
Step 4: Level and Smooth the First Coat
Use the appropriate trowel or straightedge to bring the surface to the required level.
Work across the area while the material remains workable.
Fill low spots with suitable material. Remove excess plaster from high areas when the product allows.
Avoid pressing too hard. Excessive pressure can pull material away or leave marks.
Step 5: Apply the Second Coat if the Plaster System Requires It
Some plaster systems use two coats. Others require a different sequence.
Follow the manufacturer’s instructions for timing and coat preparation.
If a second coat is required, apply it evenly over the prepared first coat.
Do not use a fixed waiting period taken from another product. Setting and working times differ between plaster types and environmental conditions.
Step 6: Wash Out and Clean the Trowel
Keep your tools clean during application.
Dried plaster on a trowel can leave scratches and ridges. Clean tools also make it easier to control the surface.
Dispose of leftover material according to the product instructions. Do not wash large amounts of plaster into household drains.
Step 7: Trowel the Surface for a Smooth Finish
Troweling is one of the most skill dependent parts of plastering.
Use controlled movements and the correct pressure for the plaster’s setting stage. The aim is to close surface marks and create an even finish without damaging the material.
A professional sequence may include an initial trowel pass, further refinement, and cross troweling. The exact process varies with the product and finish.
Do not add excessive water to make the plaster easier to smooth. Use moisture only as directed by the product system.
Step 8: Finish Corners, Edges, and Wall Joints
Use a suitable corner tool or smaller trowel where needed.
Check the edges around door frames, windows, ceiling lines, and adjoining walls.
Remove unwanted buildup while the material is still workable.
Take extra care around trims and fixtures. Small errors are easy to notice once the wall is painted.
Step 9: Allow the Plaster to Dry Properly
Let the plaster dry under suitable conditions.
Avoid forcing the process with intense heat. Excessive heat or rapid drying can contribute to cracking or poor results, depending on the product.
Maintain the temperature and ventilation recommended by the manufacturer.
Drying time depends on the material, thickness, wall condition, humidity, and airflow.
Step 10: Prepare the Finished Wall for Painting
Once the plaster has dried sufficiently, inspect the surface.
Look for pinholes, small ridges, uneven patches, and damaged corners. Correct any defects using a suitable finishing product.
Use the correct primer or sealer before painting. Some new plaster surfaces need a specific primer or mist coat system. Others have different requirements.
Follow the paint and plaster manufacturer’s instructions. Do not apply ordinary paint to a surface that is still damp or unsuitable for decoration.
How to Replaster Part of a Wall Without Replastering the Whole Surface
You do not always need to remove every layer of plaster to repair one damaged area.
Partial repairs can save time and reduce waste when the surrounding wall remains sound.
How to Replaster a Small Area of Wall
Start by marking the damaged area.
Remove loose material until you reach a stable edge. Do not leave crumbling plaster behind the repair.
Clean the exposed surface and inspect the backing. Repair any damage to the lath, masonry, or board before applying new material.
Use a compatible patching compound or plaster system. Build up deeper repairs in the required layers.
Feather the edge into the surrounding surface so the repair does not leave a raised border.
Let the repair dry and check it under good lighting.
How to Replaster a Section of Wall
For a larger damaged section, remove the failed material and inspect the backing.
If the wall has traditional lath, check that it remains attached and in good condition. Replace damaged lath where necessary.
If the wall is drywall, check whether the gypsum board is sound. Replace a damaged board section when a surface patch will not provide a reliable repair.
Apply the appropriate base and finish materials. Do not try to bridge a large unsupported opening with finishing compound.
How to Replaster a Hole in the Wall
The repair depends on the hole’s size and depth.
A small surface hole may only need a suitable filler. A deeper hole may need several repair layers.
A large hole in drywall usually needs a supported patch. A hole in traditional plaster may require repair to the lath or another backing system.
Once the support is stable, apply the suitable compound and finish the surface.
How to Blend New Plaster With Existing Plaster
Blending is important because repaired areas can show through paint.
Feather the repair beyond the damaged edge. Avoid leaving a thick line where the new material meets the old surface.
Allow the repair to dry fully. Then inspect it from different angles under normal room lighting.
A larger skim coat may be needed if isolated patches remain visible.
How to Repair Small Holes in Plaster Walls
Clean around the hole and remove material that is no longer secure.
Fill the opening with a compatible repair compound. For deeper holes, use the appropriate backing or multiple application stages.
Do not apply a thick layer of ordinary finishing material when the product is intended only for shallow repairs.
How to Match the Existing Wall Texture
Older walls may have a textured or hand finished appearance.
A perfectly smooth patch can look different from the surrounding surface. Check the original texture before completing the repair.
Use a compatible finishing method to recreate the appearance. Test the technique on a small area first.
Can You Replaster an Already Plastered Wall?
Yes. You can apply new plaster or a suitable finishing layer over an existing plaster wall when the old surface is stable and compatible with the new material.
The existing plaster must not be loose, crumbling, contaminated, or affected by unresolved moisture.
When Is It Safe to Apply New Plaster Over Old Plaster?
It may be suitable when:
- The existing plaster is firmly attached.
- There are no large hollow or detached areas.
- The wall is dry.
- The surface is clean.
- The new material is approved for the existing plaster.
- Any cracks have been repaired.
A stable wall with minor surface imperfections may only need preparation and a new finishing layer.
How to Check Whether Existing Plaster Is Firmly Attached
Inspect the surface visually. Look for bulges, cracks, crumbling edges, and missing sections.
Tap the wall lightly to identify possible hollow areas. Check whether the plaster moves when gently pressed.
A large hollow area or visible separation needs investigation. Do not cover it with a new coat and hope it will stay in place.
How to Prepare Old Plaster Before Applying a New Coat
Remove loose material. Clean the surface and repair deep damage.
Use a compatible primer or bonding product if required.
Some old plaster may have a dusty or highly absorbent surface. Others may be smooth and difficult to bond to. The correct preparation depends on the material and product.
When Should You Remove the Existing Plaster?
Removal may be necessary when:
- Large sections have detached.
- The backing is badly damaged.
- The plaster is severely deteriorated.
- Moisture has caused extensive damage.
- Repairs cannot provide a stable base.
- The wall needs access for major building work.
Avoid removing historic plaster just because it looks uneven. The National Park Service advises owners to consider repair before wholesale replacement.
How to Replaster Old Walls Without Causing More Damage
Use a careful inspection process.
Old plaster may contain materials that need specialist assessment before disturbance. Homes built before 1978 may also have lead based paint. Some older layered building materials may contain asbestos.
Do not assume you can identify these hazards by appearance.
The EPA recommends using trained professionals to assess suspect asbestos materials before renovation work disturbs them. For old painted surfaces, follow lead safe practices and applicable rules.
How to Replaster Different Types of Wall Surfaces
Different wall surfaces need different preparation. A method that works on masonry may fail on painted drywall.
How to Replaster a Painted Wall
You may be able to apply a compatible plaster or skim coat over stable paint.
First, check that the paint is firmly attached. Remove peeling and loose areas. Clean the surface and follow the preparation instructions for the finishing product.
Glossy or very smooth paint may need additional preparation. Some systems require a bonding product.
Do not plaster over paint that is flaking, damp, or poorly attached.
For older homes, consider lead based paint before sanding or scraping. The EPA’s lead renovation guidance is especially important when paid work disturbs painted surfaces in covered homes.
How to Plaster a Brick Wall
Brick is a masonry surface, but not every brick wall is suitable for every plaster product.
Check the condition of the mortar joints, surface contamination, moisture, and the type of brick.
Some systems require a basecoat designed for masonry. Others require a bonding treatment or controlled surface preparation.
Do not cover damp masonry. Find the source of moisture first.
A product designed for drywall is not automatically suitable for brick.
How to Plaster a Concrete Wall
Concrete may require a specific primer or bonding agent.
Smooth concrete can be difficult for some plaster products to bond to. Highly absorbent surfaces may also need suitable preparation.
Follow the plaster manufacturer’s instructions for the exact concrete surface.
If the concrete has cracks, movement, water intrusion, or signs of deterioration, address those conditions before applying a finish.
How to Replaster a Bathroom Wall
Bathrooms have higher moisture exposure than most other rooms.
Before applying new material, identify whether the wall is inside a shower area, near a bathtub, or elsewhere in the room.
A surface exposed to direct water needs an appropriate waterproofing and wall finish system. Ordinary interior plaster is not a substitute for a waterproof shower assembly.
After removing tiles, inspect the backing. Water damage may have affected the board, framing, or other materials behind the finish.
If the wall has mold or ongoing leakage, fix the source and complete the required cleanup before replastering.
How to Plaster a Rough or Uneven Wall
First determine whether the roughness is only on the surface.
If the existing plaster is secure, a suitable skim coat may improve the finish.
Deep hollows need a repair or basecoat material designed for that application. Large high and low areas may require more extensive preparation.
Do not use a thin finishing layer to correct severe unevenness.
Can You Plaster Over Wallpaper?
It is generally better to remove wallpaper before plastering.
Wallpaper can absorb moisture, soften, bubble, and lose adhesion. The new material may then separate along with the paper.
Remove the wallpaper and adhesive residue. Check that the underlying plaster or drywall remains sound.
Repair any damage caused by removal before applying a new finish.
How to Repair Common Plaster Wall Problems
A good repair addresses both the visible damage and the reason it happened.
How to Fix Cracks in Plaster Walls
Small, stable cracks may be repaired with a compatible filler.
Clean the crack and remove loose edges. Prepare it according to the product instructions, then fill and finish the area.
For recurring cracks, investigate the cause. Seasonal movement, building settlement, or an unstable backing can cause the same crack to return.
The National Park Service notes that historic plaster cracks may need different repair methods depending on their size and cause. Larger or repeated cracks should not be covered without checking the wall’s stability.
How to Fix Plaster Coming Off Walls
Find out why the plaster is separating.
It may have lost its bond with the backing. Moisture, damaged lath, movement, or poor previous repairs can contribute.
Remove loose areas carefully and inspect the exposed surface.
If the plaster is detached across a large area, consult a plastering professional. Some traditional repairs involve securing existing plaster rather than removing all of it.
How to Repair Loose or Hollow Plaster
Small isolated areas may be repairable with suitable materials.
Larger detached sections may need mechanical support, specialist plaster repair methods, or removal and replacement.
Do not simply fill visible cracks while leaving a loose section unsupported.
The International Masonry Institute recommends evaluating existing plaster adhesion and composition before selecting restoration products.
How to Repair Water Damaged Plaster Walls
Find the source of water first.
Repair the plumbing leak, roof defect, exterior opening, or other source. Allow the affected area to dry and assess the backing.
If plaster has become soft, crumbled, or detached, it may need removal and replacement.
Look for mold and hidden damage. The EPA advises fixing moisture problems before completing cleanup or covering affected surfaces.
How to Repair Plaster Walls With Small Holes
Remove loose material around the hole. Clean the opening and apply a suitable repair compound.
Follow the product’s maximum fill depth. Deep holes may need more than one application or a suitable backing.
Finish the surface so it blends with the surrounding plaster.
How to Fix Uneven Plaster and Rough Surfaces
Use good lighting to identify high and low spots.
Remove minor surface imperfections only where the material allows. Fill low areas with a suitable product.
If the whole wall is uneven, consider whether it needs a new basecoat or a broader resurfacing method.
Excessive sanding is not a substitute for correct leveling during application.
How to Repair Bubbles and Poor Adhesion
Bubbles may indicate poor bonding, moisture, contamination, or a problem with the material.
Do not simply puncture each bubble and cover it.
Remove the affected material as required. Check the substrate and find the cause. Prepare the wall properly before applying new plaster.
How to Fix Recurring Cracks
A crack that returns needs investigation.
Check whether the wall is moving, whether the plaster is detached, or whether seasonal changes are affecting the surface.
A suitable reinforcement system may help in some repairs, but it will not correct structural movement.
Seek professional advice if cracks are widening, recurring across several surfaces, or accompanied by other signs of building movement.
When Does Damaged Lath Need Replacement?
Lath may need repair or replacement when it is loose, broken, rotten, or unable to support the plaster.
Wood lath must remain firmly fixed. Metal lath must be secure and suitable for the plaster system.
If large sections of lath are damaged, the repair may require opening the wall and checking the framing.
This is a good point to involve an experienced plasterer.
How Long Does It Take for Replastered Walls to Dry?
Drying time depends on the plaster type, coat thickness, surface, temperature, humidity, and airflow.
A thin repair may dry much faster than a full plaster system. Lime based products can also behave differently from gypsum based materials.
How Long Does It Take to Replaster a Wall?
The physical work may take several hours or longer, depending on the wall size and condition.
Preparation can take as much time as application. Removing old plaster, repairing the backing, and fixing moisture problems can extend the project.
A full room may require several stages and more than one working day.
Do not plan painting based only on the date the plaster was applied.
What Factors Affect Plaster Drying Time?
Common factors include:
- Type of plaster.
- Thickness of the applied material.
- Room temperature.
- Relative humidity.
- Air movement.
- Wall moisture.
- Porosity of the substrate.
- Number of coats.
A cold, damp room may dry more slowly than a warm room with suitable ventilation.
How Can You Tell When Plaster Is Completely Dry?
Look for an even appearance and follow the product’s drying guidance.
Dark or damp looking patches may indicate that the surface needs more time. However, appearance alone does not prove that the full thickness is dry.
Use the product manufacturer’s readiness guidance. Some systems provide specific moisture or preparation requirements before decoration.
Can You Make Plaster Dry Faster?
Do not use extreme heat or aggressive airflow to force drying.
Excessive heat can dry the surface too quickly and affect the finish. Keep the room within the recommended temperature range and provide suitable ventilation.
Do not paint or seal plaster before it is ready.
When Can You Paint Newly Plastered Walls?
Paint only after the plaster has dried sufficiently for the chosen coating.
Some new plaster surfaces need a primer or a specific first coat before normal paint. Other products have different requirements.
Read both the plaster and paint instructions. Confirm that the coating is suitable for the surface.
How to Seal and Prime New Plaster Before Painting
Use the primer or sealer recommended for the plaster system and paint.
Apply it evenly and allow it to dry as directed.
Do not seal a damp surface or use a product that is incompatible with the plaster.
A suitable primer helps create a consistent surface for decoration. It does not repair loose plaster or solve moisture problems.
How Much Does It Cost to Replaster a Wall?
The cost depends on the wall size, condition, plaster type, access, preparation, and local labor rates.
A small patch may be inexpensive compared with a full room. A wall with loose plaster, damaged lath, or water damage needs more work.
Average Cost to Replaster a Wall
There is no reliable single price for every wall. Contractors may price by area, room, minimum job charge, or the amount of preparation required.
Angi’s October 2026 cost guide reports that professional plastering for an average room commonly falls between $2,000 and $8,000, with a reported average of about $5,000. These are room level estimates, not a fixed price for one wall. Actual quotes vary by location and project scope.
See Angi’s 2026 plastering cost guide for its current estimate and cost factors.
DIY Plastering Material Costs
DIY expenses may include:
- Plaster or repair compound.
- Primer or bonding agent.
- Tape or reinforcement.
- Mixing tools.
- Trowels and knives.
- Protective equipment.
- Floor and furniture coverings.
- Primer and paint.
If you already own suitable tools, the project may cost less. Buying specialist equipment for one small repair can increase the total.
Professional Plastering Labor Costs
Labor depends on the skill required and the wall’s condition.
A professional may charge more for:
- Removing damaged plaster.
- Replacing lath.
- Repairing large cracks.
- Working around curved surfaces or detailed trim.
- Matching historic finishes.
- Repairing water damaged walls.
- Preparing a large room.
Ask whether the estimate includes preparation, removal, disposal, materials, and final cleanup.
How Much Does It Cost to Replaster a Small Wall?
A small wall may cost less than a full room, but the job size is not the only factor.
A small damaged area may require more preparation than a larger, stable surface. Contractors may also have a minimum charge for travel and labor.
Request a written estimate for your exact wall rather than applying a room average to a small repair.
What Factors Affect the Cost of Replastering?
The main cost factors include:
- Wall size: Larger areas need more material and labor.
- Surface condition: Loose plaster and deep damage require extra preparation.
- Existing wall type: Lath, drywall, brick, and concrete require different methods.
- Plaster selection: Specialist finishes may cost more.
- Access: High walls, staircases, and difficult spaces can increase labor.
- Moisture repairs: Leaks and damaged backing may need separate work.
- Decoration: Priming and painting may not be included in the plastering quote.
How Much Does It Cost to Replaster and Paint a Wall?
Plastering and painting are usually separate stages.
The quote may include surface preparation and priming but exclude the final paint. Ask the contractor to identify each part of the work.
Allow for drying time between plastering, priming, and painting.
How to Estimate Your Replastering Project
Measure the height and width of the wall. Calculate its area and identify the type of repair needed.
Take clear photos of damaged areas. Record any moisture stains, cracks, or loose plaster.
Ask at least three local contractors for written estimates. Compare the preparation method, materials, labor, cleanup, and decoration work. A low quote may exclude important repairs.
Should You Replaster a Wall Yourself or Hire a Professional?
DIY work can make sense for small, simple repairs. Full wall plastering requires more control and experience.
The right choice depends on the wall condition and the finish you expect.
Can a Beginner Replaster a Wall?
A beginner can often handle a small patch or a simple repair with the right materials and preparation.
Applying plaster evenly across a large wall is harder. The material changes as it sets, so you need to manage timing, pressure, and surface leveling.
Start with a small practice area. Learn the product’s working time before tackling a visible wall.
How Difficult Is It to Replaster a Wall?
The difficulty depends on the size and type of project.
A small hole in drywall may be a manageable DIY task. Repairing a traditional plaster wall with detached lath is more complex.
Full wall skim coating also takes practice. Uneven pressure, poor timing, and incorrect mixing can leave visible marks.
Do not judge the work only by how easy it looks in a professional video. An experienced plasterer has developed control through repeated practice.
What Is the Easiest Way to Learn Plastering?
Read the product instructions and watch demonstrations from experienced plasterers.
Practice with a suitable product on a small test board or inconspicuous area. Learn how the material spreads, sets, and responds to the trowel.
Use smaller batches at first. Focus on even application rather than speed.
When Is DIY Plaster Wall Repair a Good Option?
DIY may be appropriate when:
- The damage is small and isolated.
- The backing is stable.
- There is no active moisture problem.
- The material is suitable for the surface.
- The repair does not involve hazardous materials.
- You are comfortable with the tools and instructions.
When Should You Hire a Professional Plasterer?
Hire a professional when:
- Large areas of plaster are loose.
- Traditional lath needs repair.
- Cracks keep returning.
- The wall shows structural movement.
- Water damage affects the backing.
- Historic plaster needs preservation.
- The surface requires a high quality finish across a large room.
- You suspect lead paint or asbestos containing materials.
For paid work that disturbs covered painted surfaces in homes built before 1978, check EPA and state requirements. Use a certified lead safe firm where required.
Is Replastering Worth It or Should You Replace the Wall?
Repair may be the better choice when most of the old plaster remains sound.
Replacement may make sense when the plaster and backing are badly damaged or when major renovation work requires access behind the wall.
Consider cost, historic value, sound performance, fire resistance, and the amount of demolition involved.
Do not remove a traditional plaster wall simply because drywall is newer or easier to install.
Can You Replace Old Plaster Walls With Drywall?
Yes. Old plaster walls can sometimes be removed and replaced with drywall. In other situations, drywall may be installed over an existing plaster wall using a suitable attachment method.
The right approach depends on the wall condition, available space, framing, and the reason for the renovation.
When Should You Replace Plaster Walls With Drywall?
Replacement may be suitable when:
- The plaster is severely damaged.
- The lath or framing needs extensive repair.
- Major electrical or plumbing work is planned.
- The wall needs significant changes.
- Repair costs are not reasonable for the condition.
However, removal creates dust and debris. Older homes may contain lead based paint or other suspect materials.
Check for hazards before demolition.
Can You Install Drywall Over Old Plaster?
It may be possible when the existing wall is stable enough to support the new installation and the framing or attachment method is suitable.
The added thickness can affect door and window trim, electrical boxes, baseboards, and room dimensions.
It can also hide existing damage without correcting it.
Do not use drywall overlay to conceal active moisture, mold, or structural problems.
Advantages of Keeping and Repairing Traditional Plaster
Repairing old plaster can preserve original building features.
Traditional plaster can provide a solid finish and may contribute to sound reduction and fire resistance. The National Park Service identifies these benefits in its historic plaster guidance.
Repair may also avoid unnecessary demolition.
Advantages and Disadvantages of Replacing Plaster With Drywall
Consideration | Repairing plaster | Replacing with drywall |
Historic character | Preserves original material | Changes the original wall |
Construction process | Requires plaster repair skills | Uses panel installation and joint finishing |
Demolition | Often limited | May involve substantial removal |
Surface finish | Can preserve existing contours | Can create a consistent new surface |
Hidden services | May require careful access | Wall cavity may become easier to access during replacement |
What Should You Check Before Removing Old Plaster?
Check the wall’s age, backing, wiring, plumbing, framing, and possible hazardous materials.
Identify whether the wall is load bearing before making structural changes. A building professional can help assess the wall where its role is uncertain.
Check local requirements before major demolition or changes to building systems.
Common Replastering Mistakes and How to Avoid Them
Many poor results start before the plaster reaches the wall.
Skipping Proper Surface Preparation
Dust, loose material, and contamination can reduce adhesion.
Clean the wall and remove failing plaster before applying new material. Use the correct preparation product for the surface.
Using the Wrong Type of Plaster
A product made for drywall may not suit traditional lime plaster or masonry.
Check the intended use and approved substrate. Ask the manufacturer or a qualified plasterer when the wall type is unclear.
Mixing Plaster With the Wrong Consistency
A mixture that is too wet or too stiff can be difficult to apply.
Follow the product’s water and mixing instructions. Prepare only the quantity you can use within the working time.
Applying Plaster Over Loose or Damp Surfaces
Fresh plaster cannot make an unstable wall sound.
Remove or repair loose material. Fix moisture sources and allow the surface to become suitable for application.
Applying Coats Too Thickly
An excessive layer can dry unevenly, crack, or fail.
Use the thickness recommended for the selected product. Deep damage may require a basecoat or several repair stages.
Waiting Too Long or Not Long Enough Between Coats
Each plaster system has its own application sequence.
Follow the instructions for the next coat. Do not copy timing from a different brand or material.
Using Incorrect Trowel Pressure
Too much pressure can pull material away or leave marks. Too little control can leave ridges and an uneven finish.
Practice the movement on a test surface. Keep tools clean and work while the material is within its suitable finishing stage.
Trying to Fix Uneven Plaster by Excessive Sanding
Sanding can smooth certain dry compounds and minor surface defects. It cannot correct major unevenness or poor plaster application.
Fill low areas and correct high spots using the method approved for the material.
Before sanding an older painted surface, consider lead paint and other dust hazards.
Painting Before the Plaster Is Ready
Paint applied too early may peel, discolor, or fail to bond as expected.
Wait until the plaster meets the manufacturer’s drying requirements. Then use the appropriate primer or sealer.
How to Maintain Replastered Walls
Good maintenance helps protect the finish.
Keep Walls Dry and Address Leaks Quickly
Repair plumbing leaks, damaged seals, and roof problems as soon as possible.
Check bathroom ventilation and condensation. Persistent moisture can damage plaster and create conditions for mold.
Inspect Cracks and Surface Changes
Look for cracks that become wider or return after repair.
Check for bulges, soft areas, and paint that starts peeling. Early inspection can prevent a small problem from becoming a larger repair.
Repair Small Plaster Problems Early
Fill minor damage with a suitable repair material.
Do not leave exposed plaster where water can reach it. Prepare the repair properly before painting.
Use Suitable Paint and Wall Finishes
Choose a coating that is suitable for the plaster and the room.
Bathrooms and other high moisture areas need suitable ventilation and compatible finishes. Paint alone does not make an unsuitable wall assembly waterproof.
Avoid Impact Damage to Newly Replastered Surfaces
Allow the surface to dry and harden as directed.
Avoid scraping, drilling, or attaching heavy items before the finish is ready. Use suitable anchors for the wall type when installing shelves or fixtures.
Frequently Asked Questions About Replastering a Wall
Can You Replaster an Already Plastered Wall?
Yes. You can apply new plaster or a compatible finishing layer over old plaster when the existing surface is firm, clean, dry, and properly prepared. Remove loose areas and repair any damage first.
Can I Replaster a Wall Myself?
You can handle some small repairs yourself. Full wall plastering takes practice and good timing. Hire a professional when large areas are loose, the lath is damaged, or the wall has moisture or structural problems.
What Is the Best Plaster for a Beginner to Use?
There is no single best product for every beginner. Choose a repair compound or finishing product that matches the wall and clearly explains its application method. A small drywall repair may need joint compound, while an older plaster wall may need a compatible plaster repair product.
What Tools and Materials Do I Need to Replaster a Wall?
Common tools include a plastering trowel, hawk, mixing bucket, paddle mixer, filling knife, scraper, and straightedge. Materials may include plaster, repair compound, primer, bonding agent, and reinforcement. The exact list depends on the wall.
How Much Does It Cost to Replaster a Wall?
The price depends on wall size, damage, material, preparation, and local labor rates. A small patch costs much less than replastering an entire room. Angi’s October 2026 guide reports a typical room level range of $2,000 to $8,000, but this is not a fixed price for one wall.
How Long Does It Take to Replaster a Wall?
The work may take several hours or more, depending on the wall and preparation. A full room may need several stages and additional drying time. Follow the product instructions before applying another coat or painting.
Can You Replaster Part of a Wall?
Yes. Remove loose material from the damaged section, repair the backing, and apply compatible repair material. Blend the finish into the surrounding surface. The surrounding plaster must remain sound.
Can You Plaster Over Paint?
Some plaster or skim coat products can be used over stable painted surfaces when the manufacturer permits it. Remove loose paint, clean the wall, and use the correct bonding preparation. Take lead paint precautions in older homes.
Can You Plaster Over Wallpaper?
It is generally not recommended. Wallpaper and adhesive can lose adhesion when exposed to moisture from new plaster. Remove the wallpaper, clean the wall, and repair the underlying surface before applying a new finish.
Can You Plaster a Wall With a Roller?
Traditional plaster is commonly applied with a trowel and hawk. Some specialist wall coatings and roll on products use a roller, but they are not interchangeable with every plaster system. Use a roller only when the product instructions specifically allow it.
Is It Better to Skim Coat or Fully Replaster a Wall?
Skim coating is usually suitable when the existing surface is stable but needs a smoother finish. Full replastering may be needed when the old plaster has failed across a larger area or the backing requires repair. Inspect the wall before choosing.
Can You Replaster a Damp Wall?
Do not apply new plaster over a damp wall until the source of moisture has been fixed and the surface is suitable for the chosen product. Persistent moisture can cause new plaster to fail and may support mold growth.
Can You Put Drywall Over Old Plaster?
Sometimes. The existing wall must be stable enough to support the new installation. Added thickness can affect trim, electrical boxes, and room dimensions. Drywall overlay should not hide active moisture or structural damage.
How Many Coats of Plaster Does a Wall Need?
It depends on the plaster system and the backing. Some systems use a basecoat and finish coat. Others use a different sequence. Follow the manufacturer’s instructions rather than applying a fixed number of coats to every wall.
Can You Plaster a Wall With Cement?
Cement based plaster can be suitable for certain masonry applications. It is not a universal replacement for gypsum or lime plaster. Check the product’s approved use and the condition of the wall.
Final Thoughts on Replastering a Wall
A successful replastering project starts with the right diagnosis. Identify the wall type, check for moisture, and decide whether the surface needs patching, skim coating, or more extensive repairs.
Choose materials that match the existing wall. Prepare the surface carefully and follow the manufacturer’s instructions for mixing, application, drying, and painting.
Small repairs may be suitable for beginners. Loose traditional plaster, damaged lath, recurring cracks, and extensive water damage need more careful attention.
Do not cover problems that have not been fixed. A smooth finish only lasts when the surface underneath is sound.