How to Program a Garage Door Opener: Step by Step Guide
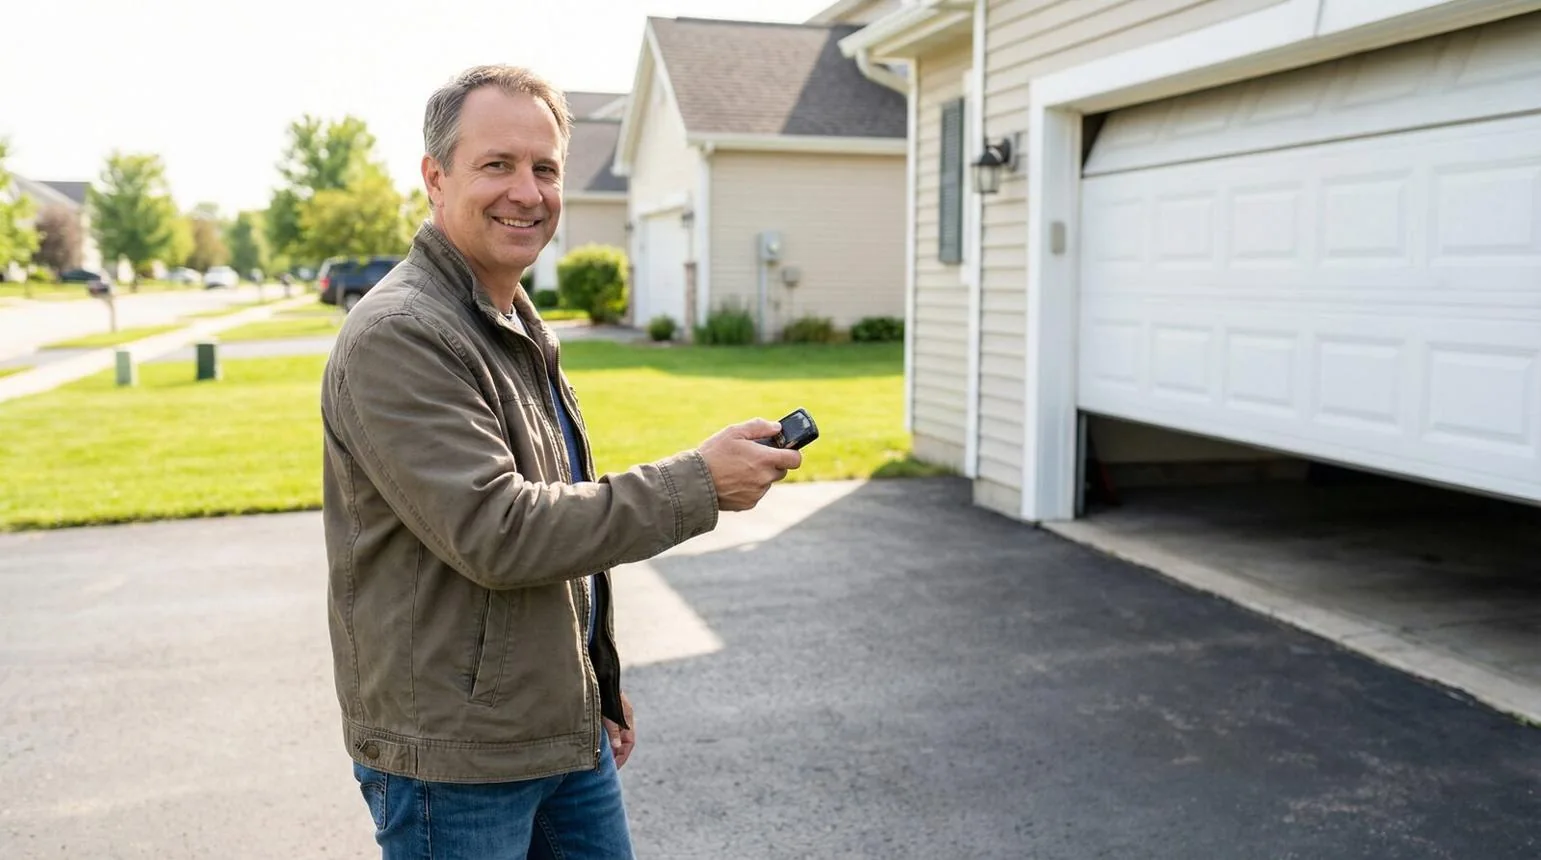
A garage door remote makes it easy to open and close your garage without leaving your vehicle. However, a new remote will not work until you connect it to the opener. You may also need to program a keypad, pair your car, or reconnect a remote after resetting the system.
Most modern garage door openers use a Learn or Program button. You activate programming mode, press the button on your compatible remote, and wait for the opener to confirm the connection.
The exact process depends on your opener’s brand, model, and security system. Chamberlain, LiftMaster, Genie, and Craftsman openers do not all follow the same procedure. Vehicle controls such as HomeLink also need separate programming.
This guide explains how to program a garage door opener, connect different types of remotes, set up a keypad, pair your car, and fix common programming problems.
How Do You Program a Garage Door Opener?
You can program many garage door remotes through the Learn button on the opener’s motor unit. The button activates a short programming window. You must connect your compatible remote before that window closes.
Follow these general steps:
- Find the brand and model number on your garage door opener.
- Check that your remote is compatible with the opener.
- Locate the Learn or Program button on the motor unit.
- Press and release the button as instructed in your manual.
- Press and hold the remote button you want to program.
- Wait for the opener light to flash or another confirmation signal.
- Test the remote from a safe position where you can see the door.
On many Chamberlain and LiftMaster models, the Learn button activates a 30 second programming window. The opener may flash its lights or make two clicking sounds when it accepts the remote. Other models use different timing and confirmation signals.
Important: Do not hold the Learn button unless your opener’s instructions tell you to. On some models, holding it can erase stored remote and keypad codes.
Keep the garage door area clear during programming. The door may move when the opener accepts a remote or when you test it.
What Do You Need Before Programming a Garage Door Opener?
Check your equipment before starting. A compatible remote and the correct programming method will save you from repeated attempts.
1. Identify Your Opener’s Brand and Model
Look for a label on the motor unit. It usually shows the manufacturer, model number, and sometimes the manufacturing date.
Common garage door opener brands include:
- Chamberlain
- LiftMaster
- Genie
- Craftsman
- Linear
- Overhead Door
- Wayne Dalton
- Marantec
- Raynor
The model number is important because one manufacturer may use several programming systems. Two openers from the same brand can require different procedures.
Write down the model number before buying a replacement remote or searching for instructions.
2. Check Remote Compatibility
Not every garage door remote works with every opener. Compatibility depends on the opener’s model, remote type, radio frequency, and security technology.
For Chamberlain and LiftMaster openers, the Learn button color can help identify compatible replacement remotes. Common colors include yellow, purple, green, and orange or red. However, newer models may use different systems, so the button color alone is not enough.
Before buying a replacement remote, check your opener’s model number and identify its Learn button. Then compare these details with the manufacturer’s compatibility chart.
You can use the Chamberlain Remote Compatibility Chart or the LiftMaster Remote Compatibility Chart to find a suitable replacement.
A remote that looks similar to your old one may still use a different security system. Always confirm compatibility before purchasing.
3. Find the Learn or Program Button
The Learn button is commonly on the rear or side of the motor unit. It is often near the hanging antenna wire or beneath the light cover.
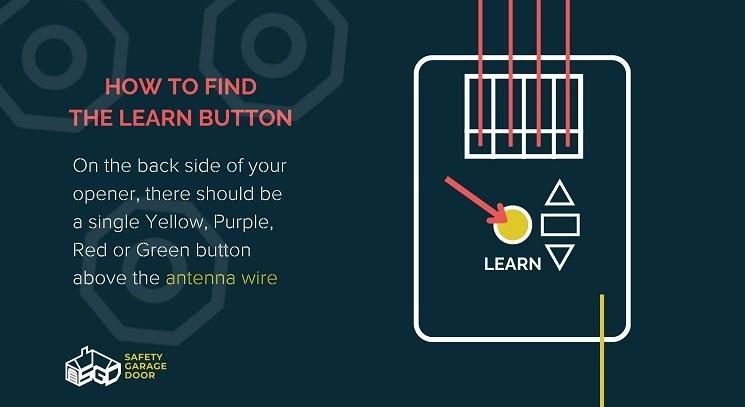
Depending on the opener, it may be labeled:
- Learn
- Program
- Set
- Code
- Radio
Some systems use a programming button on the wall control or an external receiver. Check the manual if you cannot find it.
Do not press nearby adjustment buttons without knowing their function. They may control travel limits or other opener settings.
4. Check the Remote Battery
A weak battery can prevent a remote from sending a reliable signal.
Open the battery compartment and check the battery type. Replace it if necessary. Make sure the positive and negative sides match the markings inside the compartment.
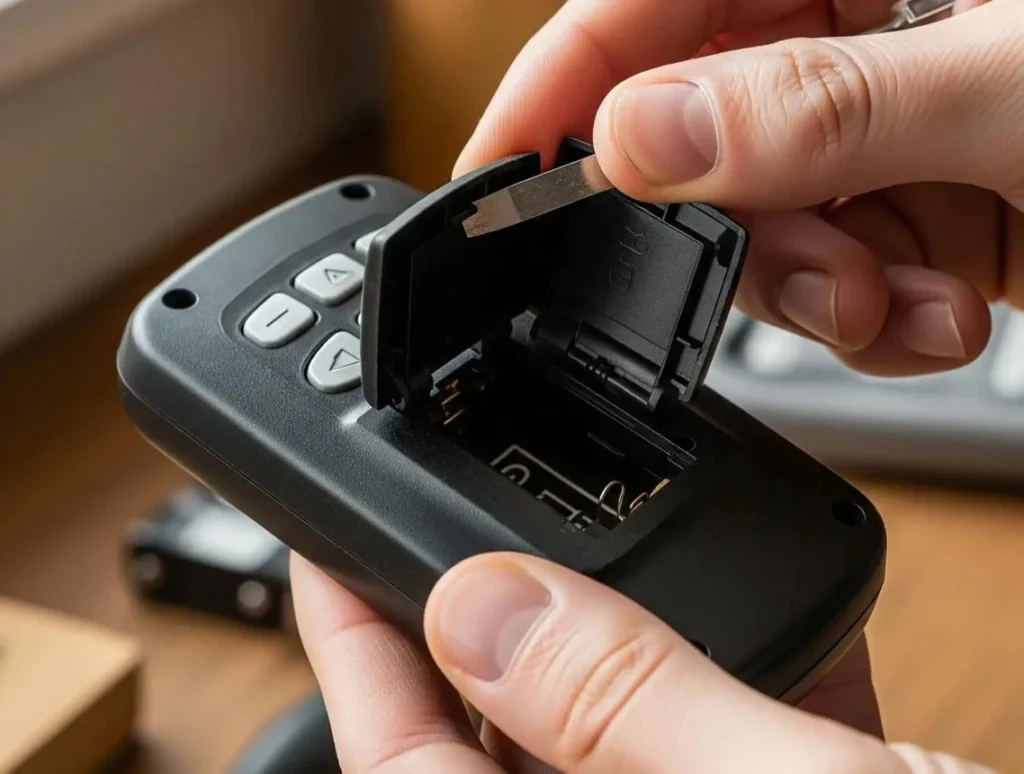
If the remote has an indicator light, press a button and check whether it turns on. No light may indicate a battery or remote problem.
5. Keep the Owner’s Manual Nearby
Your opener’s manual provides the correct button sequence and timing.
Use it to confirm which button activates programming mode, how long the mode stays active, and what signal confirms successful pairing.
This matters because pressing the Learn button once and holding it for several seconds can have completely different results.
How Does a Garage Door Opener Work?
A garage door opener uses an electric motor to move the door. A remote, keypad, or vehicle transmitter sends a wireless signal to the opener. Its receiver recognizes an authorized device and activates the motor.
The main components include:
| Component | Function |
|---|---|
| Motor unit | Powers the opening and closing mechanism |
| Receiver | Receives signals from compatible devices |
| Learn button | Activates programming mode on supported systems |
| Remote control | Sends a wireless command |
| Wall control | Operates the door from inside the garage |
| Wireless keypad | Provides access through a PIN |
| Antenna | Helps receive wireless signals |
| Safety sensors | Detect objects in the door’s path on equipped systems |
Many modern openers use rolling code technology. It changes the access code after each operation, making it harder to reuse a recorded signal.
Older openers may use fixed codes or small code switches. These systems can require different remotes and programming methods.
How to Program a Garage Door Opener Remote
The Learn button method works with many modern openers. Use the following procedure as a general guide. Your model’s instructions take priority.
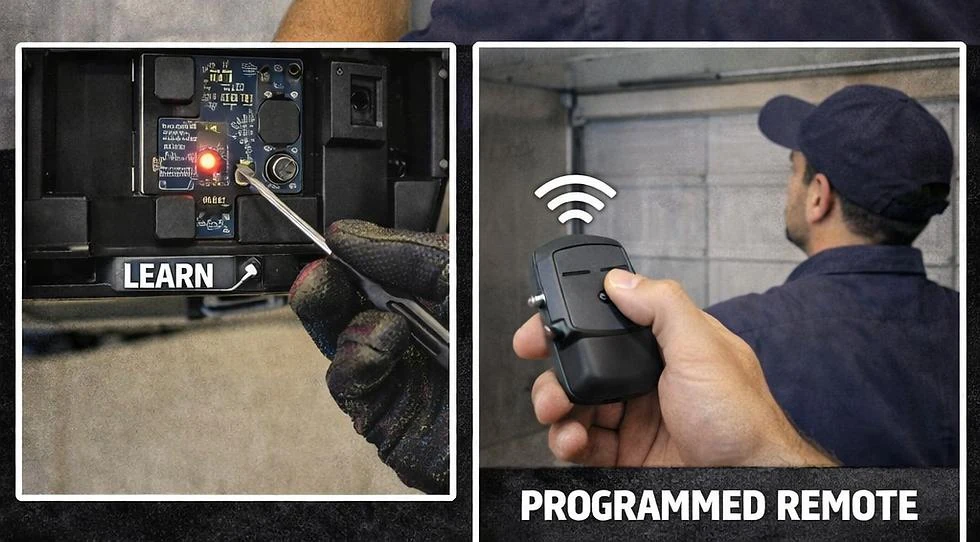
Step 1: Locate the Learn Button
Find the Learn or Program button on the motor unit. Check the rear or side panel, near the antenna wire or beneath the light cover.
Use a stable ladder if you need to reach it. Bring the remote with you if necessary, but keep your hands away from moving parts.
Step 2: Activate Programming Mode
Press and release the Learn button as instructed.
Some openers show a steady indicator light when programming mode begins. Others use a blinking light or a different signal.
Do not hold the button unless the manual specifically requires it. A long press may clear stored devices.
Step 3: Press the Remote Button
Choose the remote button you want to connect to the opener.
Press and hold it during the programming window. Keep holding until the opener confirms that it has accepted the signal.
If your remote has multiple buttons, use the button you want assigned to that particular door.
Step 4: Wait for Confirmation
Watch the opener’s lights and listen for a click.
Depending on the model, the lights may flash or you may hear two clicks. Some openers use a different indicator.
Release the remote button when the confirmation signal occurs.
Step 5: Test the Remote
Move to a position where you can see the entire garage door. Press the programmed button once.
The door should respond if pairing was successful. Keep the doorway clear while testing.
Step 6: Program Additional Buttons
Some remotes have two, three, or four buttons. You may be able to assign different buttons to separate garage doors or compatible devices.
Repeat the correct programming process for each opener. Test every button separately so you know which door it controls.
How to Program a Chamberlain Garage Door Opener
Chamberlain openers use different programming methods across product generations. Many compatible models use a Learn button on the motor unit.
Find the Chamberlain Learn Button
Check the back or right side of the motor unit, near the hanging antenna wire. The button may also be beneath the light cover.
Note its color and the opener’s model number. The button color can help identify compatible remotes, but you should still check the exact model.
Program a Chamberlain Remote
For many compatible Chamberlain remotes, follow these steps:
- Locate the Learn button on the opener.
- Press and immediately release it.
- Wait for the Learn button indicator to turn on.
- Within the programming window, press and hold the desired remote button.
- Release the remote button when the opener lights flash or you hear two clicks.
- Test the remote.
Some Chamberlain remotes can also be programmed through a compatible wall control or the myQ app. The available method depends on the opener, remote, and control panel.
Program a Chamberlain Universal Remote
A Chamberlain universal remote may require you to select a programming mode before pairing.
Check the instructions for your remote model. Some versions use a brand selection process or a sequence of button presses.
Once the remote is prepared, follow its instructions for connecting it to the opener. Do not assume every Chamberlain or Clicker remote uses the same sequence.
Program a Chamberlain Keypad
A compatible Chamberlain keypad usually requires a PIN and a programming sequence.
The general process involves activating the opener’s programming mode, entering your chosen PIN, and confirming the connection. The exact button sequence depends on the keypad model.
Some newer keypads include a QR code that opens the instructions for that specific product.
After programming, test the PIN from outside the garage.
How to Program a LiftMaster Garage Door Opener
Many LiftMaster openers use a Learn button, but the location and programming method depend on the model.
Find the LiftMaster Learn Button
Look on the rear or side of the motor unit, usually near the antenna wire. It may be beneath the light cover.
Note the model number and Learn button color. These details can help you identify a compatible replacement remote.
Program a LiftMaster Remote
For many compatible models:
- Press and release the Learn button.
- Wait for the programming indicator.
- Press and hold the button on your compatible remote.
- Release it when the opener confirms the connection.
- Test the remote.
The confirmation may be a flashing opener light or two clicks. Follow the instructions for your exact model.
Program a LiftMaster Keypad
A compatible LiftMaster keypad normally uses a PIN and a model specific programming sequence.
Depending on the system, you may need to activate the Learn button before entering the PIN. Some newer keypads use a different setup process.
Check the keypad and opener model numbers before starting.
What Is Security+ 2.0?
Security+ 2.0 is an access technology used by compatible Chamberlain Group products, including some LiftMaster systems.
A remote must support the opener’s security technology to work correctly. Do not assume that every remote from the same brand is compatible.
How to Program a Genie Garage Door Opener
Genie garage door openers use different programming methods depending on the model and remote. Many newer models support Intellicode, a rolling-code security system that changes the access code each time you operate the door.
Before programming, identify your opener and remote model. Then follow the correct Genie remote programming instructions. You can also learn how Genie Intellicode works.
Find the Genie Program or Learn Code Button
Look for the Learn Code or Program button on the motor unit. It may sit near the indicator lights or beneath the light cover.
Some newer Genie models use a Program or Set button with a different sequence.
Check the model number if you are unsure which system you have.
Program a Genie Remote
The steps depend on the remote and opener generation.
For some Genie Intellicode remotes used with Learn Code button equipped openers, the process works as follows:
- Press and release the Learn Code button on the motor unit.
- Wait for its indicator light to blink.
- Press and release the desired remote button.
- Wait for the indicator to change.
- Press and release the same remote button again.
- Press it once more to test the opener.
This sequence applies to certain Genie remote and opener combinations, not every Genie model. Other remotes use a Program or Set button and a different sequence.
What Is Genie Intellicode?
Intellicode is a rolling code security system used by compatible Genie products.
It changes the access code to help prevent someone from recording and reusing a remote signal. Your remote must support the Intellicode system used by the opener.
Program a Genie Keypad
A Genie wireless keypad usually requires a PIN and a programming sequence based on the keypad model.
Identify the opener and keypad first. Then follow the correct process for entering the PIN and registering the device.
Test the keypad after setup. If it does not operate the door, check its battery and compatibility.
How to Program a Craftsman Garage Door Opener
Craftsman openers have used different systems over the years. Some models share technology with Chamberlain Group products, but not every Craftsman remote works with every Craftsman opener.
Identify Your Craftsman Opener
Find the model label on the motor unit. Check the Learn button, model number, and manufacturing date.
Older openers may use code switches or an external receiver rather than the Learn button found on newer systems.
Program a Craftsman Remote
If your Craftsman model uses a Learn button, you may be able to connect a compatible remote through programming mode.
Press and release the button as directed. Then press the selected remote button during the programming window.
The exact sequence depends on the model. Check compatibility before trying a replacement remote.
Program a Craftsman Keypad
A compatible Craftsman keypad may use the opener’s Learn button and a PIN.
Follow the instructions for the exact keypad model. If the opener uses an older receiver, check its manual before attempting a standard Learn button method.
How to Program a Universal Garage Door Remote
A universal garage door remote can operate certain openers from different manufacturers. However, it does not work with every system.
Check Compatibility First
Read the universal remote’s packaging or manual. Confirm that it supports your opener’s brand, model range, frequency, and security technology.
Some universal remotes support several opener brands. Others cover only selected models or product generations.
Older systems may require a specific receiver or code setting.
Prepare the Universal Remote
Some universal remotes need an initial setup before pairing.
You may need to select the opener brand, choose a channel, or enter a programming mode. Follow the instructions for the remote you purchased.
Pair the Universal Remote
The general process is:
- Prepare the remote using its instructions.
- Select the correct opener brand or programming mode if required.
- Locate the opener’s Learn or Program button.
- Activate programming mode.
- Press the selected button on the universal remote.
- Wait for the opener’s confirmation signal.
- Test the remote.
Some remotes use a code selection process. Others require repeated button presses until the opener responds. The method depends on the remote.
What If the Universal Remote Does Not Work?
Check the battery, opener model, and compatibility. Make sure you selected the correct programming mode.
If the remote still does not connect, it may not support your opener. Do not keep trying unrelated button sequences.
How to Program a Garage Door Opener Keypad
A wireless keypad lets you open or close the garage door without carrying a remote. You enter a PIN on the keypad, and the opener receives the access signal.
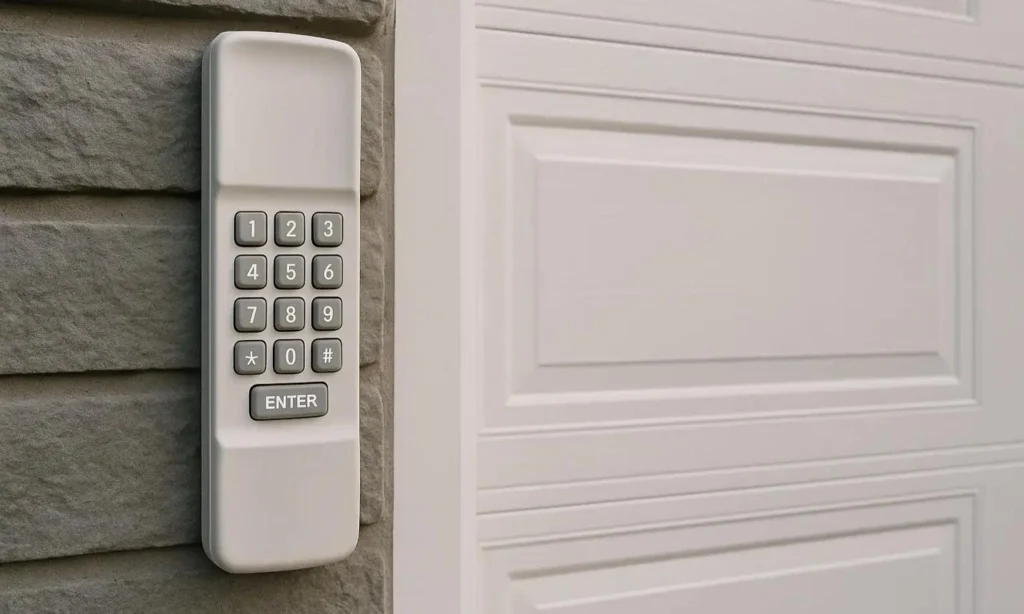
Step 1: Identify the Keypad and Opener
Find the model numbers of both devices. Check whether the keypad supports your opener’s security system.
A keypad from the same brand may still be incompatible with an older opener.
Step 2: Choose a Secure PIN
Choose a PIN that is difficult to guess. Avoid repeated numbers, simple patterns, your house number, or information someone could easily discover.
If you have moved into a new home, replace the previous owner’s PIN.
Step 3: Activate Programming Mode
Find the Learn or Program button on the opener. Use the keypad manual to activate the correct programming mode.
Some models require you to press the Learn button before entering the PIN. Others use a different sequence.
Step 4: Enter and Confirm the PIN
Enter your chosen PIN on the keypad. Press the confirmation button if the instructions require one.
Wait for the opener’s confirmation signal. The indicator light or another response may show that the keypad has connected.
Step 5: Test the Keypad
Close the door and test the keypad from outside the garage.
Enter the PIN and press the required confirmation key. The door should respond if the programming was successful.
If it does not, check the battery, PIN, compatibility, and button sequence.
How to Program a Garage Door Opener to Your Car
Many vehicles have built in buttons that can operate a compatible garage door opener.
These buttons may be on the rearview mirror, sun visor, or overhead console. HomeLink is a common vehicle control system. Some vehicles use Car2U or another built in transmitter.
How to Program HomeLink
HomeLink can connect compatible vehicle buttons to a garage door opener. The exact steps vary by vehicle make, model, and year.
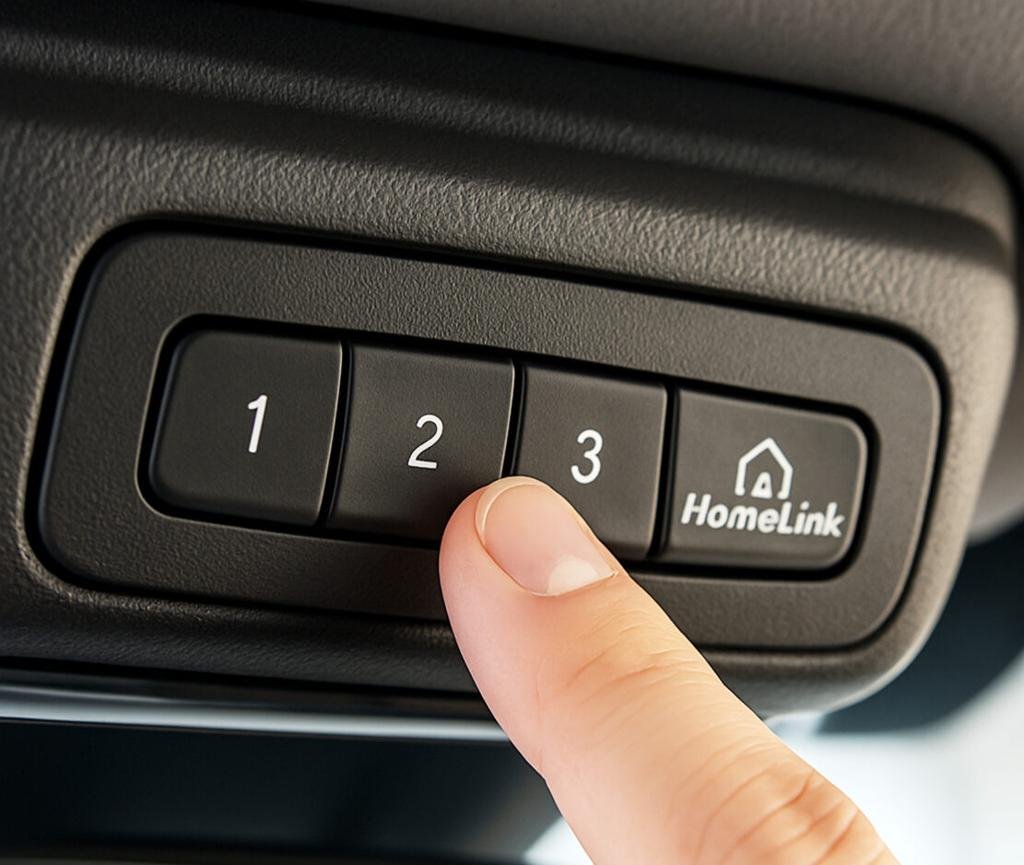
For many vehicles, the process starts by teaching HomeLink the signal from your handheld remote.
- Park your vehicle outside the garage.
- Keep the garage door area clear.
- Turn the ignition to the position required by the vehicle manual.
- Hold the handheld remote close to the HomeLink buttons.
- Press and hold the desired HomeLink button and the remote button.
- Watch the HomeLink indicator light.
- Release the buttons when the indicator changes as instructed.
- Test the vehicle button.
Some systems require the HomeLink indicator to change from a slow flash to a rapid flash. Others use a different signal.
Complete the Rolling Code Programming Step
If the vehicle learns the remote signal but does not operate the garage door, the opener may use rolling code technology.
You may need to complete another step at the motor unit.
- Find the Learn, Smart, or Program button on the opener.
- Press and release it as directed.
- Return to the vehicle within the programming window.
- Press and release the programmed HomeLink button.
- Repeat the press and release sequence up to three times if required.
- Test the button again.
Some systems provide only about 30 seconds for this step. A second person can make the process easier.
Do not stand on your vehicle to reach the motor unit. Use a stable ladder.
How to Program a Car2U Garage Door Opener
Car2U is a different vehicle control system. Its programming method is not the same as HomeLink.
Check your vehicle’s owner’s manual to identify the Car2U buttons and the required sequence.
Some systems need you to clear old transmitter settings before adding a new opener. Follow the instructions for your vehicle rather than using HomeLink steps.
What If Your Car Remote Will Not Pair?
Check these points:
- Confirm that your vehicle has HomeLink, Car2U, or another garage door transmitter.
- Make sure the opener is compatible with the vehicle system.
- Replace the handheld remote battery.
- Follow the correct vehicle programming sequence.
- Complete rolling code training if required.
- Check whether the vehicle system needs to be cleared first.
The programming steps can vary between a Ford F-150, Jeep Wrangler, Toyota Highlander, Honda Pilot, Subaru, BMW, Mercedes-Benz, and other vehicles. Use the instructions for the exact model year.
How to Program a Garage Door Opener Without a Remote
You do not always need an existing remote to add a new device.
Many modern openers allow you to program a replacement remote or keypad directly through the Learn button.
Program a Replacement Remote Directly
If you have a compatible replacement remote, follow its instructions and use the opener’s Learn button.
You need access to the motor unit and the correct programming sequence. Some systems also support setup through a compatible wall control or app.
Program a Keypad Without an Existing Remote
Many wireless keypads can connect directly to the opener.
Activate the opener’s programming mode, enter your chosen PIN, and confirm the setup as directed by the keypad instructions.
The original handheld remote is not always required.
Use a Supported Smart Garage Controller
Some openers support smartphone control through a compatible app or separate smart garage controller.
The opener must support the required technology. Older models may need an additional accessory.
Check compatibility before purchasing a hub or controller.
How to Program a Garage Door Opener Without a Learn Button
Some older garage door openers do not have a visible Learn button. They may use code switches, an external receiver, or another programming method.
Check for an External Receiver
An external receiver may be attached to the opener or mounted nearby. It can have its own antenna and programming button.
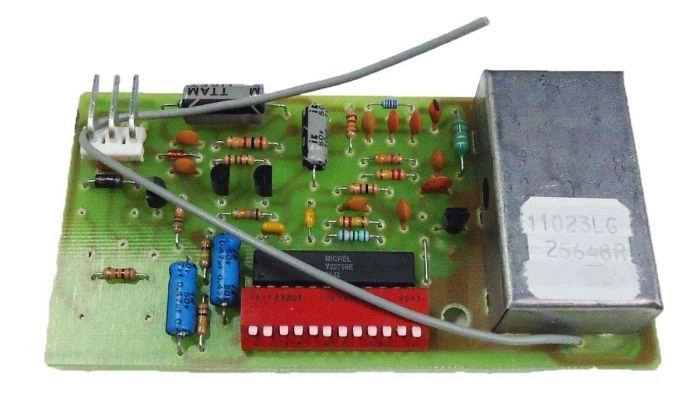
The receiver’s Learn button may be easier to access than a control on the motor unit.
Do not open electrical housings or touch wiring to find it. Check the model information or ask a technician.
Check for Code Switches
Some older systems use small switches to set a transmitter code. The remote and receiver must use matching settings.
This is different from modern rolling code programming. You should use a remote designed for the exact system.
Use a Compatible Replacement Receiver
Some older openers can work with an approved external receiver and compatible remote.
However, compatibility and safety must be checked first. A universal remote alone cannot make every older opener compatible.
When to Get Professional Help
Contact a garage door technician if you cannot identify the receiver, the wiring is damaged, or the system has no clear programming instructions.
A technician can identify the equipment and check whether a replacement remote or receiver is suitable.
How to Program Two or More Garage Door Remotes
Many openers can store several remotes. This is useful when multiple people use the garage or when you want a separate remote for another vehicle.
Add a Second Remote
You usually do not need to erase the first remote to add another one.
- Check that the second remote is compatible.
- Activate the opener’s programming mode.
- Press the desired button on the second remote.
- Wait for the confirmation signal.
- Test the remote.
Repeat the process for additional remotes.
If the first remote stops working after you program the second one, check whether you held the Learn button too long. On some systems, holding it clears stored access codes.
How to Program a Three Button Garage Door Remote
A three button remote may operate three separate garage doors or compatible devices.
Choose the button you want to assign to the opener. Activate programming mode and follow the remote’s instructions.
If you have more than one opener, program a different button for each one. Test every button separately.
How to Program a Four Button Garage Door Remote
A four button remote may support several garage doors, gates, or compatible devices.
Some universal remotes require you to select a brand or code for each button. Others use separate pairing steps.
Follow the instructions for the remote model. Do not assume all four buttons can control every opener.
How Many Remotes Can One Opener Support?
There is no single number for all garage door openers.
The maximum depends on the model’s memory capacity. Some systems count keypads and other accessories as stored devices.
Check the owner’s manual before adding more remotes.
Can You Program a Remote From Another Remote?
Some systems support a specific remote training process. Many require you to connect the new remote through the opener or a compatible control panel.
Do not assume that holding two remotes together will copy the access code. Check the instructions for both devices.
How to Reset and Reprogram a Garage Door Opener
Resetting an opener can mean clearing old remotes, changing a keypad PIN, removing smart access, or restoring selected settings.
These actions are not the same.
When Should You Reset the Opener’s Remote Memory?
You may want to clear stored access when:
- You lose a remote.
- Someone steals a remote.
- You move into a new home.
- You give away an old remote.
- You want to remove devices you no longer use.
Before clearing the memory, make sure you have the remotes and keypads you want to keep. Some systems erase all stored devices at once.
How to Erase Old Remote Codes
On certain Chamberlain and LiftMaster models, you can erase stored remote and keypad codes by holding the Learn button until its indicator light turns off. Some of these models use a hold of approximately six seconds.
This can remove every stored remote and keypad, not just one device.
Other openers use different procedures. Do not apply the six second method to every brand.
Reprogram the Opener After Clearing Codes
After clearing the stored devices, program each remote and keypad you still want to use.
Follow the correct instructions for each accessory. Test every device once programming is complete.
Review Smart Access Separately
Clearing handheld remote codes does not necessarily remove smartphone access.
If your opener supports an app, review its connected users and device settings. Remove old users or accounts through the system’s supported process.
This is especially important after moving into a new home.
How to Program a Garage Door Opener With a Smartphone
Some garage door openers support smartphone control. You may be able to operate the door, check its status, and manage access through an app.
Check Whether Your Opener Supports App Control
Look for built in Wi-Fi or compatibility with a separate smart garage controller.
Some Chamberlain and LiftMaster models support myQ features. Not every opener from these brands includes the same smart functions.
Check the model before buying a controller or hub.
Connect the Opener to the App
The setup process generally involves:
- Downloading the supported app.
- Signing in or creating an account.
- Confirming that the opener supports the service.
- Connecting the opener to the required Wi-Fi network.
- Following the app’s device setup instructions.
- Testing the door control.
The steps depend on the opener and whether it uses built in Wi-Fi or a separate hub.
What If the App Will Not Connect?
Check that the opener supports the app and has power. Confirm that your phone and opener have the required network connection.
If you use a separate hub, check its setup and connection status. Restarting a device may fix a temporary issue, but it will not fix an incompatible opener.
Why Is My Garage Door Remote Not Programming?
A remote may fail to program because of a weak battery, an incompatible device, an incorrect button sequence, or a problem with the opener.
Use these checks to narrow down the cause.
| Problem | Possible cause | What to check |
|---|---|---|
| Remote does not program | Incompatible remote | Check the opener and remote model numbers |
| No indicator light | Weak battery or power issue | Replace the remote battery and check opener power |
| Learn button does not respond | Wrong button or opener fault | Confirm the programming button in the manual |
| Programming times out | Programming window expired | Repeat the process using the correct timing |
| Remote works only nearby | Weak battery or interference | Replace the battery and check the antenna |
| Old remote stops working | Memory was cleared | Program the old remote again |
| Remote opens the wrong door | Button assigned to another opener | Reprogram the correct button |
| No remotes work | Receiver or power problem | Test another programmed remote and check the opener |
The Remote Battery Is Weak
Replace the battery with the correct type. Check its direction and make sure the compartment is closed.
If the remote still does not work, check compatibility and programming.
The Remote Is Not Compatible
A remote may look similar to another model but use a different frequency or security system.
Check the model numbers before trying again. Buying the correct replacement is often easier than trying to pair an incompatible remote.
The Learn Button Is Not Responding
Make sure the opener has power and that you have found the correct button.
Some nearby buttons control travel limits or other settings. Do not press them unless the manual identifies them as programming controls.
If the Learn button appears damaged, ask a technician to inspect the opener.
The Programming Window Has Expired
Some openers allow only a short time to connect a remote.
If you wait too long after pressing the Learn button, the opener may leave programming mode. Repeat the process from the beginning and follow the model’s timing.
The Remote Has Poor Range
If the remote works only when you stand close to the opener, check the battery and antenna.
Certain LED light bulbs can interfere with the radio signal on some systems. Testing the remote from a different position may help identify a range problem.
The Opener Has a Receiver Problem
If several compatible remotes fail at the same time, the receiver or opener may have a fault.
Do not open electrical components unless you are qualified to work on them. Contact a garage door technician if the problem continues.
Garage Door Opener Programming Safety Tips
A garage door can move unexpectedly during programming or testing. Take a few precautions before you begin.
- Keep people, pets, vehicles, and stored items away from the doorway.
- Keep the moving door in sight while testing the remote.
- Never walk or stand beneath a moving garage door.
- Keep remote controls away from young children.
- Use a stable ladder when reaching the motor unit.
- Never climb on the garage door or its tracks.
- Keep your hands away from moving parts.
- Do not touch exposed electrical wiring.
- Never bypass or disable the safety sensors.
- Follow the instructions for your specific opener and remote.
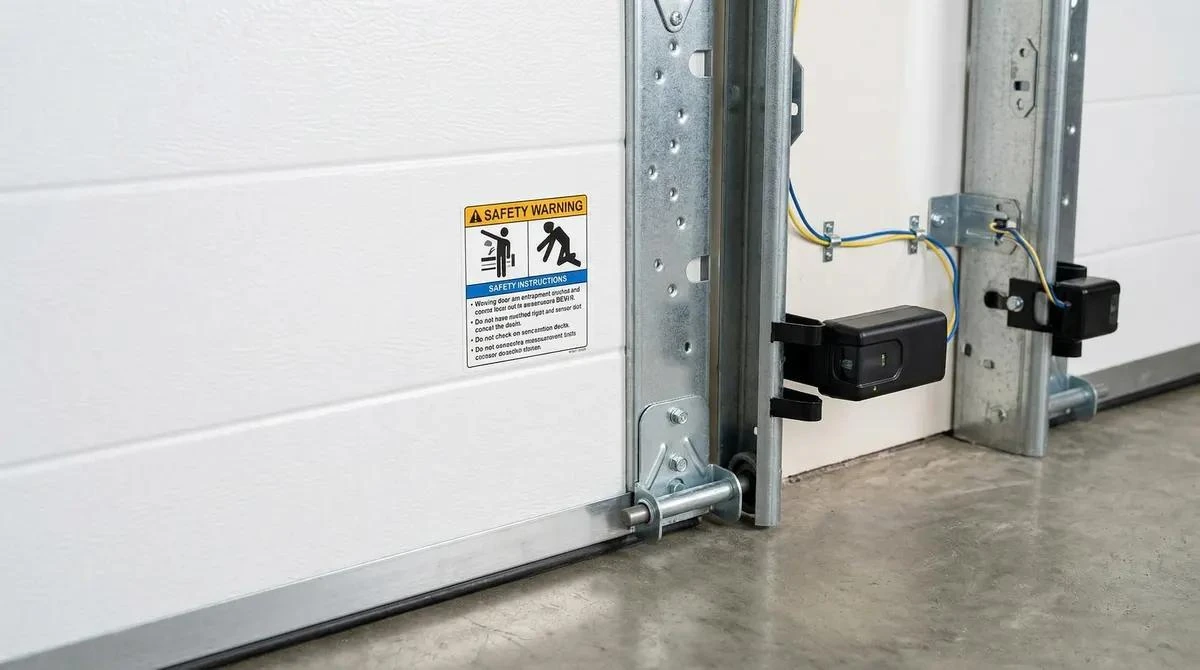
Garage door safety sensors help detect objects in the door’s path and prevent the door from closing on an obstruction. Keep these sensors correctly installed and unobstructed. Never disconnect them to bypass a programming or operating problem.
You should also know how your opener’s safety reversal system works. Chamberlain recommends testing this system regularly. You can learn how to test a garage door opener’s safety reversal system.
For additional homeowner precautions, read the U.S. Consumer Product Safety Commission’s garage door opener safety guidance.
If the door moves unexpectedly, stop programming and make sure the area is clear before continuing. Contact a qualified garage door technician if the safety system does not work correctly.
When Should You Call a Garage Door Professional?
Many homeowners can program a compatible remote or keypad themselves. However, some problems need professional attention.
Contact a qualified technician if:
- The receiver appears damaged.
- The Learn or Program button does not respond.
- The opener has damaged wiring.
- You cannot identify an older receiver or coding system.
- Several compatible remotes fail to connect.
- The door moves unexpectedly during programming.
- The opener has a mechanical problem.
- You need a replacement receiver.
- The programming method is unclear.
A technician can identify the opener, check remote compatibility, and determine whether the problem involves the remote, receiver, wiring, or control board.
Do not try to repair a damaged spring or cable as part of a remote programming task. These components can cause serious injury.
Frequently Asked Questions
Can You Program a Garage Door Opener Yourself?
Yes. Many modern openers allow homeowners to program compatible remotes and keypads. You usually activate programming mode through the Learn button and follow the accessory instructions.
How Many Times Do You Press the Learn Button?
It depends on the opener. Some models require one quick press and release. Others use a different sequence through the wall control or programming panel. Never hold the button unless the instructions require it.
How Do I Program a New Garage Door Opener?
First, complete the opener’s installation and safety checks according to its manual. Then identify a compatible remote, activate the programming mode, and connect the remote using the model specific steps.
Programming a remote does not replace the installation and setup of a new motor unit.
Can Any Remote Work With Any Garage Door Opener?
No. The remote must support the opener’s frequency, security technology, and model range. Check compatibility before buying a replacement.
How Do I Program a Garage Door Opener Without a Remote?
Many openers allow you to program a compatible keypad or replacement remote directly through the Learn button. An existing handheld remote is not always required.
Can I Program a Garage Door Opener to My Phone?
Yes, when the opener supports app control or works with a compatible smart garage controller. The setup method depends on the opener and its smart features.
How Many Remotes Can I Program to One Opener?
The number depends on the opener’s memory capacity. Check the manual for the maximum number of remotes, keypads, and supported accessories.
Why Does My Remote Work Only From Close Range?
A weak battery, receiver issue, antenna problem, or radio interference may reduce the remote’s range. Replace the battery first and check whether nearby devices or certain LED bulbs interfere with the signal.
How Do I Remove a Lost Garage Door Remote?
Some openers allow you to erase all stored remote and keypad codes through the Learn button. This may disconnect every programmed device, so check the manual first. Then reconnect the remotes and keypads you still use.
Can I Program a Garage Door Opener Without a Learn Button?
Some older openers use code switches, external receivers, or another programming method. Identify the model and receiver before choosing a procedure. A universal remote may work with some systems, but compatibility is not guaranteed.
Why Does My Garage Door Remote Stop Working After I Program Another One?
You may have cleared the opener’s memory by holding the Learn button too long. Some systems erase stored remotes when that button is held. Program the remotes again using the correct quick press procedure.
Who Can Program a Garage Door Opener?
A homeowner can usually program a compatible remote or keypad by following the instructions. A garage door technician can help with receiver faults, older systems, wiring problems, and difficult compatibility issues.
Final Thoughts
Programming a garage door opener is usually straightforward when you have the correct remote and model instructions.
Start by identifying your opener and checking remote compatibility. Find the Learn or Program button, follow the correct sequence, and test the device from a safe position.
Remember that handheld remotes, keypads, vehicle controls, and smartphone apps use different setup methods. Do not assume one procedure works for every brand.
If you have lost a remote or moved into a new home, review the stored access devices. Remove access you no longer trust and reconnect the remotes and keypads you want to keep.
When the opener does not respond or the programming method is unclear, stop and get help from a qualified garage door professional.